
Focus Keyword: slate roof solar hook installation
Secondary Keywords: solar slate roof hook, solar mounting hooks for slate roofs, slate roof solar mounting system, solar panel mounting on slate roof, slate tile roof hooks
مقدمة
Installing solar panels on a slate roof requires more careful planning than installing a mounting system on many conventional roof types. Natural slate is durable under normal roofing conditions, but individual slate tiles can be brittle and may crack if they are stepped on, lifted incorrectly or subjected to concentrated loads.
For solar installers and EPC contractors, the main challenge is not simply selecting a suitable solar roof hook. The complete installation must provide a reliable load path from the solar mounting rail to the supporting roof structure while protecting the existing slate covering and maintaining the roof’s weather resistance.
A suitable solar slate roof hook must match the roof profile, supporting structure and installation requirements. Its fixing method must be verified for the actual substrate, and the surrounding slate and waterproofing details must be properly restored after installation.
This guide explains how to inspect slate roofs, select suitable solar roof hooks, install the hooks and check the mounting arrangement for European rooftop PV projects.
Quick Answer: How Are Solar Roof Hooks Installed on Slate Roofs?
Solar roof hooks on slate roofs should be fixed to a suitable supporting roof structure, not to the slate tile itself.
The general installation process involves:
- Inspecting the slate type, roof construction and supporting structure.
- Selecting a fixed solar roof hook with geometry compatible with the slate roof profile.
- Carefully lifting or removing the relevant slate to access the supporting structure.
- Positioning and mechanically fixing the hook using a verified fixing method.
- Restoring the slate covering and the roof’s waterproofing details.
- Connecting the solar mounting rail and checking the completed installation.
- Verifying the complete mounting system against the project’s wind, snow and structural requirements.
The correct hook model, fixing method and installation details depend on the actual roof construction. There is no universal hook spacing or fixing specification suitable for every European slate roof.
1. Why Slate Roofs Require Special Solar Mounting Solutions
Slate roofs require specific installation considerations because the roofing material and the supporting structure perform different functions.
Slate tiles form the external weather-protective covering. The roof structure beneath them provides the support required for the solar mounting system.
1.1 Slate Tiles Can Be Brittle
Natural slate can remain serviceable for a long period, but individual tiles may crack when subjected to concentrated pressure or inappropriate handling.
Common installation risks include:
- Walking directly on unsupported slate tiles.
- Lifting slate incorrectly during hook installation.
- Applying excessive pressure when repositioning tiles.
- Creating unsuitable clearance around the hook.
- Allowing the hook or mounting components to press against the slate.
Installers should identify the condition of the existing slate before starting work and use appropriate methods to remove, lift and reinstall individual tiles.
1.2 Slate Is Not the Structural Fixing Substrate
A solar roof hook must transfer loads into a suitable supporting roof structure.
Depending on the roof construction, the hook will generally need to transfer loads into a verified structural member, such as a timber rafter or another engineered support. Battens or roof boards should only be used as fixing substrates when their dimensions, condition, connection to the primary structure and design resistance have been verified for the project loads. The actual fixing substrate must be identified and verified before the installation method is selected.
The slate tile itself should not be treated as the structural fixing substrate for the solar mounting system.
The fixing method must be suitable for the supporting material and verified against the project requirements. The presence of a timber batten or roof board does not automatically establish that it is suitable for the required structural loads.
1.3 Waterproofing Must Be Maintained
Removing or lifting slate can disturb the roof’s weather-protective layers.
A correctly selected stainless steel hook does not automatically make the roof connection waterproof. The installer must consider the roof underlay, flashing, water-shedding arrangement and the way the surrounding slate is restored.
The hook must be positioned so that the slate can be reinstated in its intended overlap and water-shedding arrangement. Any required cutting, replacement or flashing detail should follow the approved roofing specification rather than relying on the hook profile alone.
2. Identify the Slate Roof Type Before Selecting a Solar Roof Hook
Before selecting a solar slate roof hook, installers should understand the actual roof profile and construction. The term “slate roof” can describe different materials, dimensions and installation arrangements.
2.1 Natural Slate Roofs
Natural slate is produced from natural stone and is commonly used on traditional and residential roofs in Europe.
Its dimensions, thickness, surface condition and installation pattern can vary. Older roofs may also contain slate tiles with irregular dimensions or evidence of previous repairs.
Before selecting a hook, check:
- Slate length and width.
- Slate thickness.
- Slate overlap and exposure.
- Roof pitch.
- Condition of the existing slate.
- Position of the supporting structure beneath the slate.
The hook geometry must be checked against the actual roof profile rather than selected based only on the general description “natural slate”.
2.2 Manufactured Slate Roofs
Manufactured slate products may have different dimensions, thicknesses and surface profiles from natural slate.
Their material composition and installation details can also vary by manufacturer.
A hook suitable for one slate product should not automatically be assumed to fit another. Product dimensions and installation clearance must be checked before specifying the mounting component.
2.3 Check the Supporting Roof Structure
The supporting structure is a critical part of solar roof hook selection.
Common roof arrangements include:
- Timber rafters with battens.
- Timber rafters with roof underlay and battens.
- Fully boarded roof constructions.
- Other roof structures requiring a project-specific fixing solution.
The installer should identify where the hook can be fixed and whether the available substrate is suitable for the specified fasteners.
If the supporting structure cannot be identified or verified, the fixing detail should be reviewed before installation proceeds.
2.4 Information Required Before Selecting a Hook
The following information helps installers and suppliers assess whether a standard solar slate roof hook is suitable.
| Inspection item | Information to confirm |
|---|---|
| Slate type | Natural slate or manufactured slate |
| Slate dimensions | Length, width and thickness |
| Roof pitch | Actual roof inclination |
| Slate arrangement | Overlap, exposure and installation pattern |
| Supporting structure | Rafters, verified structural supports, or approved fixing substrates |
| Fixing location | Available structural fixing position |
| Rail connection | Required rail profile and connection arrangement |
| Project conditions | Location and relevant wind and snow requirements |
A roof photograph is useful for an initial assessment, but photographs alone may not provide enough information to confirm structural compatibility.
3. How to Install Solar Tile Roof Hooks on Slate Roofs
The following procedure describes the general installation sequence. The actual method must follow the approved product details, roof construction and project-specific installation instructions.
Step 1: Inspect the Roof and Confirm the Installation Position
Before lifting any slate, inspect the roof covering and identify the supporting structure.
Confirm:
- The slate tiles are in suitable condition.
- The proposed hook position aligns with a suitable structural support.
- The selected hook geometry is compatible with the roof profile.
- There is sufficient clearance for the hook and rail connection.
- The installation will not interfere with critical roof details.
Mark the proposed installation positions according to the approved mounting layout.
Do not determine hook spacing solely from a general installation guide. The final layout must be established through the project’s structural design and mounting system requirements.
Step 2: Carefully Lift or Remove the Relevant Slate
Access to the supporting structure may require lifting or temporarily removing one or more slate tiles.
Handle slate carefully to avoid cracking or damaging adjacent tiles.
The installer should:
- Use appropriate slate-handling tools and methods.
- Avoid applying concentrated loads to unsupported slate.
- Check the condition of the exposed roof underlay.
- Inspect the supporting structure and proposed fixing area.
- Replace damaged or unsuitable slate before completing the installation.
If the slate cannot be removed or repositioned safely, the installation method should be reviewed before proceeding.
Step 3: Position the Solar Slate Roof Hook
Place the selected hook at the verified installation position.
Check the hook geometry against the slate profile and the available clearance beneath the surrounding tiles.
The hook should be positioned so that:
- Its fixing section aligns with the intended supporting structure.
- Its upper section provides the required connection to the mounting rail.
- The surrounding slate can be restored without inappropriate pressure.
- The installation does not create an unintended obstruction to water drainage.
Do not force the slate into position around an incompatible hook. If the hook geometry does not fit the roof construction, reassess the selected model or installation detail.
Step 4: Fix the Hook to the Supporting Structure
The hook must be mechanically fixed to a suitable supporting structure using a verified fixing arrangement.
For timber roof structures, the specified wood fixing screws must be suitable for the timber substrate and project requirements.
Before fixing, verify:
- Supporting member type, dimensions and condition.
- Fastener diameter and length.
- Effective fastener embedment depth.
- Required edge and end distances.
- Number and arrangement of fasteners.
- Installation position and fastener specification.
- Structural design requirements for the project.
Do not assume that the same screw specification is suitable for every timber roof structure.
The fastener arrangement and its design resistance must be confirmed for the actual substrate and project loads. Where required, the fixing detail should be reviewed by the responsible project engineer.
Step 5: Restore the Slate and Waterproofing Details
After fixing the hook, restore the surrounding roof covering.
Check that the slate can be returned to its intended position without being forced against the hook.
The installer should verify:
- The slate is correctly repositioned.
- The intended slate overlap and water-shedding arrangement are maintained.
- Adjacent tiles are not cracked or excessively stressed.
- The roof underlay and relevant weather-protective details are restored.
- The hook does not create an unintended water-trapping point.
- The completed detail follows the approved roof installation method.
Where flashing or additional waterproofing components are required, they must be selected and installed according to the roof construction and project details.
Do not rely on the stainless steel hook itself to provide waterproofing.
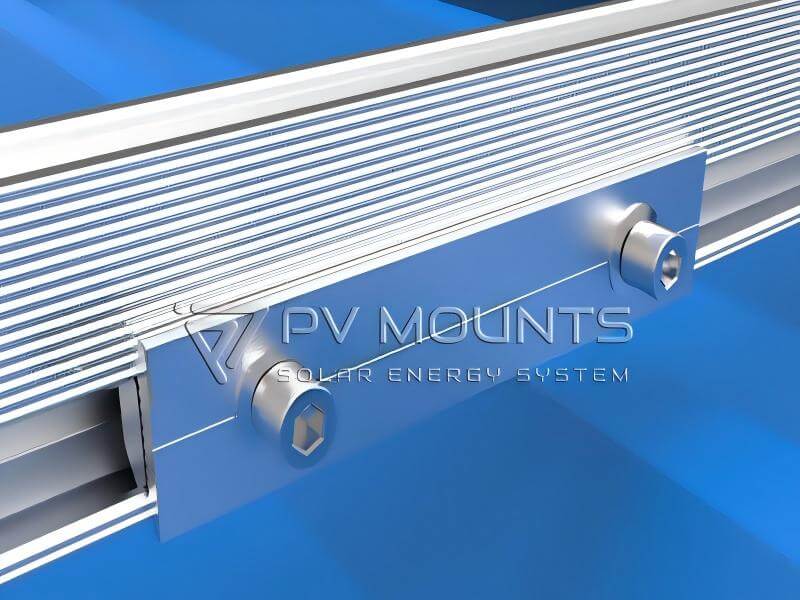
Step 6: Connect the Solar Mounting Rail
Once the hook and roof covering have been checked, connect the mounting rail using the specified connection components.
Verify that:
- The hook-to-rail connection is compatible.
- The required fasteners and connection components are installed.
- The rail is positioned according to the approved mounting layout.
- The connection is completed using the specified installation procedure.
The rail connection must not introduce unintended forces or cause the hook to press against the slate.
Step 7: Inspect the Completed Installation
Before installing the PV modules, inspect the completed mounting arrangement.
The inspection should cover:
- Hook position and fixing condition.
- Fastener installation.
- Clearance between the hook and surrounding slate.
- Condition of adjacent slate tiles.
- Roof underlay and waterproofing details.
- Rail connection and alignment.
- Consistency with the approved mounting layout.
Any damaged slate or incomplete waterproofing detail should be corrected before the installation is accepted.
4. How to Prevent Slate Damage: Five Site Inspection Rules
Slate tiles are brittle and can crack under concentrated loads, excessive handling or incorrect hook positioning. During solar roof hook installation, installers should follow these five inspection rules to reduce the risk of slate damage.
4.1 Roof Access and Load Distribution
Before starting work, check the roof access route and use suitable roof access equipment and load-distribution measures. Avoid placing concentrated weight directly on unsupported slate tiles. Installers should follow the project’s approved roof-access and fall-protection procedures.
4.2 Slate Removal and Handling
Check the condition of each slate before and after removal. Any cracked, chipped or weakened slate should be identified and replaced according to the approved roofing detail. Adjacent tiles must remain properly supported and undamaged.
4.3 Hook-to-Slate Clearance
Verify that the installed hook does not create concentrated pressure on the surrounding slate. The clearance must be compatible with the actual slate profile and roof construction, allowing the roof covering to retain its intended position without forced contact.
4.4 Damaged Slate Replacement
Confirm that any slate damaged during installation has been replaced with a suitable tile. The repaired area must maintain the roof’s intended overlap and weather-protection function.
If the exposed timber is split, decayed, undersized or otherwise unsuitable, do not proceed with the planned fixing arrangement. The supporting structure and fixing detail must be reviewed and approved before installation continues.
5. Material Selection: Why SUS304 Stainless Steel Is Used
Material selection is an important consideration for solar mounting components installed outdoors.
SUS304 stainless steel is commonly used for solar roof hooks because of its corrosion resistance and suitability for many outdoor mounting applications.
5.1 Corrosion Resistance
SUS304 stainless steel contains chromium and nickel, which contribute to its corrosion-resistant properties.
It is used in many outdoor applications where resistance to atmospheric exposure and normal environmental conditions is required.
However, actual corrosion performance depends on the operating environment, surface condition, installation details and maintenance conditions.
For coastal, marine or other aggressive environments, the suitability of SUS304 should be evaluated against the project’s environmental requirements. A material should not be selected solely on the basis of its stainless steel designation.
5.2 Material Compatibility
A roof hook is part of a larger mounting system. Its material should be considered alongside the rail, fasteners and other connection components.
Installers and EPC contractors should review the material specifications of the complete assembly and consider the potential for galvanic corrosion where dissimilar metals are in contact.
5.3 Verify the Actual Material Specification
When purchasing SUS304 solar roof hooks, B2B buyers should request the available material specifications and supporting documentation.
For larger projects, material traceability and documentation requirements should be agreed with the supplier before ordering.
6. Engineering Checks for European Slate Roof Solar Projects
A slate roof solar mounting system must be assessed as a complete assembly. Selecting a stainless steel hook alone does not establish the structural suitability of the installation.
European rooftop projects may have different roof structures, environmental conditions and national design requirements. EPC contractors should verify the following engineering considerations.
6.1 Wind Load Requirements
Wind actions depend on factors such as:
- Project location.
- Building height and geometry.
- Roof pitch.
- Roof edge and corner zones.
- Terrain and exposure.
- PV module arrangement.
- Mounting system configuration.
Wind loads should be assessed using the applicable project design basis and relevant national requirements.
The resulting forces must be transferred through the PV modules, clamps, rails, roof hooks, fasteners and supporting roof structure.
A wind speed figure alone does not establish the load resistance of a roof hook or complete mounting system.
6.2 Snow Load Requirements
Snow loads vary by location, altitude, roof geometry and other project conditions.
The responsible designer should evaluate the relevant snow actions and their effects on the modules, rails, hooks, fasteners and roof structure.
Do not assume that a hook suitable for one European project will automatically be suitable for another project with different snow conditions.
6.3 Roof Structure and Fastener Verification
The supporting roof structure must be suitable for the additional loads introduced by the PV mounting system.
The responsible engineer should verify the actual substrate, fixing arrangement and load transfer path.
For timber structures, the fastener design must account for the relevant timber properties, fastener specification, installation conditions and design requirements.
6.4 Complete Mounting System Verification
The complete load path should be reviewed, including:
- PV modules and module clamps.
- Mounting rails.
- Rail-to-hook connections.
- Solar roof hooks.
- Hook fasteners.
- Supporting roof structure.
- The building’s primary structural system.
A component-level specification should not be treated as proof of complete system performance.
The verification should consider the condition of the existing roof structure, not only the nominal dimensions of the supporting members. Existing timber may have deterioration, moisture damage, splitting or previous modifications that affect its suitability for the proposed fixing arrangement.
6.5 Project Documentation for European EPC Contractors
Before approving a slate roof mounting solution, EPC contractors and project buyers may need the following documentation, depending on the project and applicable requirements.
| Document | Purpose |
|---|---|
| Product technical drawings | Confirm hook geometry, dimensions and connection details |
| Material specifications | Identify the specified material and surface finish |
| Fastener specifications | Confirm the proposed fixing components |
| Installation instructions | Define the installation sequence and requirements |
| Structural calculations, where required | Verify the mounting arrangement for project loads |
| Applicable test reports | Support specific verified product or system performance claims |
| Relevant certificates and declarations | Provide documentation required for the product or project |
The required documents depend on the product, project specification and applicable regulatory framework.
The availability of a product certificate or material document does not replace project-specific structural verification. EPC contractors should distinguish between component documentation, mounting-system performance evidence and project-specific structural calculations.
A CE marking or certificate for an individual component should not automatically be interpreted as proof that the complete rooftop PV mounting system complies with every requirement in every European country.
EPC contractors should confirm the applicable documentation requirements with the project designer and relevant authorities.
7. Solar Slate Roof Hook Solutions from PV Mounts
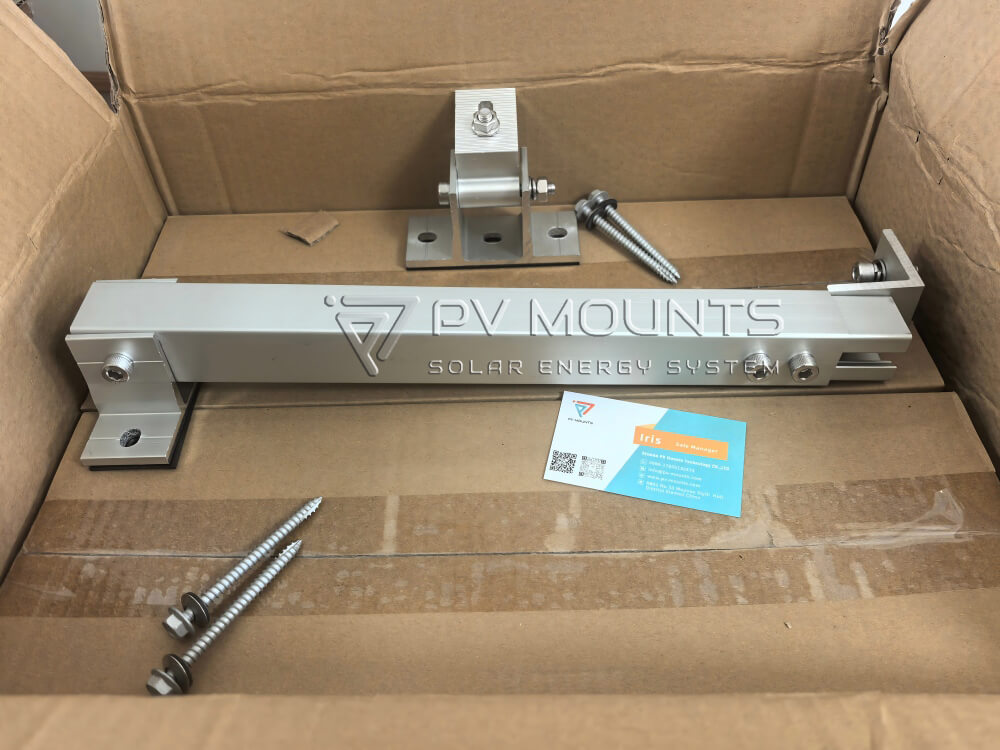
PV Mounts supplies stainless steel solar roof hooks for different tile roof mounting applications.
The appropriate model depends on the slate profile, hook geometry, supporting structure and rail connection requirements.
The following models have different product configurations. All three models described below are fixed, non-adjustable solar roof hooks.
7.1 PVM-TH-F01: Fixed Solar Roof Hook for Flat Tile and Slate Roofs
The PVM-TH-F01 is a fixed SUS304 stainless steel solar roof hook for compatible flat tile and slate roof mounting applications.
It does not feature an adjustable slot or height-adjustment mechanism.
Its hook geometry and installation position must be checked against the actual roof profile and supporting structure before specification.
For projects involving compatible flat slate profiles, the PVM-TH-F01 can be considered as the primary model for evaluation.
Before ordering, verify:
- Hook dimensions and geometry.
- Material specification.
- Roof profile compatibility.
- Fixing arrangement.
- Rail connection requirements.
7.2 PVM-TH-S01: Fixed Solar Slate Roof Hook
The PVM-TH-S01 is a fixed SUS304 stainless steel solar roof hook intended for compatible slate roof applications.
It has a fixed structure and does not include an adjustable slot or height-adjustment mechanism.
Its suitability should be assessed by comparing the actual hook geometry with the slate dimensions, roof construction and available fixing substrate.
The fixing method and accessories must be checked against the actual product BOM and project requirements.
7.3 PVM-TH-S03: Fixed Curved Solar Slate Roof Hook
The PVM-TH-S03 is a fixed curved SUS304 stainless steel solar slate roof hook.
Its curved hook geometry distinguishes it from other hook configurations and may be considered for compatible slate roof profiles requiring this type of shape.
The PVM-TH-S03 is also non-adjustable. It does not have an adjustable slot or height-adjustment mechanism.
Before selecting this model, installers should compare its geometry with the actual roof profile and verify the fixing and rail connection details.
7.4 Solar Slate Roof Hook Model Comparison
| Model | الهيكل | المواد | Product positioning |
|---|---|---|---|
| PVM-TH-F01 | Fixed, non-adjustable | SUS304 | Flat tile and compatible slate profiles |
| PVM-TH-S01 | Fixed, non-adjustable | SUS304 | Compatible slate roof profiles |
| PVM-TH-S03 | Fixed, non-adjustable, curved geometry | SUS304 | Slate profiles requiring curved hook geometry |
All three models are fixed and non-adjustable. This comparison is intended for initial product selection only. Final compatibility must be verified against the product drawings, actual slate profile and supporting roof structure.
For product drawings, specifications and available configurations, visit the PV Mounts solar roof hook manufacturer page and the solar tile roof hook range.
For quotation and technical review, buyers can request product drawings, dimensions, material specifications and available fixing accessories. Final compatibility must be confirmed against the actual slate profile and roof structure.
7.5 When Is a Custom Solar Slate Roof Hook Required?
A standard solar roof hook may not be suitable when the roof profile, slate dimensions, supporting structure or required rail connection differs from the standard product configuration.
In these cases, a custom hook may need to be evaluated.
Before requesting a custom design, prepare:
- Roof photographs.
- Slate dimensions and thickness.
- Roof pitch.
- Supporting structure details.
- Required hook installation position.
- Rail profile and connection requirements.
- Project location and relevant design requirements.
PV Mounts can review the available information and discuss whether a standard model or a customized solar tile roof hook is more appropriate.
Learn more about custom solar tile roof hooks.
8. EPC Checklist Before Approving a Slate Roof Hook
Before approving a solar slate roof hook for a project, EPC contractors and installers should check the following items.
| Inspection item | What to confirm |
|---|---|
| نوع السقف | Natural slate or manufactured slate |
| Slate dimensions | Actual length, width and thickness |
| Roof condition | Existing cracks, damage and roof age |
| Roof pitch | Actual roof inclination |
| Supporting structure | Rafters, verified structural supports, or approved fixing substrates |
| Hook geometry | Compatibility with the slate profile |
| Hook structure | Fixed or adjustable, confirmed against the actual product |
| Fasteners | Correct type and specification for the substrate |
| Rail connection | Compatibility with the selected mounting rail |
| Waterproofing | Roof underlay and weather-protection details restored |
| Structural design | Wind, snow and other project loads checked |
| Documentation | Drawings, material details and required project documents available |
A product should not be approved based only on its appearance or general product description. The actual dimensions, fixing arrangement and project conditions must be reviewed.
9. Frequently Asked Questions
9.1 Can Solar Panels Be Installed on a Slate Roof?
Yes. Solar panels can be installed on suitable slate roofs using a mounting system designed for the roof profile and supporting structure.
The roof condition, fixing substrate, hook geometry and waterproofing details must be assessed before installation.
9.2 How Are Solar Roof Hooks Fixed to a Slate Roof?
Solar roof hooks are generally positioned beneath the slate covering and mechanically fixed to a suitable supporting roof structure.
The slate is carefully lifted or removed to access the fixing area. After the hook is installed, the surrounding slate and waterproofing details must be restored.
The exact fixing method depends on the roof construction and approved installation details.
9.3 Can a Solar Roof Hook Be Fixed Directly to a Slate Tile?
The slate tile should not be treated as the structural fixing substrate for the solar mounting system.
The hook must transfer the relevant loads to a suitable supporting structure. The fixing method must be verified for the actual roof construction.
9.4 Are PVM-TH-F01, PVM-TH-S01 and PVM-TH-S03 Adjustable?
No. PVM-TH-F01, PVM-TH-S01 and PVM-TH-S03 are fixed solar roof hooks.
They do not feature adjustable slots or height-adjustment mechanisms.
Their installation position and compatibility must be checked against the actual roof profile and supporting structure.
9.5 What Is the Difference Between a Fixed and an Adjustable Solar Roof Hook?
A fixed solar roof hook has a fixed structural configuration and does not provide a dedicated adjustment mechanism.
An adjustable solar roof hook includes a design feature intended to allow a specified adjustment, such as a slot or adjustment mechanism.
The three PV Mounts models covered in this guide—F01, S01 and S03—are fixed, non-adjustable products.
9.6 How Do You Protect Slate Tiles When Installing Solar Hooks?
Use suitable tools and handling methods when lifting or removing slate. Avoid concentrated loads on unsupported tiles, check the condition of adjacent slate and do not force tiles into position around an incompatible hook.
After installation, restore the slate and waterproofing details according to the roof construction.
9.7 What Information Is Needed to Select a Solar Slate Roof Hook?
The supplier or project designer should review:
- Slate type and dimensions.
- Slate thickness and roof pitch.
- Roof photographs.
- Supporting structure details.
- Proposed hook position.
- Required mounting rail connection.
- Project location and design requirements.
Product drawings and actual roof measurements are important for confirming compatibility.
9.8 Is SUS304 Stainless Steel Suitable for Solar Slate Roof Hooks?
SUS304 stainless steel is commonly used for outdoor solar mounting components because of its corrosion-resistant properties.
However, suitability depends on the environmental exposure and project conditions. More aggressive environments, including certain coastal or marine locations, may require additional material evaluation.
9.9 How Do You Verify the Load Capacity of a Slate Roof Hook?
The hook should be assessed as part of the complete mounting system.
The responsible designer must consider the hook, fasteners, rail connections, supporting structure and applicable project loads.
A load value should only be used when it is supported by relevant test data or an appropriate engineering calculation for the stated configuration and conditions.
9.10 Can PV Mounts Provide Custom Solar Slate Roof Hooks?
PV Mounts can discuss customized solar tile roof hook requirements based on the roof profile, dimensions, installation conditions and rail connection details.
Customers should provide roof photographs, measurements or technical drawings so that the required configuration can be evaluated.
10. Request a Slate Roof Hook Selection and OEM Quotation
Selecting the correct solar roof hook for a slate roof requires more than matching a product name to a roof type.
The hook geometry, supporting structure, fixing arrangement, rail connection and waterproofing details all need to be considered.
PV Mounts supplies fixed SUS304 stainless steel solar roof hooks, including the PVM-TH-F01, PVM-TH-S01 and PVM-TH-S03 models, for compatible tile and slate roof mounting applications.
For EPC contractors, solar installers, distributors and mounting system buyers, we can review your requirements and discuss suitable standard products or customized hook configurations.
To help us evaluate your project, please send:
- Slate roof photographs.
- Slate dimensions and thickness.
- Roof pitch.
- Rafter or supporting structure details.
- Required rail connection.
- Project location.
- Available drawings or technical specifications.
Send Your Slate Roof Drawings for Hook Selection and OEM Quotation.
Contact PV Mounts to discuss your slate roof solar mounting requirements.

 Arabic
 English
 Spanish
 Portuguese
 Russian
 Hungarian
 Romanian
 French