
Primary Keyword: solar mounting clamps
Secondary Keywords: solar mid clamp, solar end clamp, solar panel mounting clamps, PV mounting clamps, solar rail clamps, solar panel rail clamps, solar rail connector, solar rail connection
Quick Answer
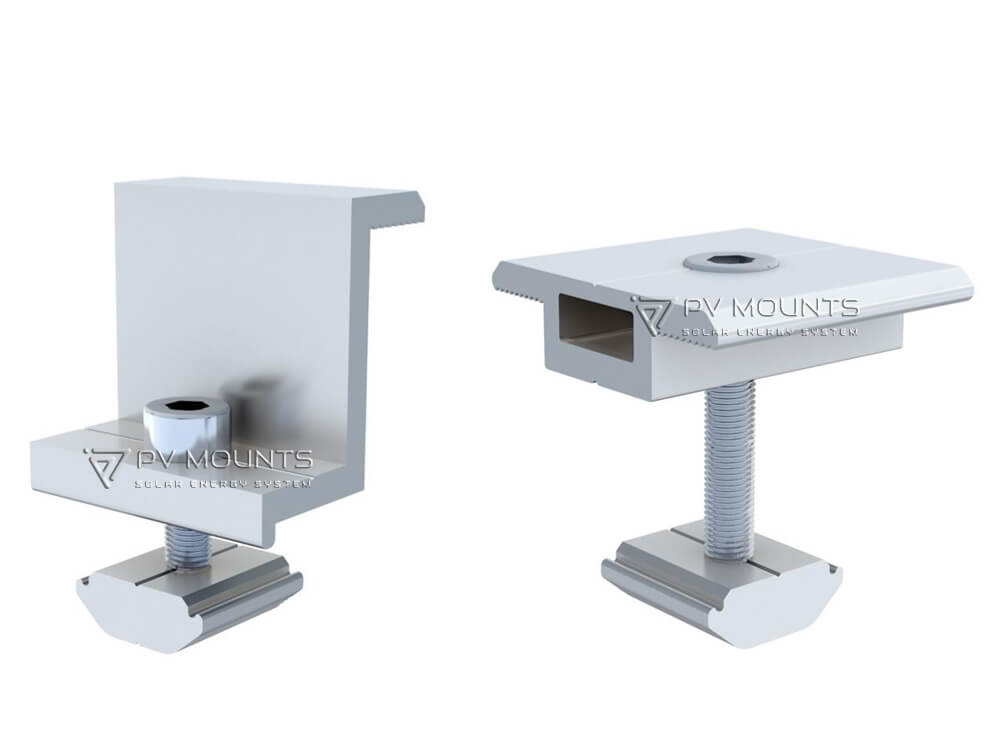
Solar mounting clamps are key components used to secure PV modules to solar rails. The two main types are mid clamps و end clamps.
- Mid clamps secure two adjacent PV modules to the same solar rail.
- End clamps secure the outer edge of a PV module at the end of a module row.
- Rail connectors join two solar rail sections to form a continuous rail run.
A typical PV module fixing connection is:
PV Module → Mid/End Clamp → Bolt + Rail Sliding Nut → Solar Rail
A typical rail-to-rail connection is:
Solar Rail → Rail Connector → Solar Rail
Where bolts and compatible rail sliding nuts are used to secure the rail connector:
Solar Rail → Rail Connector + Bolt + Rail Sliding Nut → Solar Rail
The clamp and fastening hardware should be selected according to the PV module frame and solar rail profile, while the rail connector must match the corresponding rail profile and connection system.
1. What Is a Solar Mounting Clamp?
A solar mounting clamp is a mechanical component used to secure a photovoltaic module to a solar mounting rail.
In a conventional rail-based rooftop PV mounting system, the clamp forms part of the connection between the PV module and the solar rail.
The typical connection is:
PV Module → Clamp → Bolt + Rail Sliding Nut → Solar Rail
The two primary clamp types are:
- Solar Mid Clamp
- Solar End Clamp
Although both are used for PV module fixing, they have different installation positions and functions.
2. How Do Solar Panels Connect to Solar Rails?
A typical rail-mounted PV system uses a clamp, bolt, and compatible rail sliding nut to secure a solar panel to the rail.
The connection can be simplified as:
Solar Panel Frame → Clamp → Bolt → Rail Sliding Nut → Solar Rail
The clamp contacts the PV module frame, while the bolt and rail sliding nut secure the clamp to the solar rail.
The rail sliding nut must be compatible with the specific rail profile.
Different solar mounting manufacturers may use different rail profiles, dimensions, and internal channel geometries. Therefore, the appropriate sliding nut should be selected according to the actual rail profile.
3. What Is a Solar Mid Clamp?
A solar mid clamp is installed between two adjacent PV modules.
Its main function is to secure the edges of two neighboring solar panels to the same solar rail.
A simplified connection is:
PV Module → Mid Clamp → Bolt + Rail Sliding Nut → Solar Rail
The clamp presses against the frames of the two adjacent modules.
A typical module row can therefore use:
End Clamp → PV Module → Mid Clamp → PV Module → Mid Clamp → PV Module → End Clamp
The exact arrangement depends on the PV module layout and mounting design.
4. What Is a Solar End Clamp?
A solar end clamp secures the outer edge of a PV module at the end of a panel row.
Unlike a mid clamp, an end clamp normally contacts the outside edge of the end module.
A simplified connection is:
PV Module → End Clamp → Bolt + Rail Sliding Nut → Solar Rail
End clamps are therefore installed at the outer ends of a module row.
A typical rail-mounted solar array may use end clamps at the beginning and end of each row, with mid clamps installed between adjacent modules.
5. Solar Mid Clamp vs End Clamp
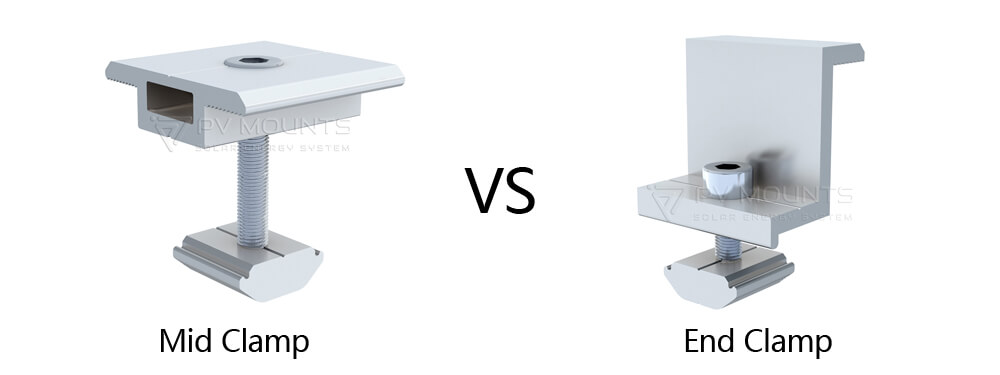
The main difference is their installation position and the module edges they secure.
| Feature | Solar Mid Clamp | Solar End Clamp |
|---|---|---|
| Installation position | Between two adjacent modules | At the end of a module row |
| Modules contacted | Two adjacent modules | One end module |
| Main function | Secure adjacent modules | Secure the outer module edge |
| Rail connection | Bolt + compatible rail sliding nut | Bolt + compatible rail sliding nut |
| Typical position | Between panels | Row end |
Both are essential components of a rail-based PV module mounting system.
6. How Does a Solar Mounting Clamp Connect to the Rail?
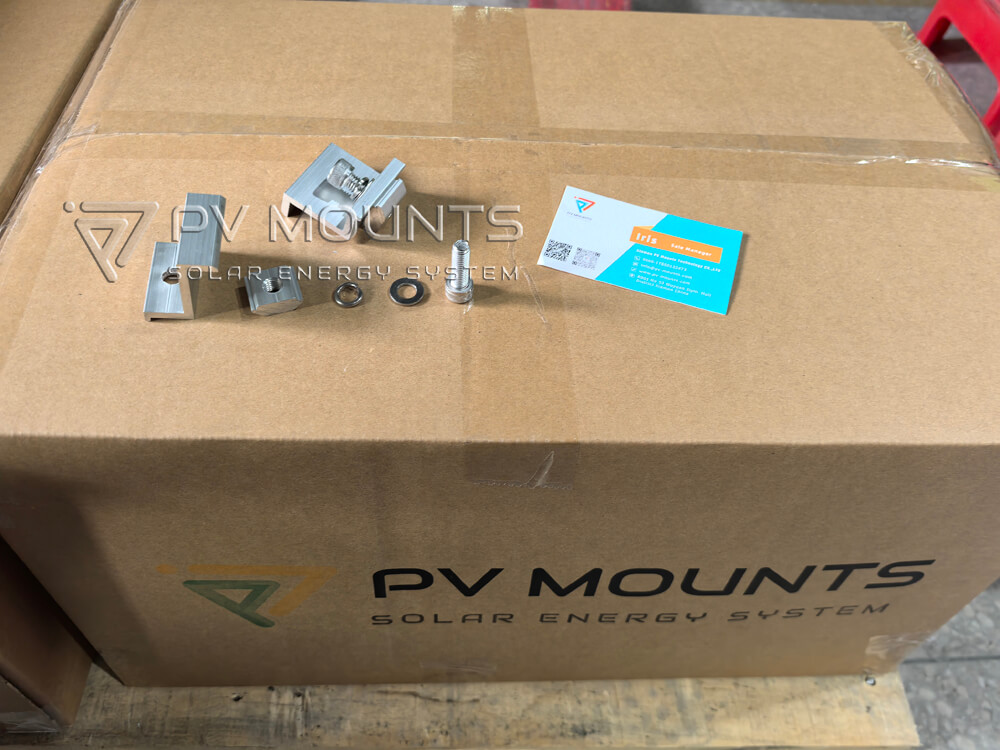
The connection between the clamp and solar rail normally uses a bolt and a compatible rail sliding nut.
A typical assembly is:
Clamp → Bolt → Rail Sliding Nut → Solar Rail
The rail sliding nut provides the threaded connection for the bolt within the compatible rail profile.
This allows the clamp to be positioned along the rail according to the module layout.
The exact sliding nut geometry depends on the solar rail profile.
Therefore:
The rail sliding nut must match the corresponding solar rail profile.
When sourcing a compatible sliding nut, buyers should provide the rail profile, drawing, dimensions, or sample whenever possible.
7. Why Does the Solar Rail Profile Matter?
Different solar mounting manufacturers can use different rail profiles.
Even when two rails appear similar externally, their:
- Internal dimensions
- Opening width
- Channel geometry
- Wall thickness
- Sliding-nut interface
may differ.
As a result, the compatible rail sliding nut can also be different.
The fastening system should therefore be evaluated as:
Clamp + Bolt + Rail Sliding Nut + Solar Rail Profile
The clamp may be suitable for a particular PV module frame, but the complete fastening interface must also be compatible with the selected rail.
8. What Is a Solar Rail Connector?
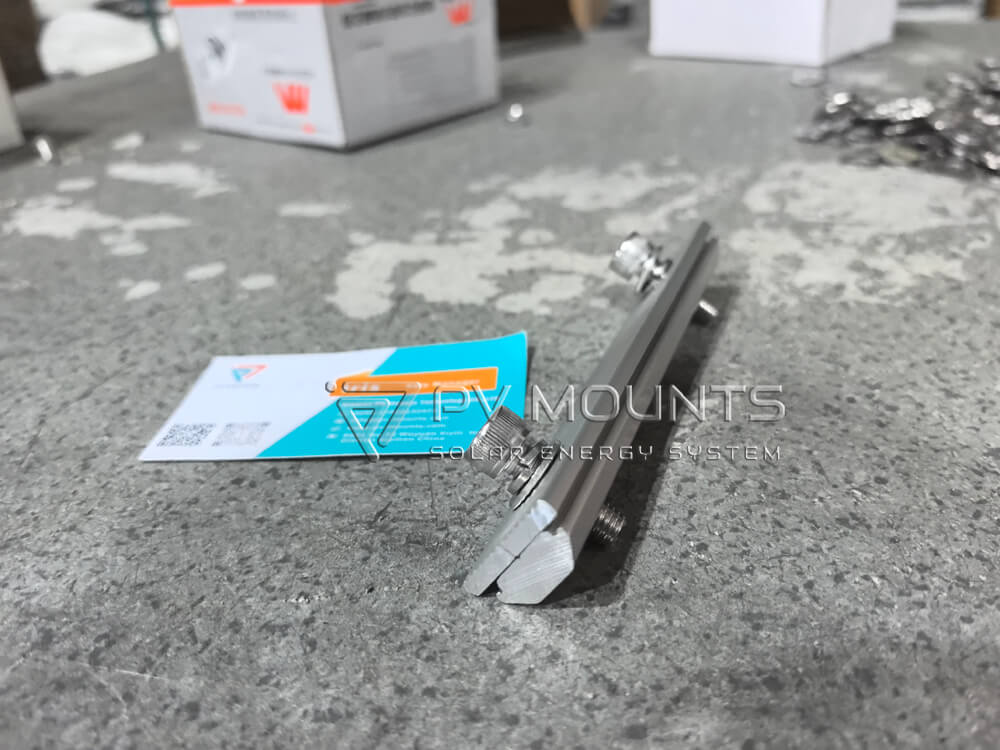
A solar rail connector, also called a rail splice in some mounting systems, is used to join two solar rail sections.
Its main function is rail-to-rail connection, not PV module fixing.
The basic connection is:
Solar Rail → Rail Connector → Solar Rail
The connector bridges the two rail sections and helps form a continuous rail run.
Where bolts and compatible rail sliding nuts are used, the complete connection can be represented as:
Solar Rail → Rail Connector + Bolt + Rail Sliding Nut → Solar Rail
The rail connector performs the rail-joining function, while the bolt and compatible rail sliding nut secure the connector to the corresponding rail profile.
9. Solar Rail Connection vs PV Module Fixing
Rail connection and PV module fixing are two different functions in a solar mounting system.
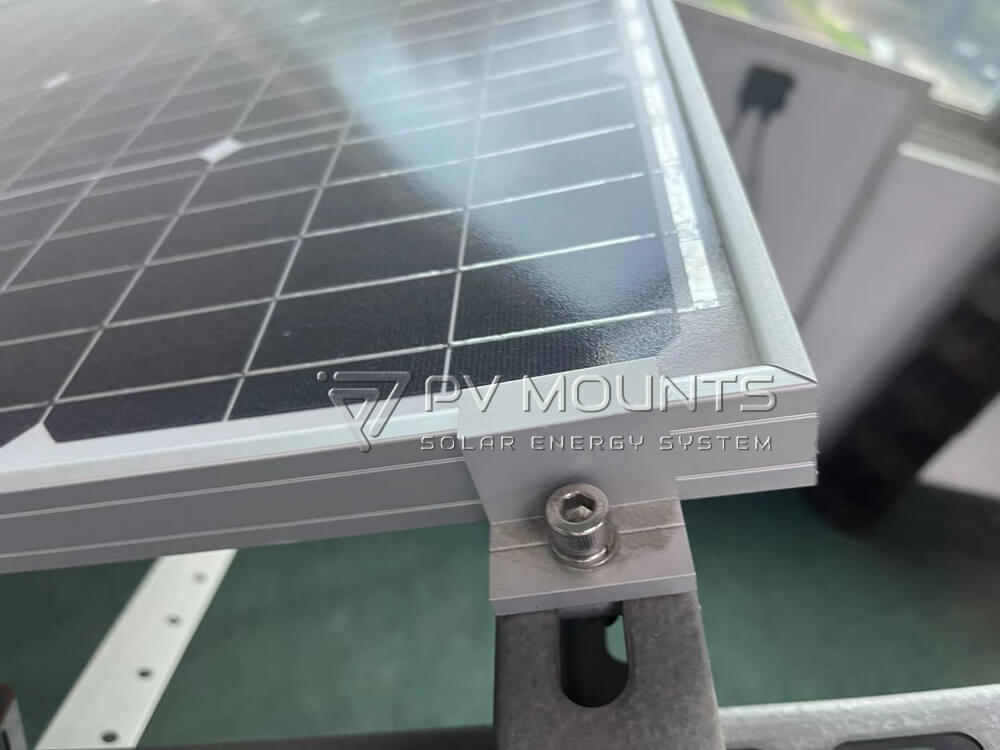
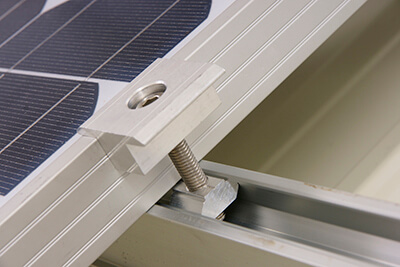
PV Module Fixing
PV Module → Mid/End Clamp → Bolt + Rail Sliding Nut → Solar Rail
Purpose:
Fix the PV module to the solar rail.
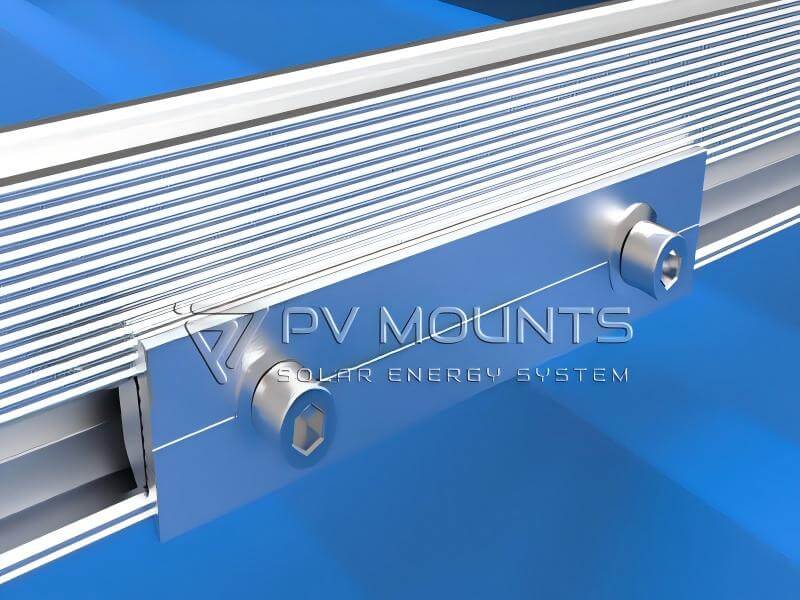
Rail Connection
Solar Rail → Rail Connector + Bolt + Rail Sliding Nut → Solar Rail
Purpose:
Join two solar rail sections into a continuous rail run.
This distinction is important when preparing a solar mounting BOM because a rail connector cannot replace a mid clamp or end clamp, and a mid/end clamp cannot replace a rail connector.
10. Solar Mounting Clamp Materials
Solar mounting clamps are commonly manufactured from aluminum alloys or other corrosion-resistant materials suitable for outdoor PV applications.
For aluminum solar mounting systems, 6005-T5 aluminum is commonly used for various mounting components.
When specifying a solar mounting clamp, buyers should confirm:
- المواد
- Surface treatment
- Clamp dimensions
- Compatible PV module frame
- Compatible solar rail
- Fastener material
- Corrosion-resistance requirements
The material and surface treatment should be selected according to the project environment and applicable requirements.
11. PV Module Frame Compatibility
The solar mounting clamp must be compatible with the PV module frame.
Important parameters can include:
- Module frame height
- Frame thickness
- Frame profile
- Clamping area
- Module orientation
A clamp designed for one module-frame height may not be suitable for another.
For procurement, buyers should provide the PV module model, frame dimensions, or module drawing whenever possible.
A typical RFQ should include:
PV Module Frame Height + Frame Thickness + Module Datasheet or Drawing
This allows the required clamp dimensions to be evaluated before ordering.
12. Solar Mid Clamp and End Clamp Height
Clamp height is an important selection parameter.
The clamp must provide appropriate engagement with the PV module frame and maintain compatibility with the module and rail assembly.
For a procurement request, specify:
- Module frame height
- Module frame thickness
- Required clamp height
- Solar rail profile
- Bolt specification
- Rail sliding nut type
Different PV module frame dimensions can require different clamp configurations.
Therefore, one clamp size should not automatically be assumed to fit every PV module.
13. How to Select the Correct Solar Mounting Clamp
When selecting a solar mounting clamp, evaluate the complete connection rather than choosing the clamp alone.
Step 1: Confirm the PV Module
Check:
- Frame height
- Frame thickness
- Frame profile
- Installation orientation
Step 2: Confirm the Solar Rail
Check:
- Rail profile
- Rail dimensions
- Channel opening
- Compatible sliding nut
Step 3: Confirm the Fastener
Check:
- Bolt type
- Bolt length
- Thread specification
- المواد
- Corrosion requirements
Step 4: Confirm the Clamp
Check:
- Mid or end clamp
- Clamp height
- Clamp width
- المواد
- Surface treatment
Step 5: Confirm the Complete Assembly
The final assembly should be evaluated as:
PV Module + Clamp + Bolt + Rail Sliding Nut + Solar Rail
14. Mid Clamp and End Clamp Installation Positions
For a typical row of PV modules:
End Clamp → Module → Mid Clamp → Module → Mid Clamp → Module → End Clamp
The mid clamps are positioned where two adjacent modules meet.
The end clamps are positioned at the outer edges of the first and last modules in the row.
The exact number and spacing of clamps depend on the PV module layout, rail arrangement, structural design, and applicable installation requirements.
15. Solar Rail Connection for Long Rail Runs
Solar mounting rails are often supplied in standard lengths.
When a project requires a rail run longer than one rail section, two or more sections may need to be joined.
A typical rail connection uses:
- Solar rail
- Rail connector
- Bolt
- Compatible rail sliding nut
The basic assembly is:
Solar Rail → Rail Connector + Bolt + Rail Sliding Nut → Solar Rail
The rail connector must be compatible with the selected rail profile.
For project procurement, confirm:
- Rail profile
- Rail dimensions
- Rail connector type
- Bolt specification
- Rail sliding nut specification
- Required rail length
- Connection location
16. Can Different Solar Mounting Components Be Used Together?
Yes, provided that the relevant interfaces are compatible.
For example, a customer may already have a solar rail and want to use mounting accessories from another supplier.
For PV module fixing, the relevant connection is:
Existing Solar Rail → Compatible Rail Sliding Nut → Bolt → Solar Clamp → PV Module
The existing rail does not necessarily need to be replaced simply because the customer wants to use compatible mounting accessories.
The critical factors are the:
- Solar rail profile
- Rail sliding nut
- Bolt
- المشبك
- PV module frame
If the customer already has a compatible rail sliding nut, it may also be possible to use the customer’s existing sliding nut with the appropriate bolt and mounting accessory.
For compatibility evaluation, customers can provide the rail profile, drawing, dimensions, or sample.
17. Common Solar Mounting Clamp Procurement Mistakes
Mistake 1: Selecting a clamp only by appearance
Two clamps may look similar but have different dimensions or module-frame compatibility.
Mistake 2: Ignoring the PV module frame
Clamp height and contact geometry should match the actual module frame.
Mistake 3: Ignoring the rail profile
The bolt and rail sliding nut must be compatible with the solar rail.
Mistake 4: Confusing mid clamps and end clamps
Mid clamps are installed between adjacent modules, while end clamps secure the outer edge of a module row.
Mistake 5: Confusing rail connection with panel fixing
A rail connector joins two rail sections.
A mid clamp or end clamp fixes the PV module to the rail.
These are different functions.
Mistake 6: Ordering a rail sliding nut without checking the rail
Different rail profiles can require different sliding nut dimensions.
Mistake 7: Selecting components separately
The complete interface should be evaluated:
PV Module → Clamp → Bolt → Rail Sliding Nut → Solar Rail
For rail extension:
Solar Rail → Rail Connector → Bolt + Rail Sliding Nut → Solar Rail
18. EPC Procurement Checklist for Solar Mounting Clamps
For EPC and distributor procurement, the RFQ should include enough information to identify the complete connection.
| Item | Recommended Information |
|---|---|
| Clamp type | Mid clamp / End clamp |
| PV module | Brand / model / datasheet |
| Module frame height | Required dimension |
| Module frame thickness | Required dimension |
| Rail profile | Drawing or sample |
| Rail dimensions | Required dimensions |
| Sliding nut | Existing type or required type |
| Bolt | Type, thread and length |
| Clamp material | Aluminum / specified material |
| Surface treatment | Required finish |
| Rail connector | If rail joining is required |
| الكمية | Project quantity |
| التطبيق | Rooftop / other PV structure |
| الرسم | Recommended |
| Sample | If required |
This information helps reduce the risk of ordering incompatible mounting components.
19. Custom Solar Mounting Clamps and Compatibility Solutions
Solar mounting projects do not always use standardized rail and module dimensions.
Customers may already have:
- Their own solar rail
- Their own rail profile
- Existing rail sliding nuts
- Existing bolts
- Specific PV module frame dimensions
In these cases, the mounting components should be evaluated according to the existing interfaces.
Xiamen PV Mounts can evaluate customized solar mounting component requirements based on customer drawings, dimensions, samples, rail profiles, and application details.
For a compatibility request, customers can provide:
- Solar rail drawing
- Rail cross-section
- Rail dimensions
- PV module frame drawing
- Existing sliding nut
- Bolt specification
- Required clamp type
- Application photos
This information can be used to evaluate the required mounting components before production.
20. Solar Mounting Clamp and Rail Connection Summary
Solar mounting clamps and rail connection components perform different but complementary functions.
PV Module Fixing
PV Module → Mid/End Clamp → Bolt + Rail Sliding Nut → Solar Rail
إن mid clamp و end clamp secure PV modules to the solar rail.
Rail-to-Rail Connection
Solar Rail → Rail Connector + Bolt + Rail Sliding Nut → Solar Rail
إن rail connector joins two solar rail sections.
إن bolt and compatible rail sliding nut provide the fastening connection between the connector and the rail profile.
Understanding these different connection functions helps EPCs, installers, distributors, and mounting-system buyers select compatible components for the complete rail-based PV mounting system.
21. Frequently Asked Questions
A solar mounting clamp is a component used to secure PV modules to a solar mounting rail. The main types are mid clamps and end clamps.
A solar mid clamp is installed between two adjacent PV modules and secures both module edges to the solar rail.
A solar end clamp secures the outer edge of a PV module at the end of a module row.
A mid clamp is positioned between two adjacent PV modules, while an end clamp is installed at the outer edge of a module row.
A typical connection uses a bolt and a compatible rail sliding nut. The basic arrangement is Clamp → Bolt → Rail Sliding Nut → Solar Rail.
A solar rail connector is a component used to join two solar rail sections. It is different from a mid clamp or end clamp, which are used to fix PV modules.
Two solar rails can be joined using a compatible rail connector and fastening hardware. Where the system uses sliding nuts, the connection can be secured with bolts and compatible rail sliding nuts.
No. A rail connector joins two rail sections, while a solar mounting clamp secures a PV module to the rail.
Yes. Different solar rail profiles can have different internal dimensions and channel geometries, so the compatible sliding nut must be matched to the rail profile.
Potentially, if the clamp, bolt, and rail sliding nut are compatible with the existing rail profile and PV module frame. The rail drawing or profile should be checked before ordering.
Potentially, if the existing sliding nut and bolt are compatible with the clamp and solar rail profile. The complete connection should be checked before ordering.
No. Clamp selection can depend on the PV module frame height, frame thickness, rail system, and installation requirements.
Provide the PV module frame dimensions, solar rail profile, required clamp height, bolt requirements, and application details.
Provide the PV module frame dimensions, solar rail profile, required clamp height, bolt requirements, and installation configuration.
Custom requirements can be evaluated based on drawings, dimensions, samples, module frame details, rail profiles, and application requirements.
Aluminum alloys are commonly used for solar mounting clamps. The exact material and surface treatment should be specified according to the project requirements.
The rail profile determines which sliding nut and fastening configuration can be used. Different rail profiles may require different sliding nut dimensions.
22. Need Compatible Solar Mounting Clamps?
If you already have your own solar rail, you do not necessarily need to replace it to use compatible PV mounting accessories.
Send us your:
- Solar rail profile or drawing
- PV module frame dimensions
- Existing rail sliding nut
- Bolt specification
- Required mid or end clamp
- Rail connector requirements
- Sample or application photos
Xiamen PV Mounts can evaluate the interfaces and provide compatible or customized solar mounting components for your project.
Have an existing solar rail and rail sliding nut? You don’t need to replace them. We can provide compatible clamps, bolts, and rail connection components for your project.
Request a Custom Solar Mounting Hardware Quote → info@pv-mounts.com


 Arabic
  English
  Spanish
  Portuguese
  Russian
  Hungarian
  Romanian
  French