Características principales
- Sustainable and Reusable: The screw piles are designed for easy removal and relocation, offering flexibility for future solar projects while minimizing environmental impact.
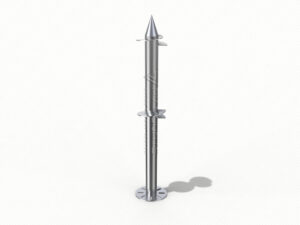
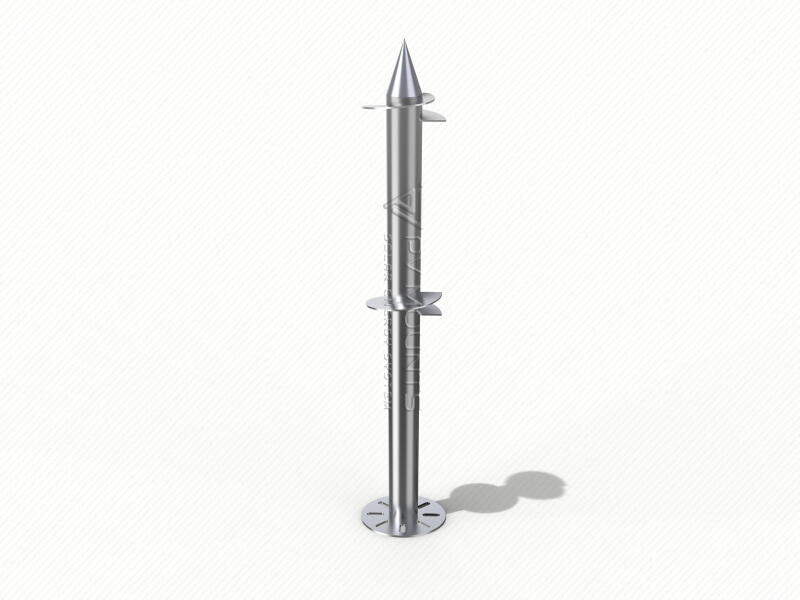
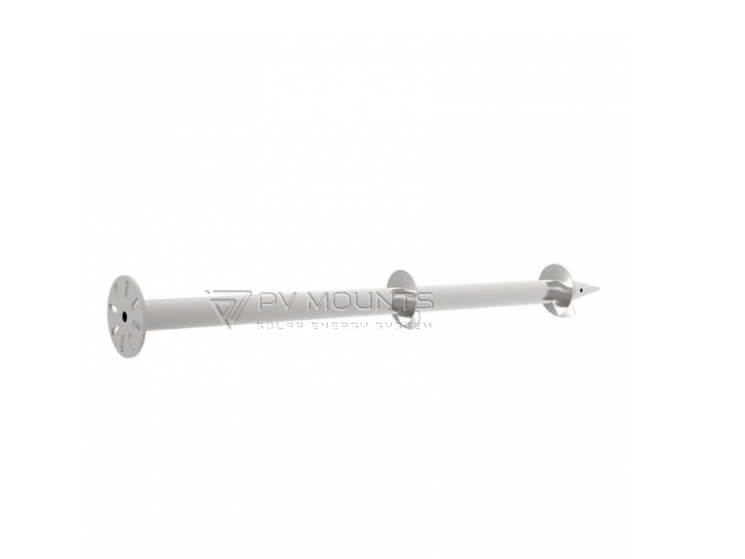
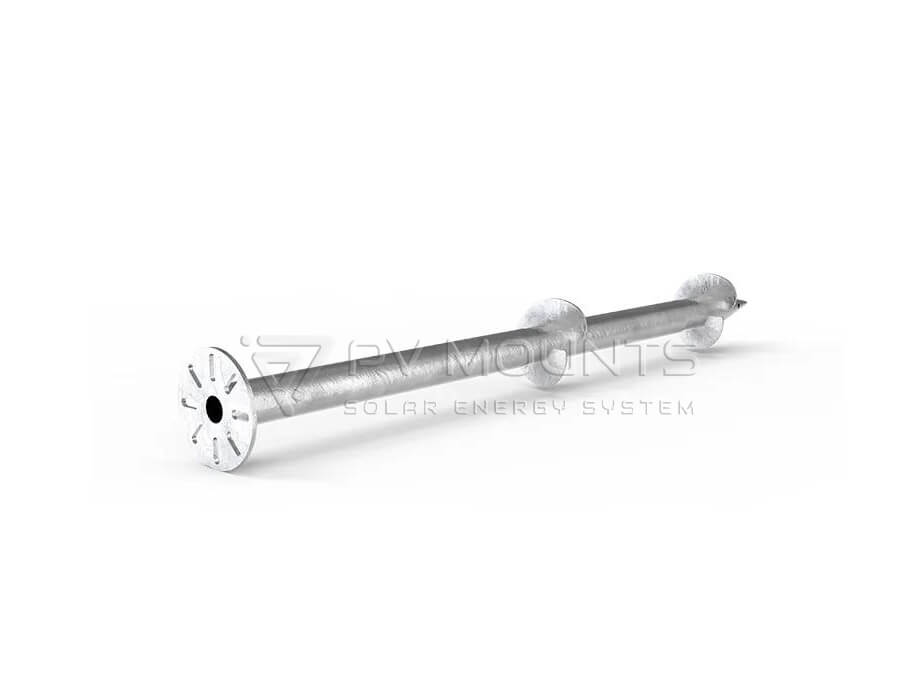
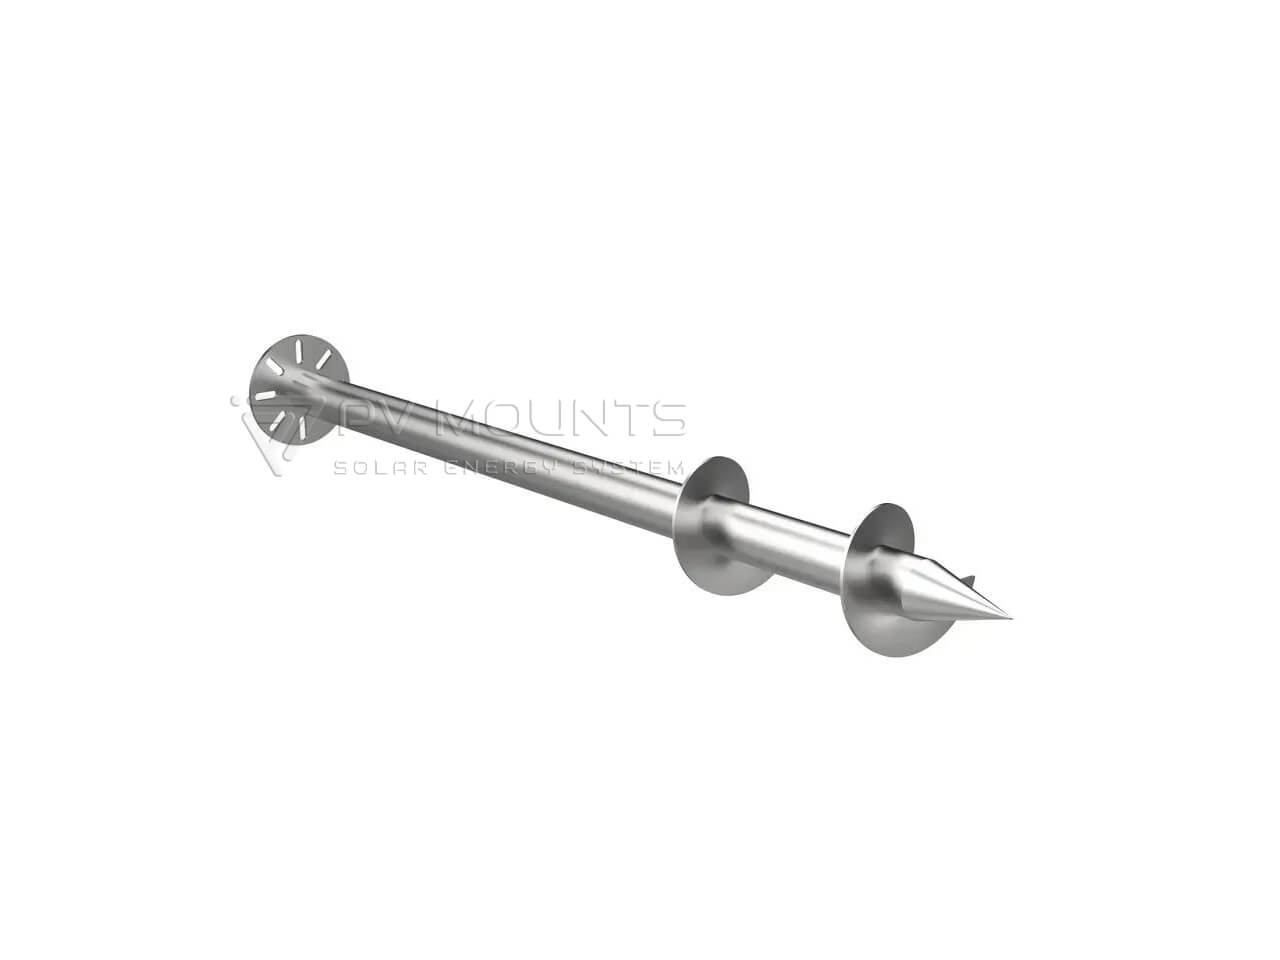
- Dual Blade Design: The innovative two-blade structure ensures quicker penetration into the ground, providing a stable, secure base for solar panels in all soil types, from soft clay to rocky terrain.
- Fácil instalación: With minimal equipment required, these screw piles are easy to install, reducing labor time and overall project costs. The unique spiral design allows for quick, screw-in installation without the need for heavy machinery or complex foundation work.
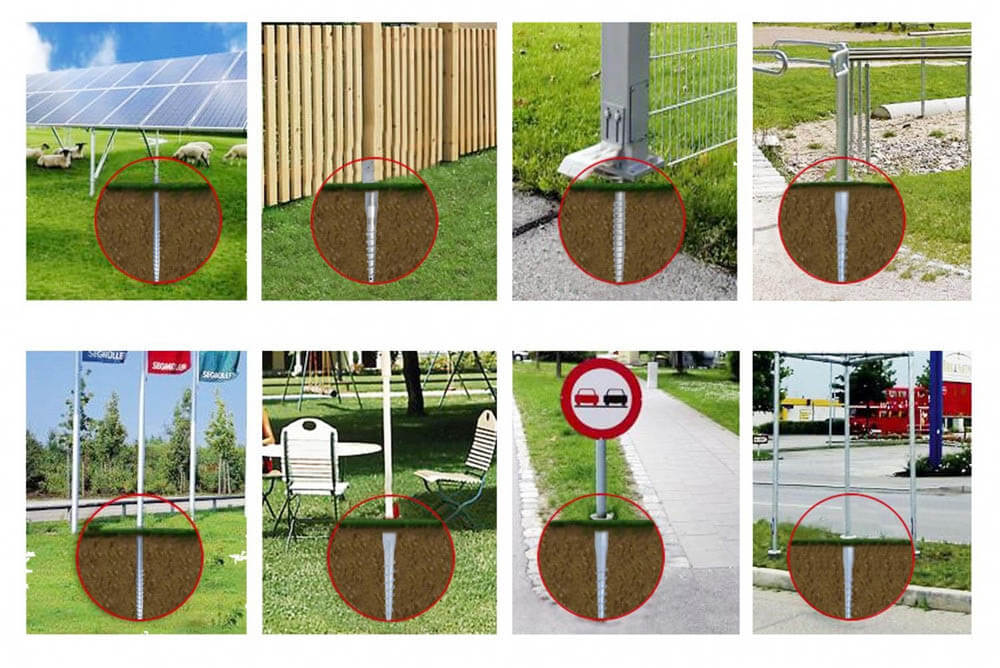
- Versatile Applications: Suitable for photovoltaic projects, fence foundations, housing construction, road signs, billboards, and more.
- Minimal Maintenance: Once installed, ground screws require little to no maintenance, providing a cost-effective solution.
- High Load Capacity: The welded-thread design supports both horizontal and vertical loads, ensuring structural stability.
- Durabilidad: Constructed from premium galvanized steel, these ground screws are built to withstand harsh environmental conditions, ensuring long-lasting performance and resistance to corrosion, making them perfect for coastal, humid, and high-wind regions.
Construction & Customized Design
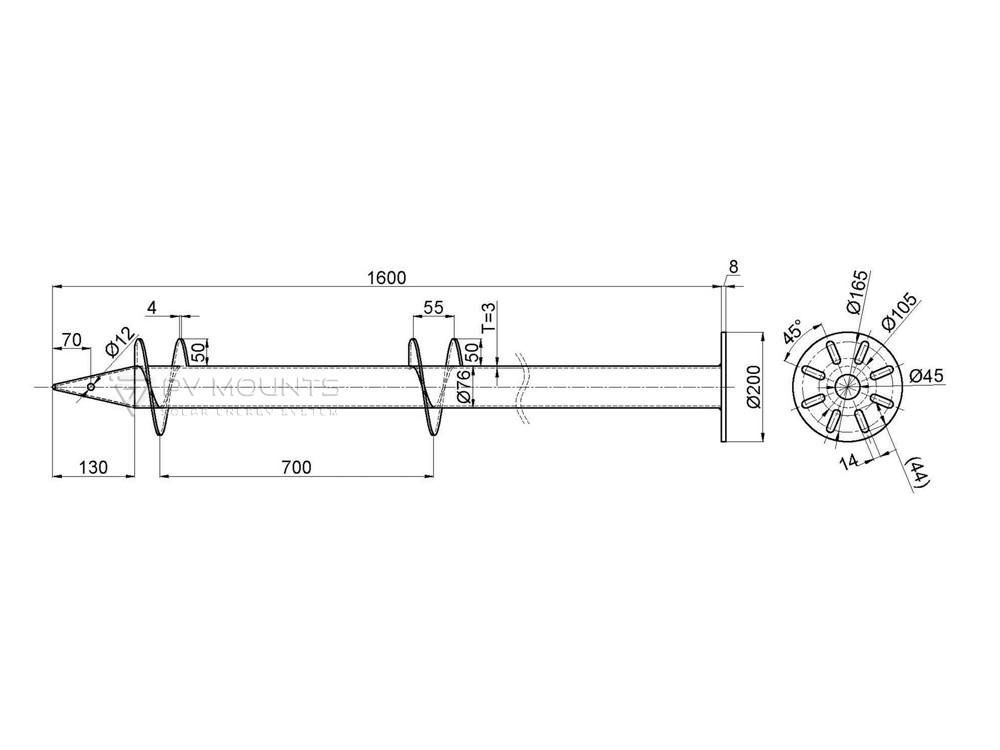
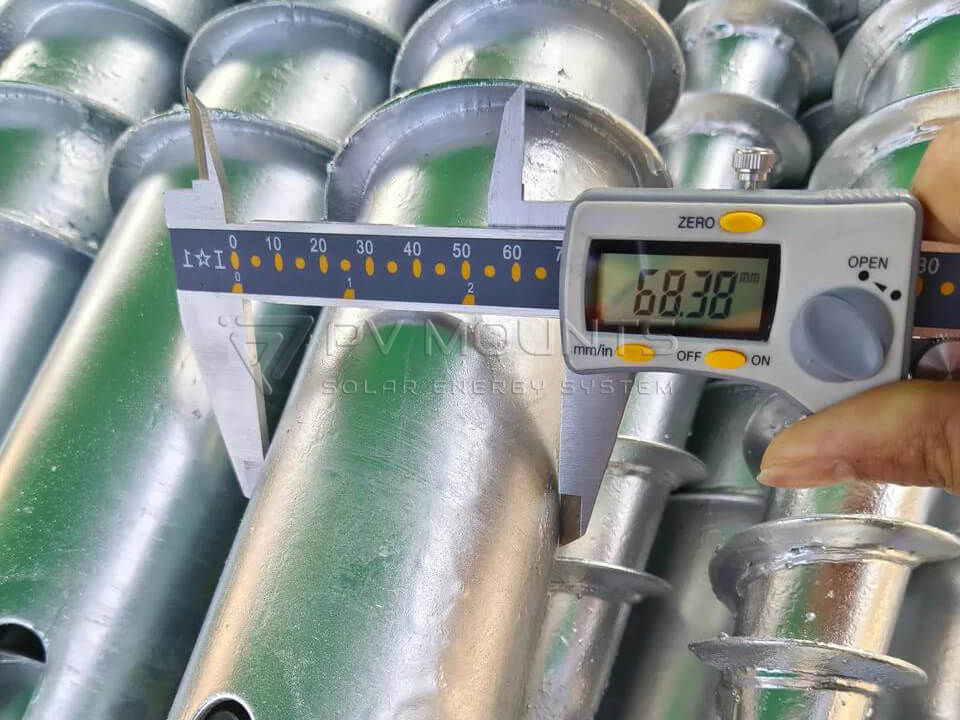
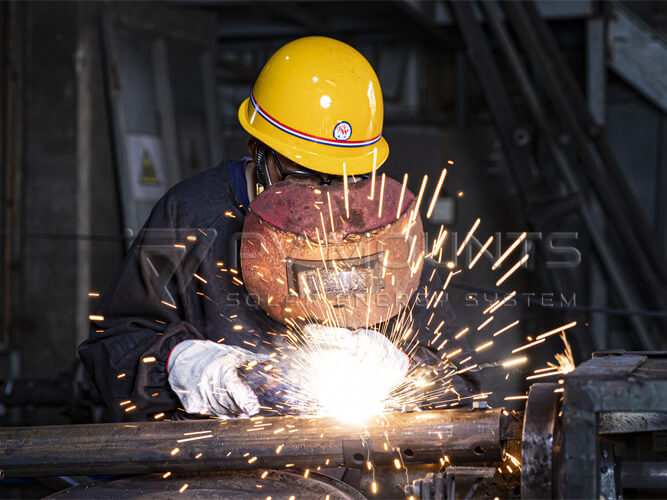
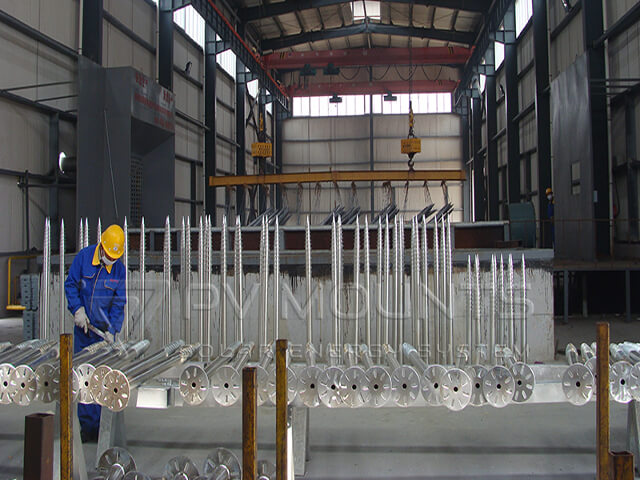
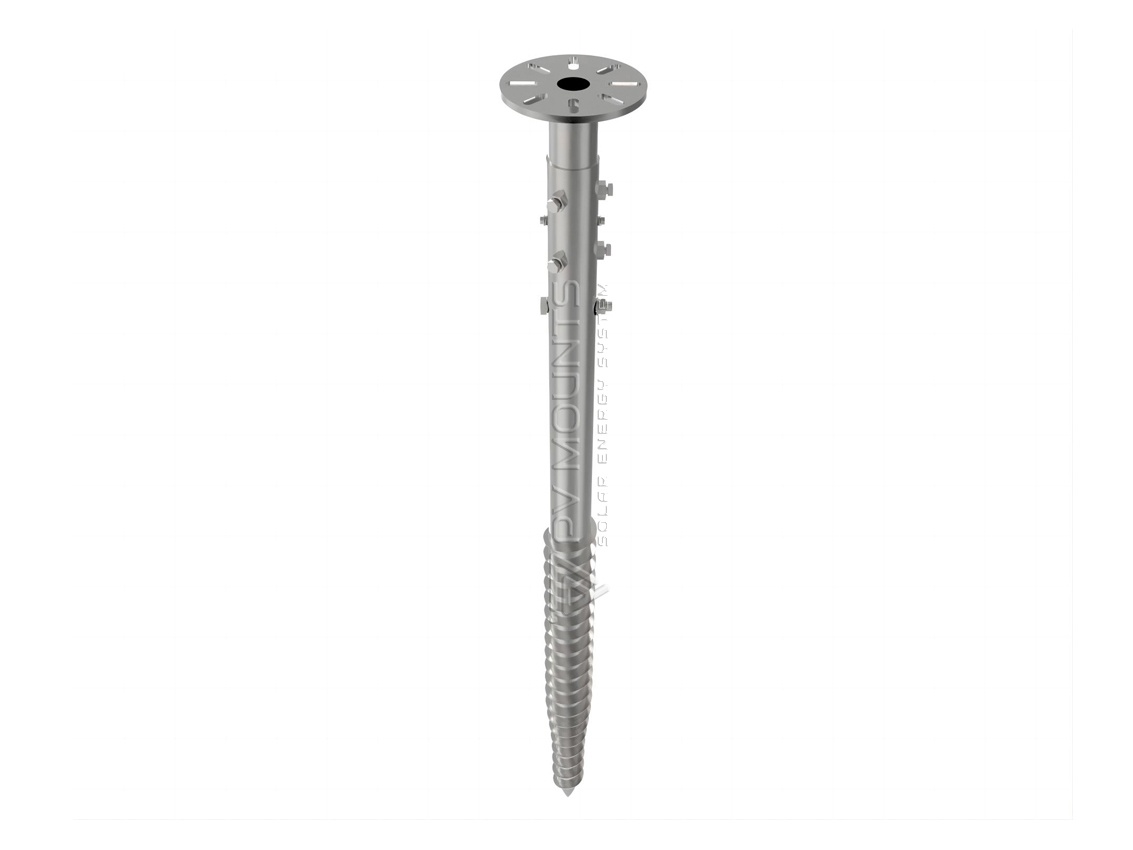
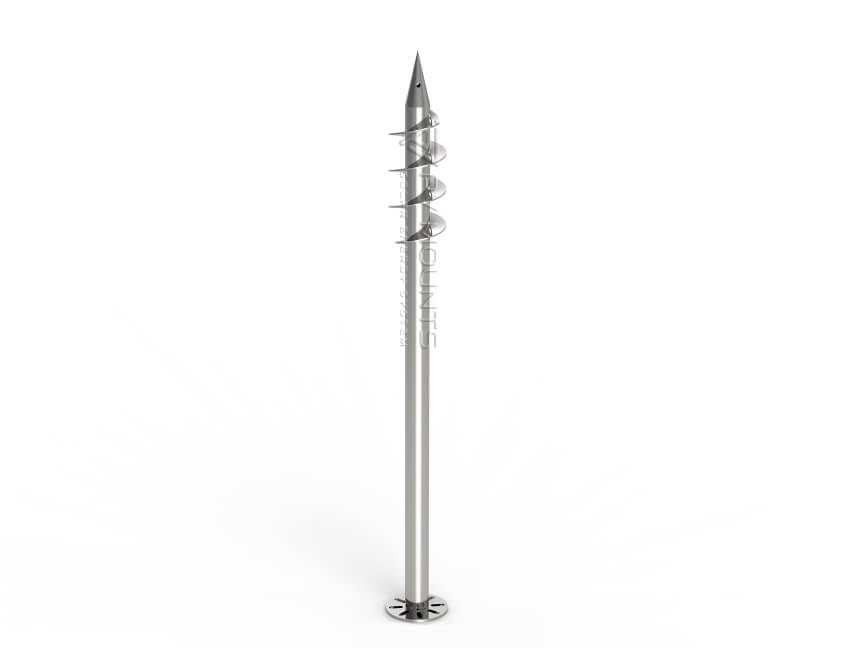
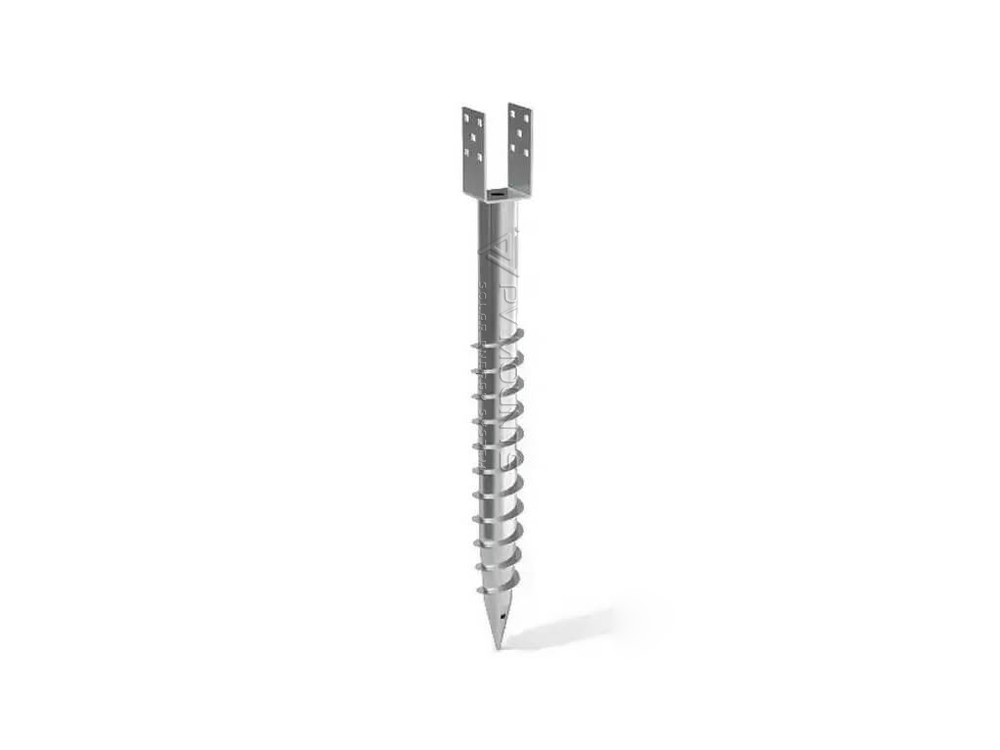
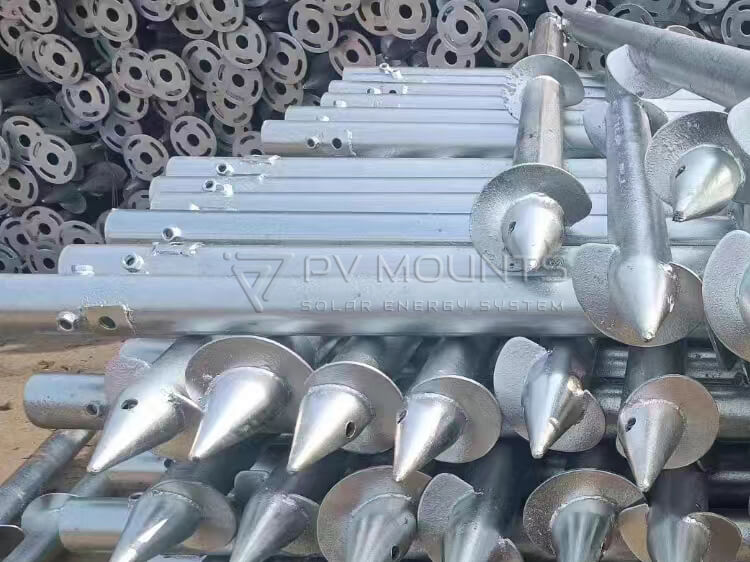
Ground screws are constructed using advanced forging technology, ensuring a smooth, burr-free surface. The spiral ground pile consists of a galvanized steel pipe with welded blades, which increases bearing capacity based on terrain conditions. Blade variations, such as single-blade, double-blade, and multi-blade designs, allow customization for different soil types and load-bearing requirements.
| Parámetros técnicos |
| Material: | Carbon Steel Q235B |
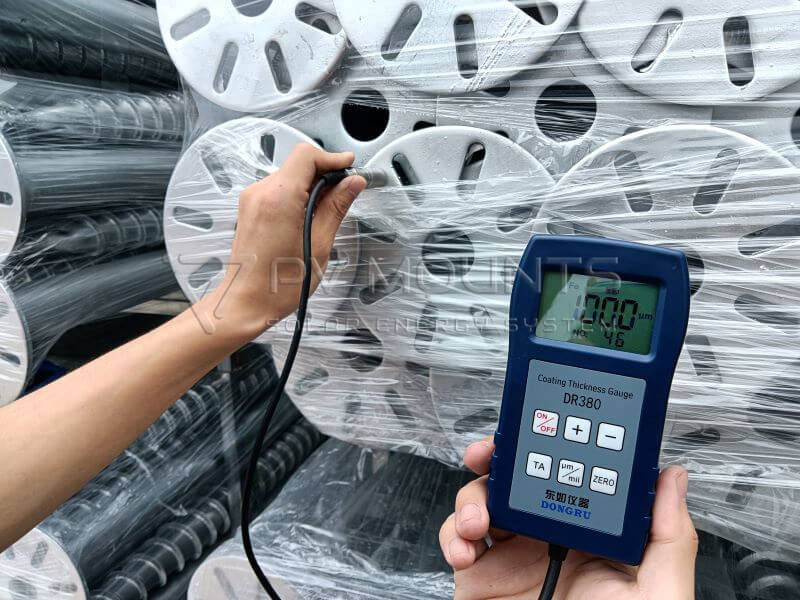
| Superficie: | Hot-dip Galvanized according to DIN EN ISO1461 |
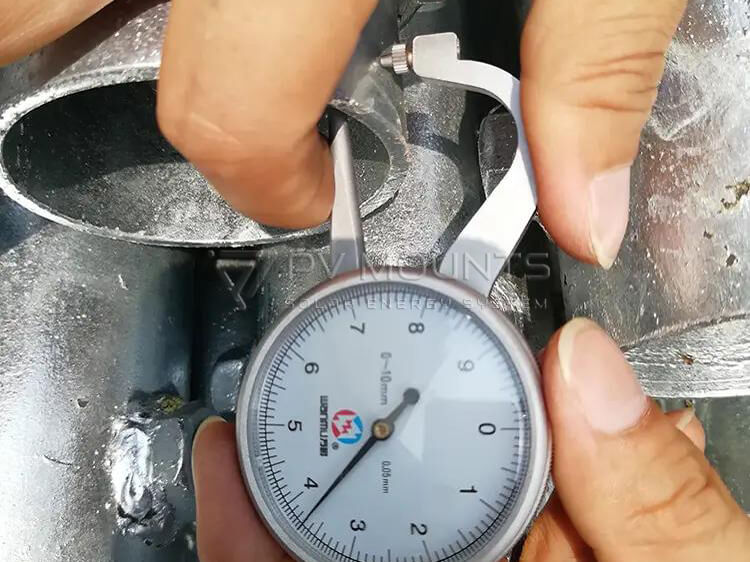
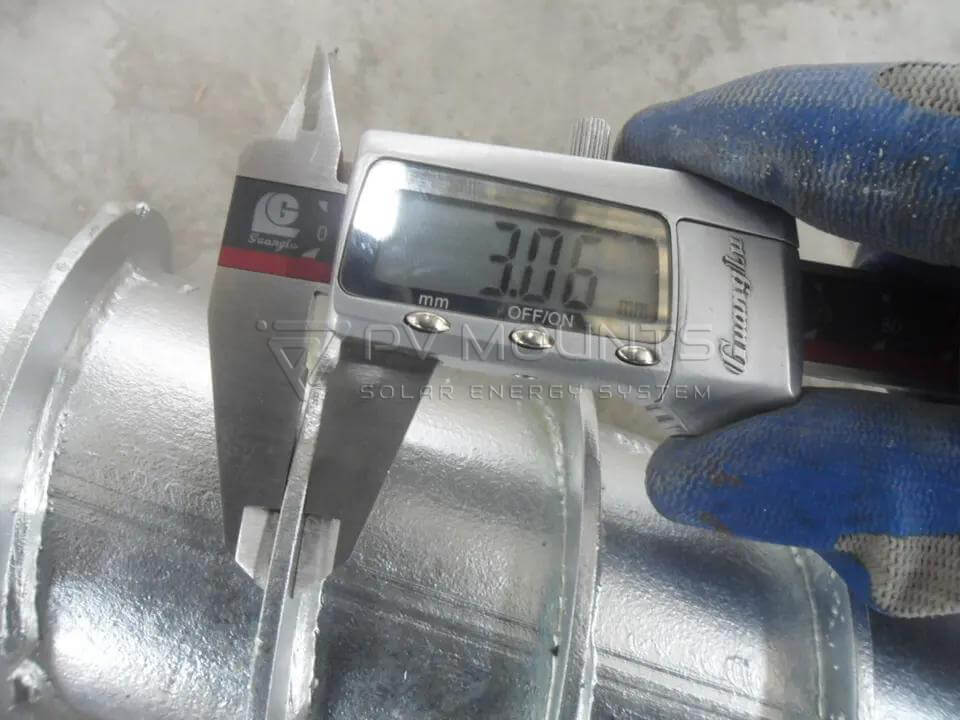
| Thickness of galvanized | ≥ 80μm |
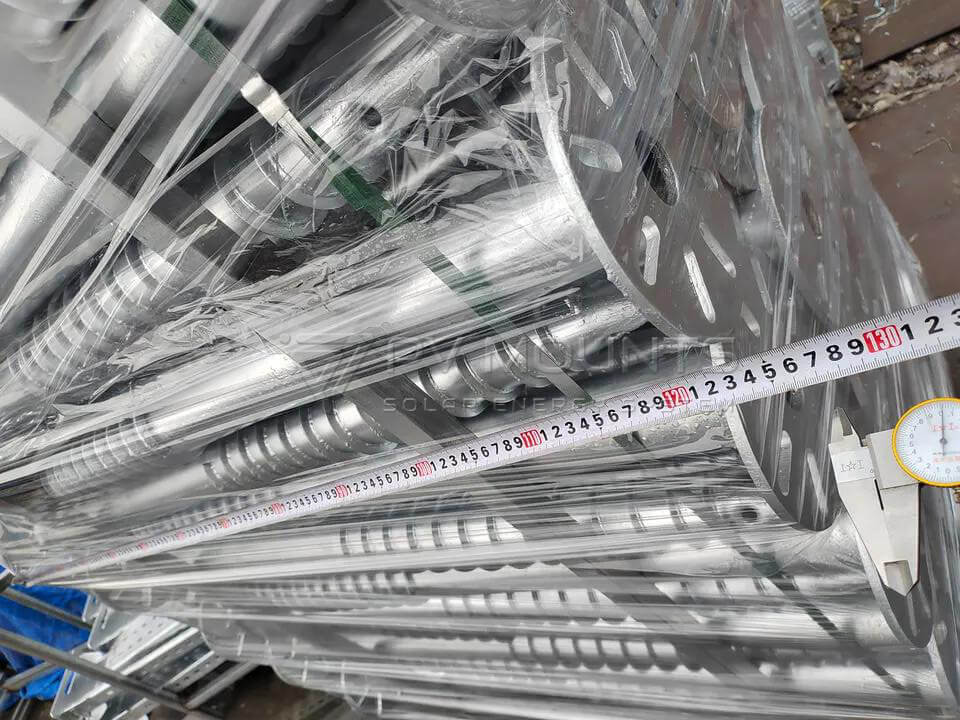
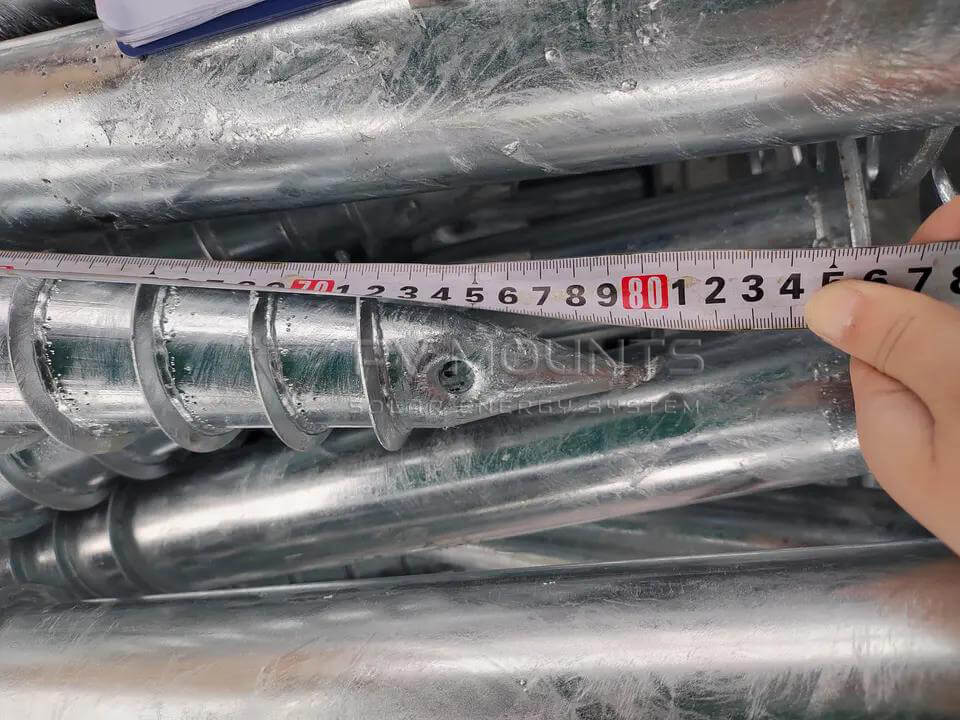
| Outer Diameter | φ76mm (optional:48mm,60mm,68mm,76mm,89mm,102mm,114mm,121mm,219mm etc.) |
| Length | Usual type: 1600 /1800 /2000mm (600~3500mm) |
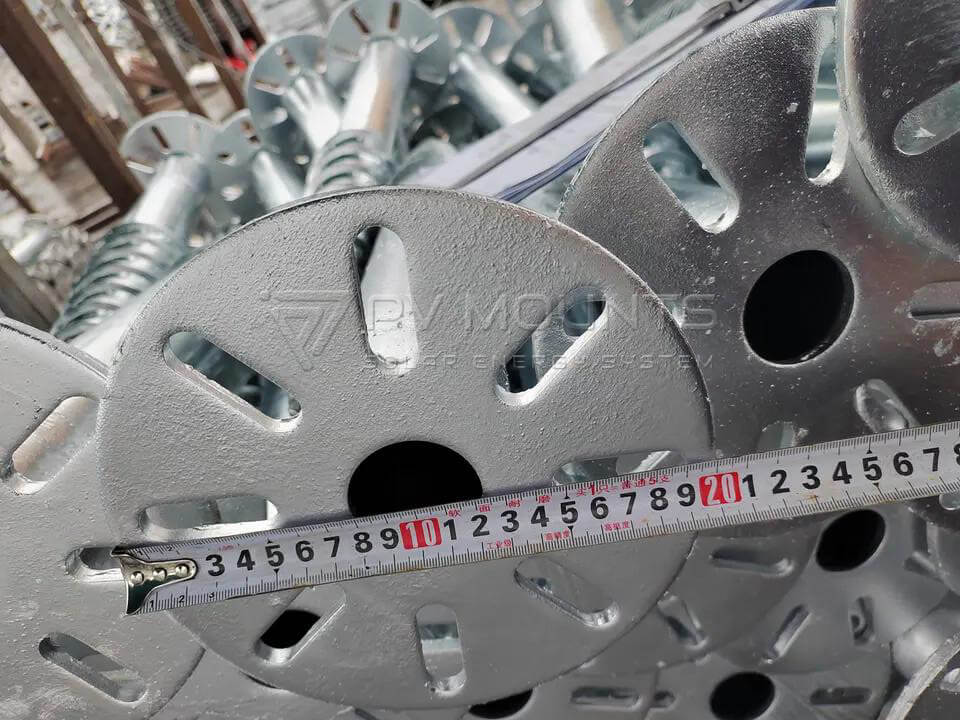
| Diámetro de la brida | D200x8mm / D220x8mm /D180x8mm or as required |
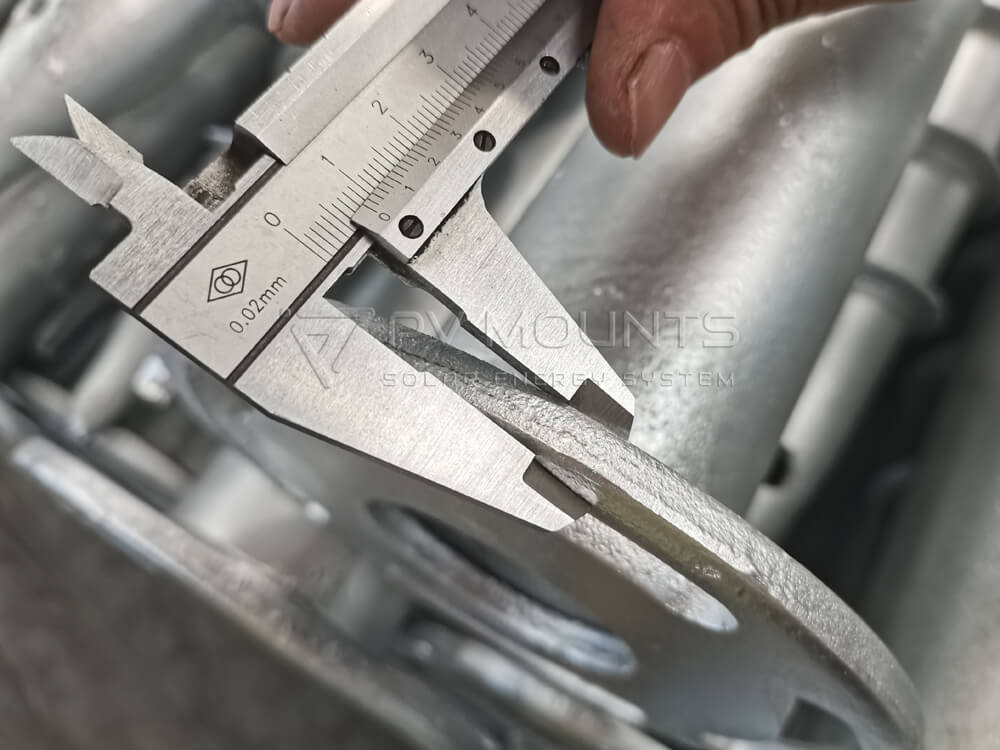
| Flange Thickness: | 8~12mm |
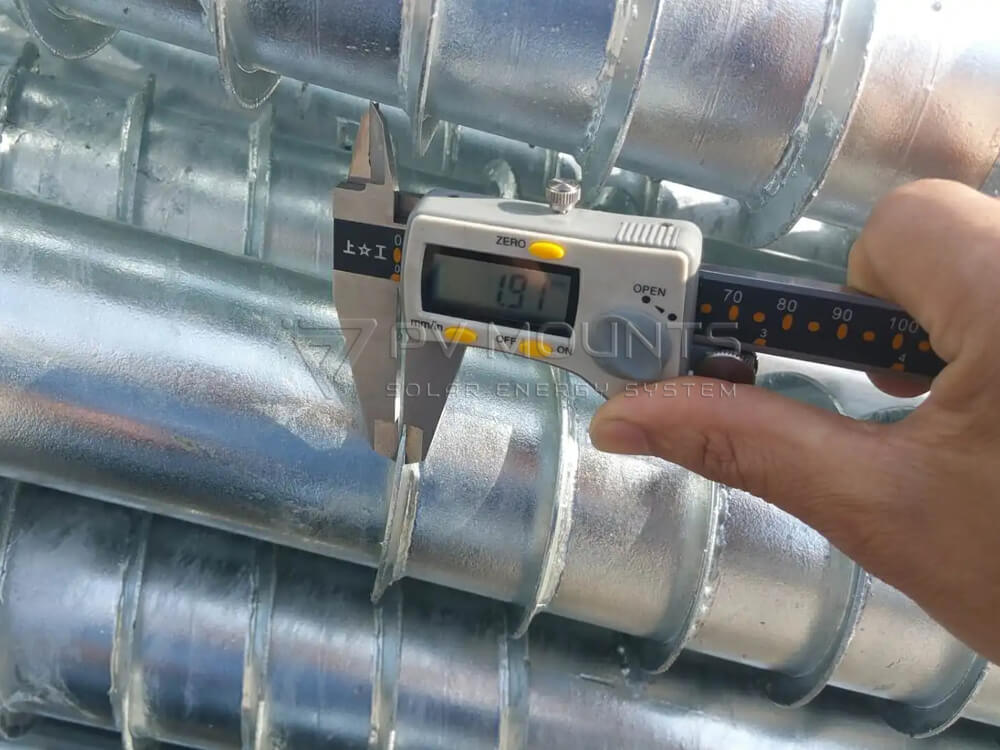
| Blade Number | 2 Blades Continuous welded helix, size 2~4mm or customized |
| Pipe thickness | 2.5mm/3mm/3.5mm (optional 2~4mm) |
| MOQ | 100 Pcs |
| Package Type: | Steel pallets |
| Drawing force: | 20.5~28.5KN |
| Nut Aperture: | 3-M10,12,14,16 uniform distribution |
| Foundation: | Suitable for all kinds of geology,such as sand, Soft soil, tight soil, clay, gobi desert,gravel etc. |
| Aplicación: | Foundation for Solar power station,fence,house construction,checkmark,field,advertising board,road signs,billboards etc |
| Servicio: | OEM/ODM |
| Carga de viento: | Máx. 60 m/s |
| Carga de nieve: | Máx. 1,4KN/m |
| Garantía | 10 años |
| Vida útil | 25 años |
| Estándar | AS/NZS 1170.2/JIS C 8955:2017/ISO9001/UL1565/DIN 1055 |
Why Choose Our Ground Screws?
Unlike traditional concrete foundations, our galvanized ground screw technology offers a faster, cleaner, and more cost-effective installation process. With minimal maintenance and maximum adaptability, it is the ultimate choice for B2B suppliers, wholesalers, construction installers, and solar project developers.
Elevate your projects with a cutting-edge foundation solution! Contact us today for OEM customization and bulk orders.
🔗 Keywords: Ground Anchor | Pile Ground Mounting System | Solar Ground Screw | Screw Pile | Galvanized Screw | Solar Mounting Ground Screw | Galvanized Ground Screw
Installing Anclajes de tierra para pilotes con tornillo de dos hojas for a solar mounting system is a relatively straightforward process, especially compared to traditional concrete foundations. Below is a step-by-step guide to help you install the anchors efficiently:
Tools and Materials Needed:
- Anclajes de tierra para pilotes con tornillo de dos hojas
- Installation machine or manual wrench (depending on size and soil conditions)
- Leveling equipment
- Measuring tape
- Hammer or impact driver (if installing manually)
- Llave dinamométrica (for ensuring correct installation depth and tension)
Step-by-Step Installation Process:
1. Preparación del terreno
- Choose the Location: Identify the exact spots where you’ll be installing the anchors. The placement should align with the mounting design for your solar panels. Ensure the area is clear of obstructions, and the soil is properly assessed for suitability.
- Measure the Distances: Mark the exact positions for each anchor based on the solar mounting layout. The distance between anchors will depend on your solar system’s specifications, but typical spacing is around 2–3 meters apart.
2. Pre-Installation Soil Testing
- Check Soil Type: Before proceeding, conduct a soil test to determine its density and stability. This helps you assess the installation method (manual vs. mechanical installation) and ensures that the anchors will securely hold.
- Adjustments for Soil: If the soil is too hard, you may need a mechanical drill to pre-punch pilot holes, or consider using larger screws or anchors for stability.
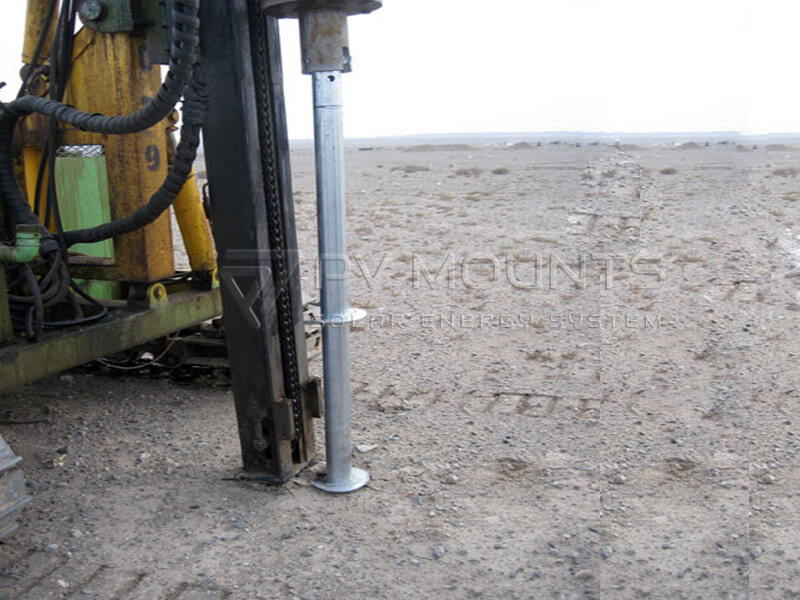
3. Begin Anchor Installation
- Align the Anchor: Position the first Two Blades Screw Pile Ground Anchor at the marked location. Ensure the anchor is vertically aligned with the ground to prevent any misalignment during installation.
- Start Screwing in the Anchor:
- Manual Installation: For smaller projects, you can manually install the screw anchor using a wrench or impact driver. Place the anchor on the ground and begin turning it clockwise. The two blades (or spirals) will begin to penetrate the soil as you apply pressure.
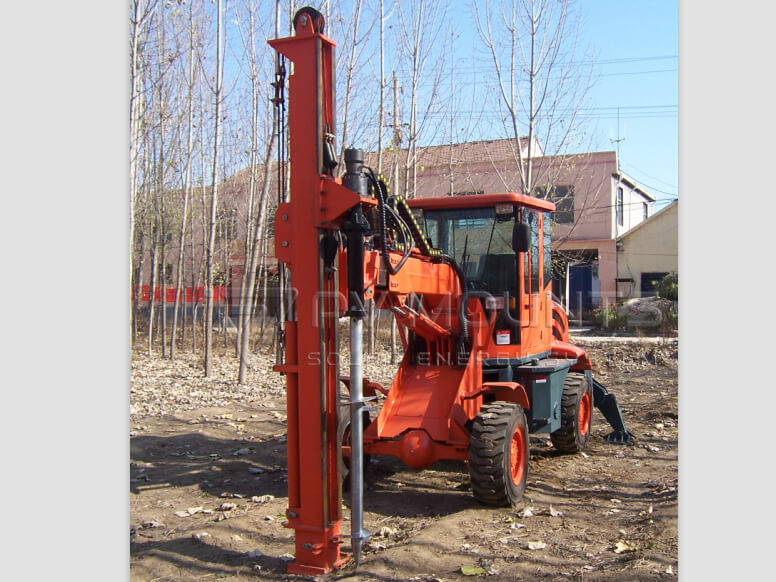
- Mechanical Installation: For larger installations, use an installation machine. This will quickly and efficiently drive the screw piles into the ground. A machine-mounted auger will ensure deep, stable placement in a fraction of the time.
4. Monitor Depth and Angle
- Monitor the Installation Depth: Keep track of how deep the anchor goes into the ground. Most screw piles are designed to reach a specific depth (usually between 1.5 and 3 meters) for optimal support.
- Level the Anchor: Use a leveling tool to ensure that the anchor remains straight and aligned vertically as it sinks. If necessary, adjust the angle of insertion to maintain proper alignment.
- Ensure Full Insertion: Once the screw pile is installed, check that the spiral blades are fully submerged in the soil. The anchor should be flush with the ground level for a solid connection.
5. Repeat for All Anchors
- Install Remaining Anchors: Move to the next marked location and repeat the process for all the screw piles required for your system. Use the same careful alignment and installation methods for each anchor.
6. Check for Stability and Torque
- Torque and Stability: After installing each screw pile, use a torque wrench to check that the anchor has been driven in correctly and to the required depth. This ensures maximum stability and resistance against weather or ground shifting.
- Verify Plumbness: Ensure that each anchor is vertically aligned to avoid any uneven load distribution on the solar structure.
7. Attach Solar Mounting Structure
- Soportes de montaje: Once all the screw piles are securely in place, attach the appropriate solar panel mounting brackets to each anchor. These brackets will support your solar panels and ensure they are fixed in place.
- Final Check: Double-check all attachments for tightness and alignment before proceeding with the installation of the solar panels themselves.
Tips for Successful Installation:
- Consider Weather Conditions: Installing screw piles in dry conditions is easiest, so plan your installation when the weather is mild and dry. Wet or muddy soil can cause difficulties in installation.
- Use Professional Equipment: For large installations, using an auger or professional piling machine will save significant time and effort.
- Consult Structural Engineer: For large-scale or commercial solar installations, it’s a good idea to consult with a structural engineer to ensure your anchors are appropriately sized and positioned for optimal solar panel performance.
Benefits of Using Two Blades Screw Piles for Installation:
- Faster Installation: No need for excavation or pouring concrete, significantly reducing labor and installation time.
- Minimal Ground Disruption: The screw-in installation method avoids disturbing the surrounding soil, making it ideal for eco-conscious projects or sensitive areas.
- Reusability: These anchors can be removed and reused in new locations, offering flexibility for future solar projects.
- Long-Term Stability: Reliable anchoring ensures your solar panels remain secure, even in challenging weather conditions.
- Solución rentable: No need for expensive concrete or heavy equipment—these galvanized screw piles provide a budget-friendly alternative to traditional foundations.
- Versatilidad: Suitable for a wide range of solar mounting systems, these screw piles work with various panel designs and can be used in both residential and commercial installations.
Would you like to explore any particular part of the installation process in more detail? Or do you need assistance with sourcing tools or equipment? Drop us a line now.
PV Mounts es un fabricante integral de sistemas de montaje solar. Podemos producir diferentes componentes de montaje de paneles solares, incluyendo:
- Rieles
- Ganchos
- Pies en L
- Tornillos de tierra
- Abrazaderas de costura
- Abrazadera central y final
- Toma de tierra
- Pinza de puesta a tierra
- Pinza de cable
- y más