Installing solar panels on a tile roof is a challenge that requires skill, precision, and the right set of components. Unlike metal or asphalt roofs, tile roofs are fragile, and any mistakes during installation can lead to broken tiles or leaks. At PV Mounts, we’ve supported hundreds of tile roof installations across Europe and Asia, and in this guide, we’ll share our step-by-step approach to ensure a safe and durable installation. This guide is designed for professional installers, EPC contractors, and distributors looking to understand every component and its role in a solar tile roof system.
1.Understanding Solar Tile Roof Mounting Components
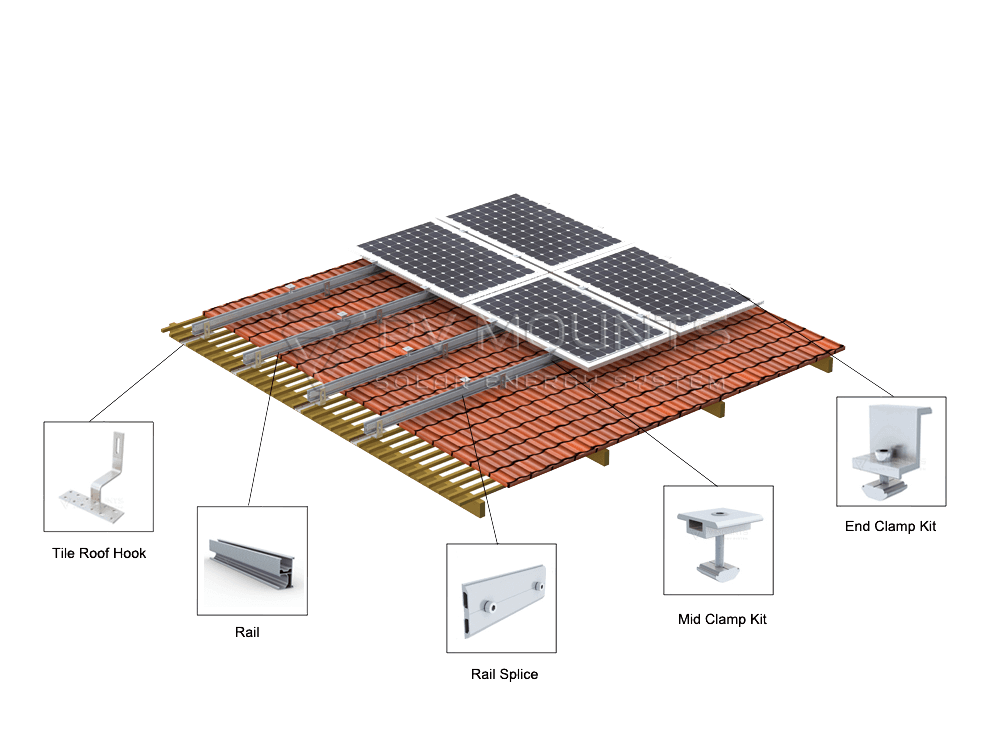
A solar tile roof mounting system is made up of several components that work together to secure panels while protecting the roof from water damage and wind loads. These components include:
- Tile Roof Hooks: Provide the main anchor into the rafters beneath the tiles.
- Mounting Rails: Connect hooks and hold panels in place.
- Mid and End Clamps: Secure panels along the rail.
- Waterproofing in Tile Roof Hook Systems: Ensure waterproofing around hooks.
- Grounding Accessories: Maintain electrical safety.
- Cable Management Clips: Organize wiring for a neat, safe layout.
Each component must be chosen with care. Low-quality or mismatched parts can compromise both safety and long-term performance.
2.Why Tile Roofs Require Specialized Mounting Systems
Tile roofs, whether clay, concrete, or ceramic, are aesthetically pleasing but mechanically delicate. Standard metal roof brackets are often unsuitable. Using inappropriate components can result in cracked tiles, misaligned panels, or water leaks.
Challenges specific to tile roof installations include:
- Fragility of tiles: Can crack under point load.
- Irregular tile shapes: Requires adjustable hooks or custom fittings.
- Waterproofing: Tiny gaps around hooks can cause leaks.
- Wind and snow load considerations: Hooks must anchor into the rafter, not just the tile batten.

3.Key Components in Detail
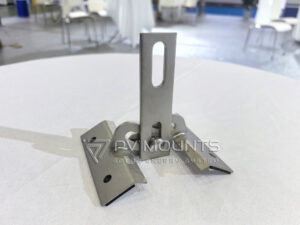
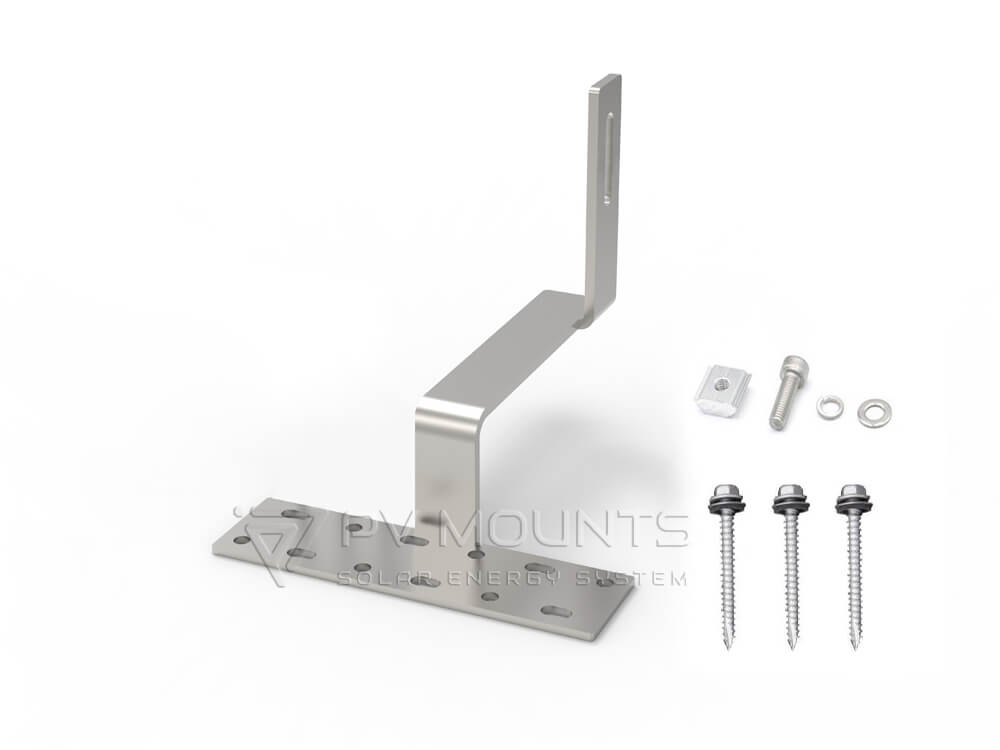
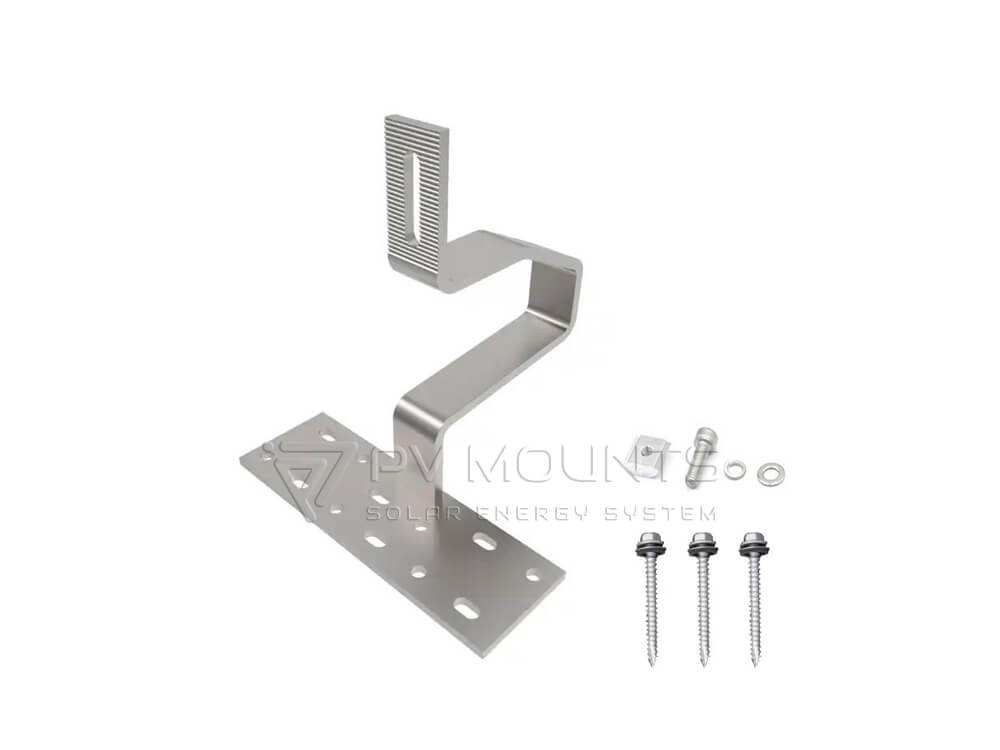
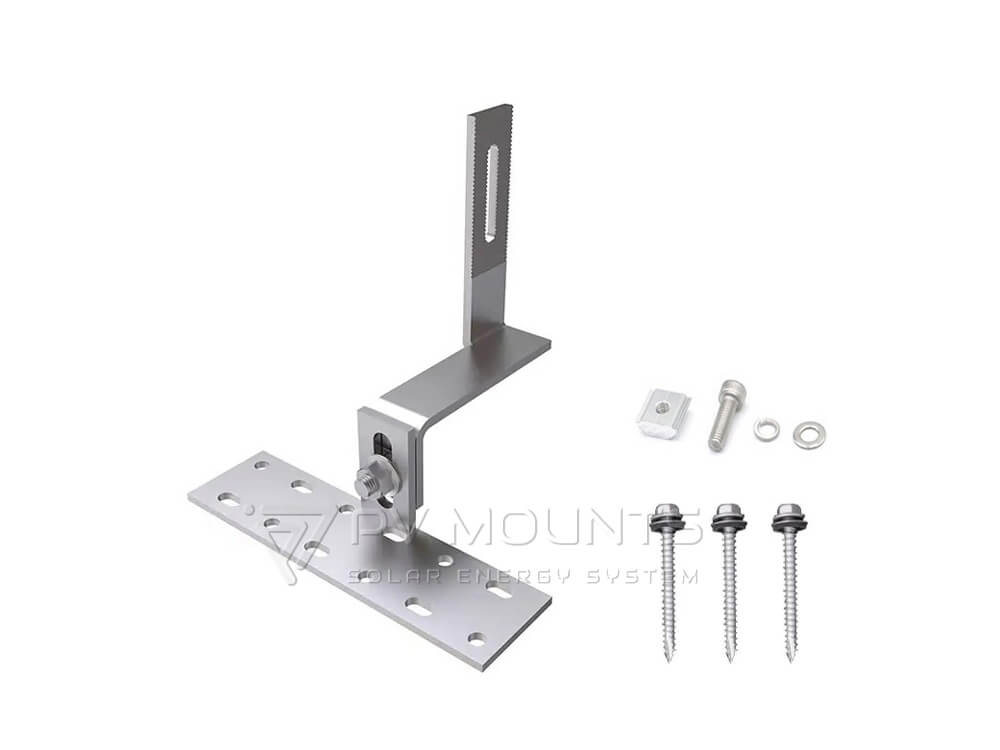
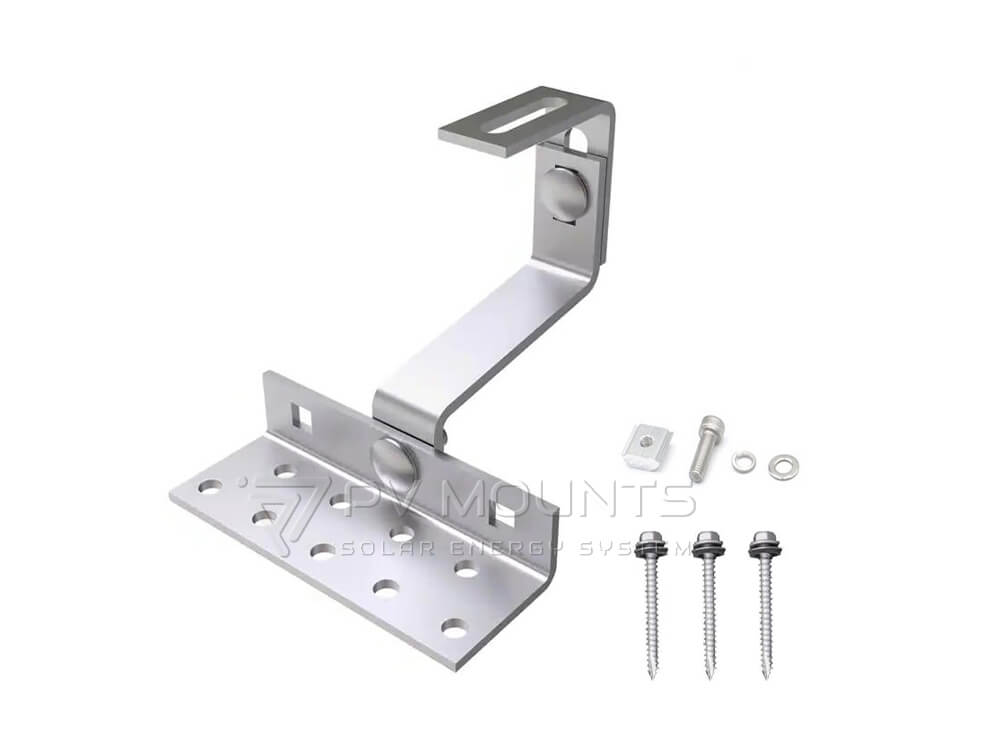
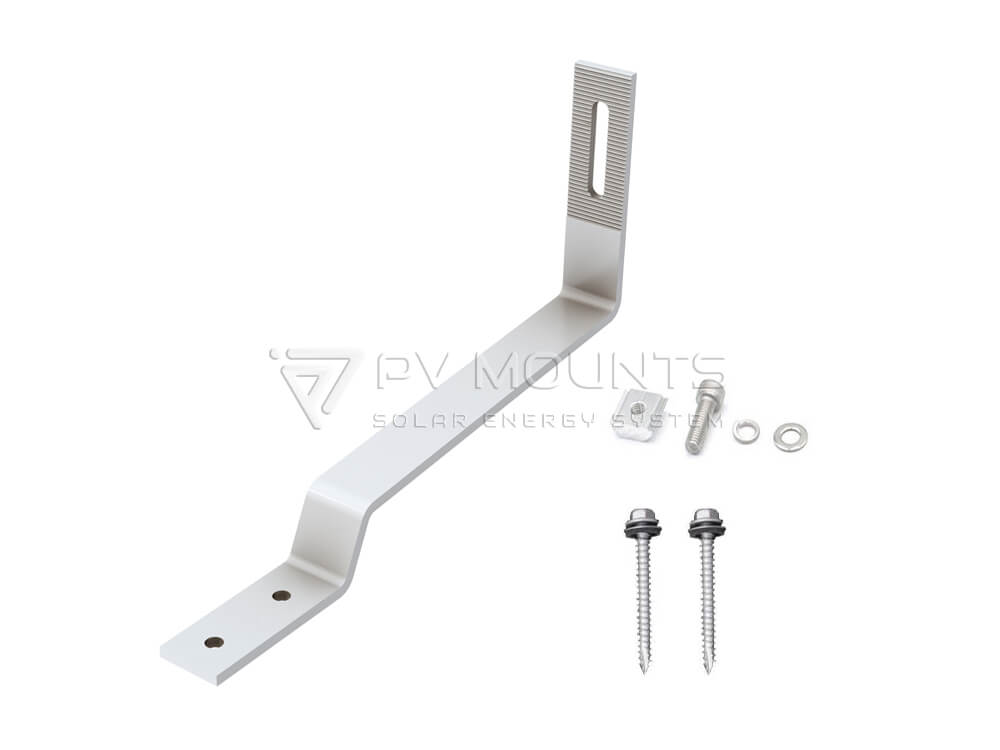
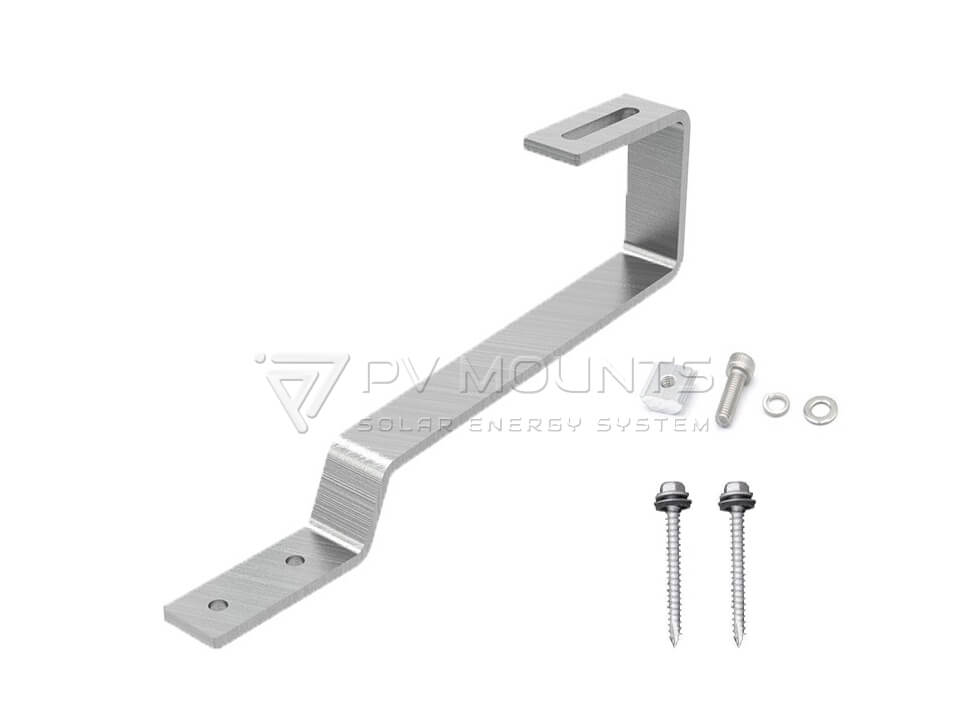
3.1. Tile Roof Hooks
Tile roof hooks are the foundation of any tile roof system. At PV Mounts, we offer several options:
- Adjustable Hooks: Ideal for uneven surfaces.
- Fixed Hooks: For uniform tile layouts.
- Double-Bent Hooks: Provide stronger load-bearing capacity.
Material options:
- Acero inoxidable SUS304: Resistant to corrosion, suitable for coastal areas.
- SUS430 stainless steel: cost-effectived option for normal residential roof installation.
- Aluminio: Lightweight and economical for inland installations.


accessories.jpg)

accesorios.jpg)
aaccessories.jpg)
con-tornillo-y-pernos-imagen-producto.jpg)


3.2. Mounting Rails
Rails connect hooks and panels, providing structural alignment. Consider:
- Material: Aluminum for corrosion resistance.
- Shape: T-profile or H-profile depending on span and wind load.
- Length: Rails can be joined with splice kits for long rows.

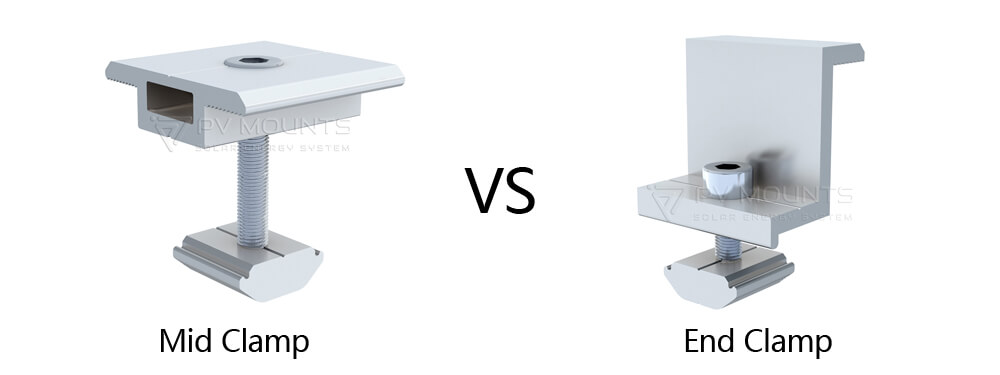
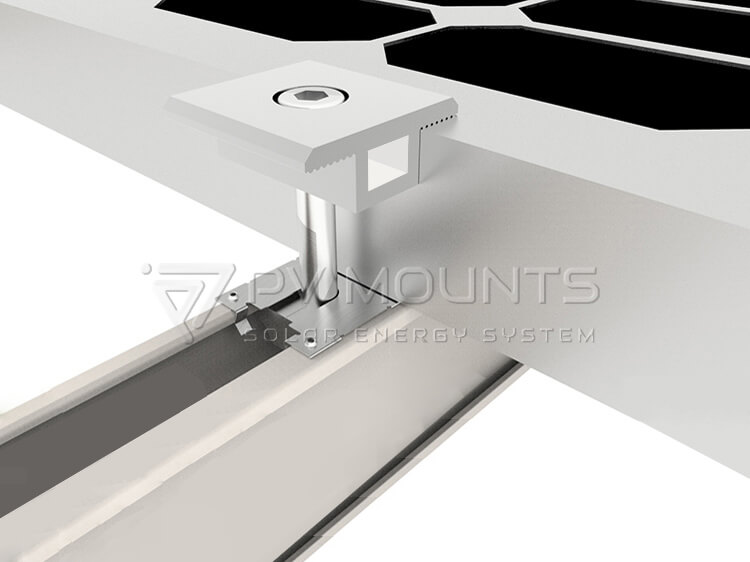
3.3. Mid and End Clamps
Clamps secure panels along rails:
- Mid clamps: Hold panels between others.
- End clamps: Secure the edge panels.
- Use the correct T-bolts or spring nuts matching rail slots.
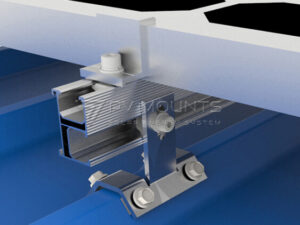
3.4. Waterproofing in Tile Roof Hook Systems
In PV Mounts’tile roof hook system, Each hook features a self-tapping screw with an integrated rubber washer, which seals the roof penetration reliably.
Installation guidelines:
- Position the hook so the screw anchors into the rafter.
- Ensure the rubber washer sits flush against the tile surface.
- Tighten the screw securely, avoiding over-torquing.
- Confirm the washer fully covers the screw hole to prevent leaks.


3.5. Grounding Accessories
Electrical safety is essential:
- Use grounding clips to bond panels to rails.
- Connect grounding lugs to copper wire according to local codes.
- Check continuity to prevent stray currents.

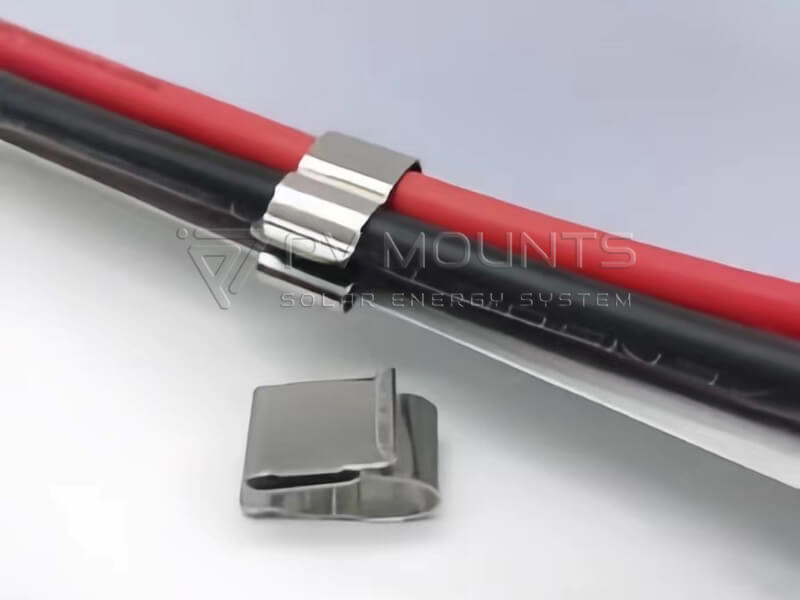
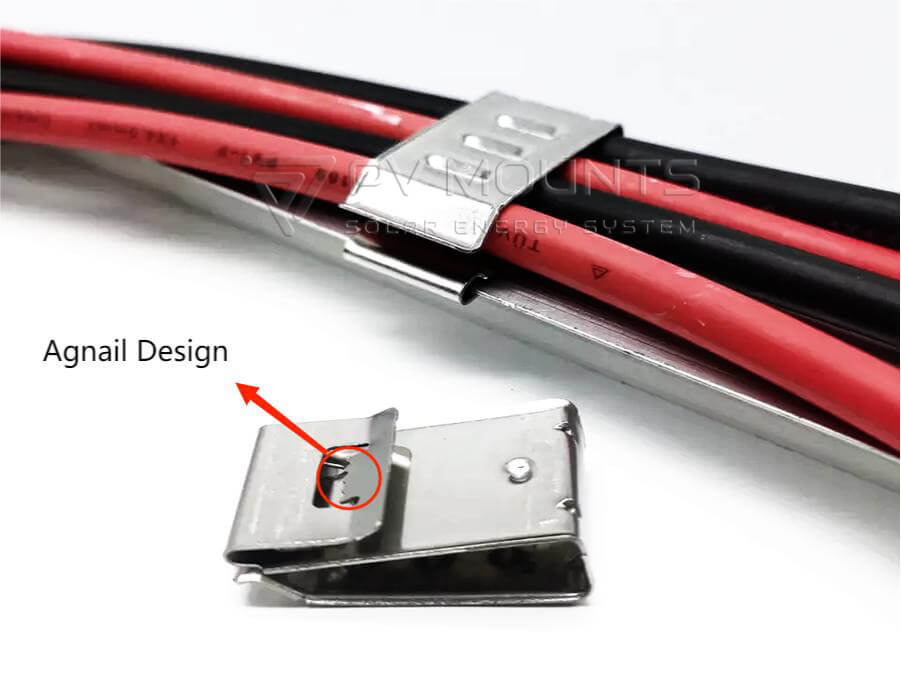
3.6. Cable Management Clips
Neat cable organization improves safety and aesthetics:
- Clips or straps prevent wires from rubbing or sagging.
- Route cables along rails and secure at regular intervals.

4.Cómo elegir el gancho para teja adecuado
Selection depends on tile type:
| Tile Type | Recommended Hook | Notes |
|---|---|---|
| Flat tile | Adjustable hook | Can compensate for height differences |
| Curved/S-type | Double-bent hook | Fits profile and prevents tile cracking |
| Thin/slate | Low-profile hook | Minimizes tile lifting |
Tip: Always secure hooks to rafters, not just battens, to ensure load-bearing capacity.
5.Step-by-Step Installation
- Preparation: Check rafter layout, gather safety gear, remove or lift tiles where hooks will be installed.
- Mark and Drill: Locate rafter centers, mark positions with chalk, drill pilot holes.
- Install Hooks: Fasten with lag screws into rafters, ensure alignment and height adjustment.
- Replace and Seal Tiles: Reposition tiles, add EPDM pads or flashing to prevent leaks.
- Attach Rails: Align rails on hooks, secure with bolts, check level.
- Install Panels: Apply mid and end clamps, ensure torque matches specifications.
- Grounding and Cable Routing: Attach grounding clips and run cables neatly along rails.
- Final Inspection: Check alignment, waterproofing, and torque on all fasteners.
6.Common Mistakes to Avoid
- Over-tightening bolts, cracking tiles.
- Misaligned rails, causing panel gaps.
- Poor waterproofing around hooks.
- Using incompatible materials near coastlines.
- Incorrect hook spacing reducing structural integrity.
7.Consejos de mantenimiento
- Inspect system after heavy rain or snow.
- Tighten loose bolts or clamps.
- Replace damaged EPDM or flashing immediately.
- Keep tiles and rails free from debris.
9.Conclusión
Installing solar panels on a tile roof requires precision, the right components, and a systematic approach. With PV Mounts’ tile roof hooks, aluminum rails, clamps, and waterproof accessories, you can achieve a secure, long-lasting installation that meets professional standards.
Explore our full range of Solar Tile Roof Hooks or contact us at info@pv-mounts.com for personalized guidance and bulk pricing.

Preguntas frecuentes
Q1: Can solar panels be installed on clay tile roofs?
Yes, with proper hooks and flashing. PV Mounts’ hooks are designed to prevent tile damage.
Q2: What is the recommended hook spacing?
Generally 1.0–1.2 meters, depending on panel size and wind load.
Q3: Do tiles need to be removed?
Usually not. Tiles can be carefully lifted or cut to fit hooks.
Q4: How long do tile roof mounts last?
High-quality stainless steel mounts typically exceed 25 years with minimal maintenance.