
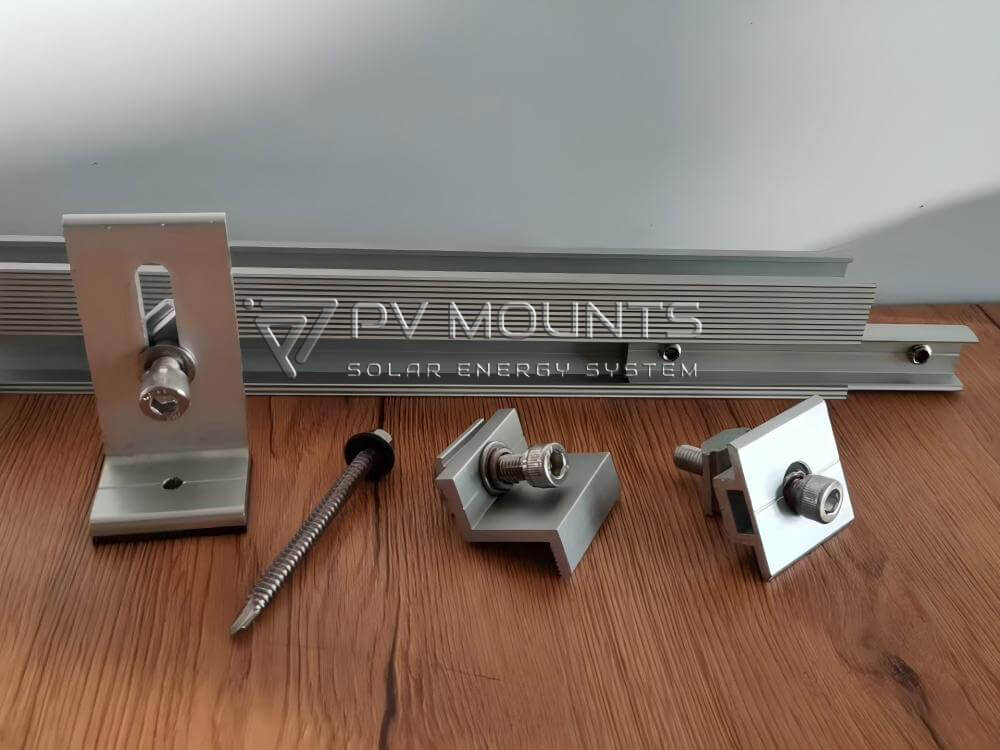
Quick Answer: What Makes a Solar Mounting System Compatible?
A solar mounting system is compatible when its roof attachments, rails, connectors, fastening components, clamps, and PV modules fit together correctly and perform their intended functions.
For EPC contractors, installers, and solar mounting distributors, solar mounting system compatibility should be checked at each mechanical interface—not simply by comparing product names or thread sizes.
A typical rooftop PV mounting system may include these connections:
Roof Structure → Roof Attachment → Solar Rail → Rail Fastening Interface → Mid/End Clamp → PV Module
A rail connector is added when two rail sections need to be joined. Depending on the mounting system, the fastening interface may use a sliding nut, channel nut, T-bolt, dedicated screw, or another design-specific solution.
The main compatibility checks include:
- Roof type, supporting structure, and attachment method
- Roof attachment and solar rail interface
- Solar rail and rail connector dimensions
- Rail channel and sliding nut geometry, where applicable
- Rail fastening method and mid/end clamp design
- Clamp dimensions and PV module frame geometry
- Fastener dimensions, thread specifications, and engagement
- Material selection and environmental exposure
Important: Component compatibility does not by itself confirm structural adequacy. Rail spans, attachment spacing, fastener capacity, roof structure, wind and snow loads, and applicable project requirements must be evaluated separately.
1. What Is Solar Mounting System Compatibility?
Solar mounting system compatibility refers to whether individual mounting components can be correctly assembled and work together in the intended application.
A rooftop PV installation may use components from several manufacturers. An EPC contractor might already have solar rails but need replacement sliding nuts, clamps, connectors, or roof attachments from another supplier.
In this situation, replacing the entire mounting system may not be necessary. The existing components can be retained if the relevant interfaces are verified and the proposed assembly meets the project requirements.
For example:
| Component interface | What needs to be checked |
|---|---|
| Roof structure → attachment | Supporting structure, fixing position, attachment design |
| Attachment → rail | Hole dimensions, fastener, rail connection geometry |
| Rail → connector | Rail profile, connector dimensions, fastening method |
| Rail → sliding nut | Channel dimensions, nut geometry, thread |
| Rail → clamp | Rail interface, fastening method, clamp dimensions |
| Clamp → PV module | Module frame height, geometry, clamping engagement |
The key principle is simple: matching one specification does not prove that the complete connection is compatible.
An M8 thread, for example, identifies a thread size. It does not guarantee that a sliding nut will fit a particular rail channel.
2. How Roof Type Affects Solar Mounting Compatibility
The roof and supporting structure determine which attachment methods may be suitable.
Different roof types require different mounting interfaces. The correct solution depends not only on the visible roof covering but also on the supporting structure, fixing location, and project design requirements.
| Tipul de acoperiș | Possible attachment | Key compatibility checks |
|---|---|---|
| Tile roof | Solar tile roof hook | Tile geometry, fixing position, supporting structure, rail interface |
| Trapezoidal metal roof | Metal roof hook, L-foot, or suitable mini rail | Sheet profile, fixing location, attachment geometry |
| Corrugated metal roof | Suitable L-foot or mini rail system | Roof profile, fixing location, fastener interface |
| Standing seam roof | Standing seam clamp | Seam geometry, clamp design, rail interface |
| Steel purlin structure | Suitable hanger bolt or attachment solution | Purlin design, fixing position, thread and fastener requirements |
| Timber structure | Suitable wood-fixing attachment | Timber structure, screw engagement, fixing position |
These are possible configurations, not universal recommendations. The appropriate attachment must be selected for the actual roof construction and project conditions.
For non-standard tile profiles, see our custom solar tile roof hook solutions.
3. How to Match Roof Attachments With Solar Rails
A roof attachment does not automatically fit every solar rail. Compatibility depends on the connection design of both components.
Common mounting configurations include:
- Roof hook → solar rail
- L-foot → solar rail
- Hanger bolt → L-foot or mounting plate → solar rail
- Standing seam clamp → solar rail
- Mini rail system → PV module, using the system’s specified fastening arrangement
Before combining an existing attachment with a different rail, check the following details.
Fastener interface
Confirm the bolt or screw diameter, thread specification, hole diameter, fastener length, and required engagement.
Where nuts or dedicated rail fasteners are used, confirm that they match the intended connection.
Rail interface
Check the rail channel, fastening surface, slot dimensions, and attachment geometry. Two rails that look similar may use different fastening interfaces.
Installation clearance
Confirm that there is sufficient clearance for rail placement, fastener installation, tool access, clamp installation, and the required distance from the roof surface.
Structural connection
The attachment must connect appropriately to the supporting roof structure. Correct fit between the attachment and rail does not establish that the roof fixing or complete assembly has sufficient load capacity.
If an existing attachment is being replaced, verify the complete connection rather than assuming that similar dimensions mean the products are interchangeable.
4. Solar Rail Compatibility: Profiles, Dimensions and Connections
Solar rail compatibility depends on the rail’s actual profile and connection design.
When sourcing accessories for an existing rail, a product description such as “aluminum solar rail” is not enough to establish compatibility.
Useful information includes:
- Rail cross-section drawing
- Overall rail dimensions
- Channel width and height
- Slot or fastening interface geometry
- Rail material and model
- Required connector or accessory
- Relevant fastener specifications
A cross-section drawing is particularly useful when evaluating sliding nuts and rail connectors because it shows the geometry that must match.
If the original rail supplier is unavailable, a technical drawing, CAD file, clear photographs, or physical sample can help the new supplier assess the interface.
However, dimensional matching should be followed by appropriate assembly and engineering checks. A component that fits physically is not automatically suitable for the intended loads or service conditions.
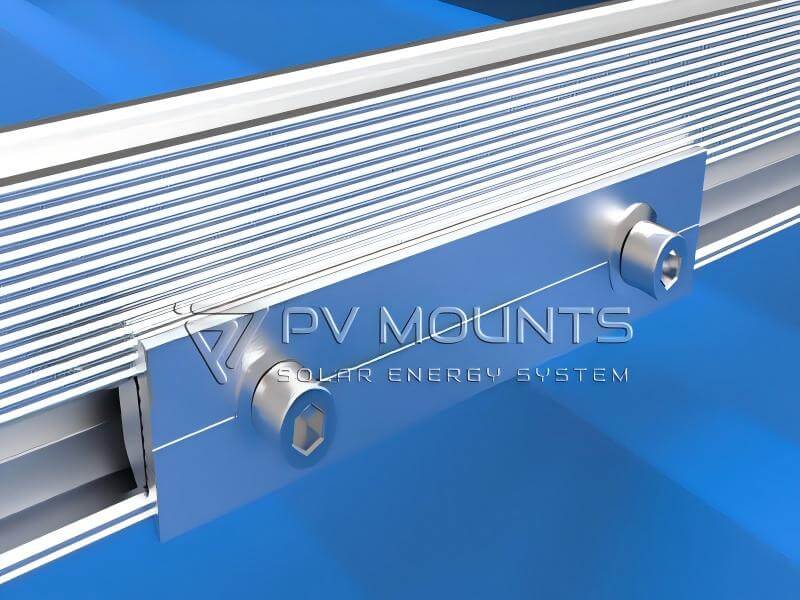
5. Solar Rail Connector Compatibility
A solar rail connector, also called a rail splice, joins two rail sections into a longer rail assembly.
A typical arrangement is:
Rail Section A → Rail Connector → Rail Section B
A rail connector is only required when the installation needs to join separate rail sections. It is not a mandatory component in every rooftop mounting system.
What should you check before selecting a rail connector?
Confirm:
- Rail profile: The connector must match the actual rail design.
- Connector dimensions: Check the relevant width, height, length, and connection geometry.
- Insertion depth: Confirm the required engagement inside or against the rail sections.
- Fastening method: Depending on the design, the connector may use set screws, bolts and nuts, or another dedicated fastening method.
- Installation position: Confirm the connector can be installed in the intended location and sequence.
Do not select a connector only because it looks similar to the original or is marketed for solar mounting rails.
For more detail, see our solar rail connector and rail splice guide.
Engineering note: A rail splice joins rail sections, but it should not automatically be treated as a fully continuous structural connection. The connector’s capacity, installation requirements, and position relative to rail supports must be considered in the system design.
6. Solar Rail Sliding Nut Compatibility
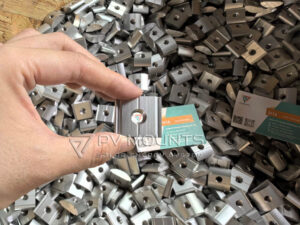
A solar rail sliding nut provides a threaded fastening interface inside a compatible rail channel.
Where this fastening arrangement is used, a typical connection is:
Solar Rail → Sliding Nut → Bolt → Mounting Component
Depending on the system, sliding nuts may be used with roof attachments, clamps, or other rail-mounted accessories.
Does an M8 thread mean the sliding nut is universal?
Nu. M8 identifies the thread specification, not the complete geometry of the sliding nut.
Compatibility also depends on:
- Rail channel width
- Channel height
- Nut width and thickness
- Nut shape and insertion method
- Thread position
- Rail profile
- Required installation clearance
A sliding nut with the correct M8 thread may still fail to fit the rail channel or may not engage correctly.
When ordering replacement sliding nuts, provide the rail profile or channel dimensions instead of specifying only “M8 sliding nut.”
If the dimensions are non-standard, a custom sliding nut may be worth evaluating. The final part should be checked for fit, fastening requirements, and suitability for the intended application.
7. Solar Rail and Mid/End Clamp Compatibility
Mid clamps and end clamps secure PV modules to the mounting rail system. Their compatibility depends on both the module frame and the rail fastening interface.
Mid clamp
A mid clamp secures the adjacent edges of two PV modules in a row.
A typical connection is:
PV Module Frames → Mid Clamp → Fastening Component → Rail Interface
End clamp
An end clamp secures the outer edge of a PV module row.
A typical connection is:
PV Module Frame → End Clamp → Fastening Component → Rail Interface
The exact fastening arrangement varies by mounting system. Some designs use sliding nuts, channel nuts, T-bolts, or other dedicated fasteners.
Before ordering clamps, confirm:
- PV module frame height
- Module frame geometry
- Clamp dimensions and engagement
- Rail profile and fastening interface
- Fastener length and specification
- Installation clearance
- Manufacturer’s installation requirements
A clamp that fits the rail may still be unsuitable for the module frame. Both sides of the connection must be checked.
8. Material Compatibility for Rooftop Solar Mounting Components
Solar mounting hardware compatibility is not only about dimensions. Materials must also be appropriate for the component’s function and operating environment.
Common materials include:
- AL6005-T5 aluminum for selected rails and mounting components
- SUS304 stainless steel for selected rooftop accessories and fasteners
- SUS410 stainless steel for selected fastening applications
- EPDM for sealing and cushioning applications
- ABS engineering plastic for selected mounting accessories
For example, an aluminum rail may be used with stainless steel fasteners or accessories. Whether the combination is appropriate depends on the specific materials, component design, environment, and project requirements.
When dissimilar metals are in contact outdoors, potential galvanic corrosion should be evaluated according to the material combination and exposure conditions. This deserves particular attention in coastal or otherwise aggressive environments.
Material compatibility should be considered alongside mechanical requirements, corrosion protection, installation details, and the required service life.
9. Can Components From Different Solar Mounting Manufacturers Be Used Together?
Yes, components from different manufacturers may be used together when their interfaces are compatible and the complete assembly meets the project’s engineering requirements.
Consider an EPC contractor that already has an aluminum solar rail but needs additional:
- Rail sliding nuts
- Mid clamps and end clamps
- Rail connectors
- Roof attachments
- Stainless steel mounting accessories
The EPC may not need to replace the existing rail. Instead, the supplier can evaluate whether the required accessories match the actual rail profile and connection design.
This approach can help reduce unnecessary replacement and simplify procurement.
However, there is an important distinction:
Physical compatibility is not the same as verified structural suitability.
Before adopting components from multiple suppliers, confirm the interfaces and applicable installation requirements. Separately verify load capacity, rail spans, attachment spacing, fastener capacity, roof structure, and other relevant engineering conditions.
10. Common Solar Mounting Compatibility Problems
Problem 1: The thread matches, but the sliding nut does not fit
Two components may both use M8 threads but have different external dimensions.
Solution: Check the rail channel and complete nut geometry, not only the thread size.
Problem 2: The rail connector does not match the rail profile
A connector designed for one rail may not fit another rail, even if both are intended for rooftop PV installations.
Solution: Compare the rail cross-section, connector dimensions, insertion depth, and fastening method.
Problem 3: The clamp fits the rail but not the module frame
The clamp may have the wrong dimensions or may not provide the intended engagement with the PV module frame.
Solution: Confirm module frame height and geometry alongside the rail fastening interface.
Problem 4: The roof attachment does not match the supporting structure
A roof attachment may appear suitable for the roof covering but fail to align with the actual fixing position or structural requirements.
Solution: Check the roof structure, fixing position, attachment design, and project engineering requirements.
Problem 5: Components from different suppliers use different fastening systems
Similar-looking products may have different interfaces or installation requirements.
Solution: Verify each relevant connection and obtain technical documentation where necessary.
Problem 6: The order specification is too general
Descriptions such as “solar rail,” “M8 sliding nut,” “end clamp,” or “rail connector” do not define every dimension needed for compatibility.
Solution: Provide product drawings, rail profiles, dimensions, photos, CAD files, or samples when the interface is uncertain.
11. Solar Mounting System Compatibility Checklist for EPC Procurement
Use the following checklist before ordering mounting accessories for a new or existing rooftop PV system.
| Interface | Information to verify |
|---|---|
| Roof → Attachment | Roof type, supporting structure, fixing position, attachment design |
| Attachment → Rail | Hole dimensions, fastener specification, rail interface, clearance |
| Rail → Connector | Rail profile, connector geometry, insertion depth, fastening method |
| Rail → Sliding Nut | Channel width and height, nut geometry, thread specification |
| Rail → Clamp | Rail profile, fastening interface, clamp dimensions |
| Clamp → PV Module | Frame height, frame geometry, clamping engagement |
| Fasteners → Components | Thread, length, engagement, installation requirements |
| Materials → Environment | Material combination, corrosion exposure, project requirements |
| Complete Assembly → Structure | Rail spans, attachment spacing, load capacity, roof structure, applicable design criteria |
This checklist supports procurement and interface verification. It does not replace structural calculations, product installation instructions, or project-specific engineering approval.
12. How to Check Compatibility Before Ordering
A practical solar mounting compatibility review can be completed in five steps.
Step 1: Identify the existing components
Determine which components are already selected or installed:
- Solar rails
- Roof attachments
- PV modules
- Cleme
- Rail connectors
- Fasteners
This helps identify whether the project needs a complete system or only selected accessories.
Step 2: Identify the exact interface
Specify which components need to connect.
Examples:
- Existing rail + sliding nut
- Existing rail + clamp
- Existing rail + rail connector
- Roof hook + rail
- L-foot + rail
Step 3: Collect technical information
Provide the relevant dimensions, drawings, rail cross-section, CAD files, product photos, installation photos, thread specifications, or physical samples.
For sliding nuts and rail connectors, the rail cross-section is especially useful.
Step 4: Verify the complete connection
Check both sides of the interface and the fastening method. For example, clamp compatibility requires checking the clamp, fastening component, rail interface, and module frame—not just one dimension.
Step 5: Evaluate a sample when necessary
For non-standard components or mixed-supplier applications, sample evaluation can help confirm physical fit, fastener engagement, installation sequence, tool access, and component clearance.
Sample fit checks do not replace load testing or structural verification where these are required.
13. What Information Should You Send a Solar Mounting Manufacturer?
The most useful information is the information that describes the actual connection.
| Requirement | Useful information to provide |
|---|---|
| Existing solar rail | Cross-section, dimensions, drawing, CAD file, model number, photos |
| Sliding nut | Rail profile, channel dimensions, thread requirement, existing sample |
| Rail connector | Rail profile, connector dimensions, required connection arrangement |
| Mid/end clamps | PV module frame dimensions, rail profile, fastening requirements |
| Roof attachment | Roof type, supporting structure, fixing position, existing rail interface |
| Custom tile roof hook | Tile dimensions, photos, drawings, CAD file or physical sample |
| General compatibility review | Component models, relevant dimensions, assembly photos, intended application |
The more accurate the information, the easier it is to assess whether a component can be used with the existing mounting system.
If a dimension is unknown, provide clear photographs and a physical sample where practical. The supplier can then determine which additional measurements are needed.
14. When Is a Custom Solar Mounting Component Necessary?
A custom component may be appropriate when:
- The existing rail uses a non-standard profile.
- A compatible sliding nut is not available as a standard item.
- The original rail connector is difficult to source.
- A roof hook must fit a non-standard roof tile.
- An EPC needs accessories for an existing rail system.
- Standard components do not provide the required installation clearance.
- The project requires OEM branding or a specific component configuration.
Customization does not always require redesigning the complete mounting system. In some cases, only one interface component needs to be adapted.
Examples include:
Existing Rail + Compatible Custom Sliding Nut
Existing Rail + Rail Connector Designed for the Actual Profile
Non-Standard Roof Tile + Customized Solar Tile Roof Hook
For roof hook customization, the roof tile geometry and supporting structure are key considerations. The required rail interface should also be specified, but a customer’s existing rail does not automatically mean the roof hook itself must be redesigned around a different rail.
See our custom solar tile roof hook guide for details on evaluating non-standard tile requirements.
15. How Suporturi PV Supports Solar Mounting Compatibility
PV Mounts supplies rooftop solar mounting components and supports compatibility evaluation for EPC contractors, installers, distributors, and importers.
Typical requirements include:
- Solar roof hooks and customized tile roof hooks
- Metal roof hooks and selected rooftop attachments
- Solar L-feet and hanger bolts
- Solar rails and rail connectors
- Rail sliding nuts
- Mid clamps and end clamps
- SUS304 stainless steel mounting accessories
- Selected EPDM-based mounting components
If you already use a rail or mounting system from another supplier, you may not need to replace the entire system. PV Mounts can review the available technical information to assess whether selected accessories may match your existing components.
For an initial compatibility review, send the rail profile, relevant dimensions, drawings, CAD files, photos, or samples.
The assessment will focus on the actual component interfaces and intended application. Structural suitability must be evaluated separately according to project requirements.
For broader product and sourcing information, visit our roof solar mounting system manufacturer page. For roof attachment sourcing, see our solar roof hook manufacturer page.
16. Solar Mounting System Compatibility: Key Takeaways
For EPC contractors and solar mounting distributors, the most important rules are:
- Start with the roof type and supporting structure.
- Match the roof attachment to the rail’s actual connection design.
- Check rail connectors against the real rail profile.
- Verify sliding nut geometry, not just thread size.
- Match mid and end clamps to both the rail interface and PV module frame.
- Consider material combinations and environmental exposure.
- Verify components from different suppliers before ordering.
- Provide drawings, dimensions, CAD files, photos, or samples when specifications are uncertain.
- Evaluate custom components when standard accessories do not fit the existing system.
- Treat component compatibility and structural adequacy as separate engineering checks.
A reliable solar mounting system is not simply a collection of individual products. It is a set of compatible mechanical interfaces designed to work together in the intended application.
Frequently Asked Questions
Yes, provided their mechanical, dimensional, fastening, and material interfaces are compatible. The complete assembly must also meet the project’s engineering and installation requirements.
No. M8 identifies the thread size, not the sliding nut’s complete external geometry. The nut must also match the rail channel and fastening arrangement.
In many cases, yes. The required accessories must be checked against the existing rail profile, fastening interface, and intended application. Structural suitability must be evaluated separately.
Check the rail fastening method, rail interface, clamp dimensions, and installation clearance. Also confirm that the clamp is suitable for the PV module frame.
Confirm the module frame height and geometry, then check the clamp dimensions, engagement, and rail fastening interface.
Provide the rail cross-section and dimensions. The connector should match the rail profile, connection geometry, insertion depth, and fastening method.
Provide the existing component model, relevant dimensions, rail cross-section, drawings, CAD files, photos, or physical samples. For module clamps, include the PV module frame dimensions.
Depending on the rail profile, technical requirements, and manufacturing feasibility, a custom sliding nut may be possible. The rail cross-section and required thread specification should be provided for evaluation.
Yes. A custom roof hook can be evaluated using roof tile dimensions, photographs, drawings, CAD files, or samples, together with the supporting structure and required rail interface.
No. Compatibility confirms that components can interface correctly. Structural suitability requires separate evaluation of rail spans, attachment spacing, fastener capacity, roof structure, wind and snow loads, and applicable project requirements.
Need Help Matching Solar Mounting Components?
Already have a solar rail or rooftop mounting system and need compatible accessories?
Send PV Mounts your existing component information so we can review the relevant interface and determine what additional details are required.
Useful information includes:
- Rail cross-section or drawing
- Component dimensions
- Required accessory and thread specification
- Photos, CAD files, or samples
- Intended application and project requirements
PV Mounts supports rooftop solar mounting components, customized solar tile roof hooks, SUS304 stainless steel mounting accessories, rails, clamps, sliding nuts, connectors, L-feet, and hanger bolts for EPC contractors, installers, distributors, and importers.
Need Compatible Solar Mounting Accessories?
Send us your existing rail profile, component drawing, dimensions, or sample for an initial compatibility review.

 Romanian
  English
  Spanish
  Portuguese
  Russian
  Hungarian
  Arabic
  French