1. Introduction
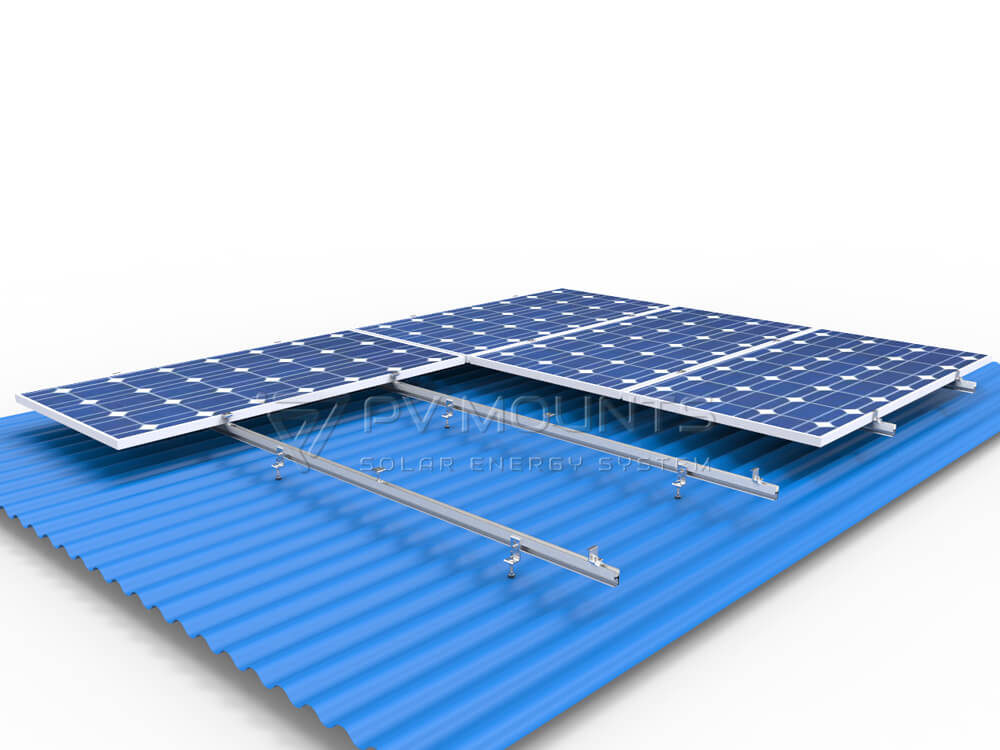
Installing solar panels on metal roofs is a highly efficient solution for residential and commercial projects. A proper metal roof solar mounting system ensures structural integrity, reduces installation time, and maximizes panel longevity. At Suporturi PV, we specialize in solar roof mounting attachments, including L feet, mini rails, standing seam clamps, adjustable tilt kits, and rails, helping installers achieve professional-grade installations.

2. Why Metal Roof Solar Installations Require Specialized Hardware
Metal roofs differ from other roof types in several ways:
- Durabilitate: Metal sheets can support mounted solar panels, but improper clamps can deform panels or roof sheets.
- Variations in Roof Profiles: Standing seam, trapezoidal, and corrugated metal roofs each require specialized clamps and rails.
- Thermal Expansion: Metal expands and contracts with temperature, requiring hardware that accommodates movement.
- Non-penetration requirements: Especially for standing seam roofs, avoiding roof penetration prevents leaks.
Suggested image: Comparison of standing seam vs corrugated metal roof mounting


3. Overview of Metal Roof Types
Different metal roof types demand tailored mounting solutions:
| Tip acoperiș | Recommended Attachment | Notes |
|---|---|---|
| Standing Seam | Clemă pentru cusătură permanentă | No roof penetration; compatible with PV rails |
| Corrugated Metal | L Feet or Mini Rails | Use self-drilling screws; ensure proper EPDM or gasket if needed |
| Trapezoidal | L Feet or Mini Rails | Pre-drilled anchor points for strong connection |
| Custom Profiles | Adjustable Tilt Kit | Accommodates module orientation and pitch |
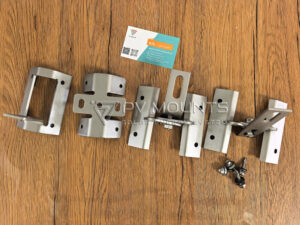
4. Essential Mounting Accessories for Metal Roofs
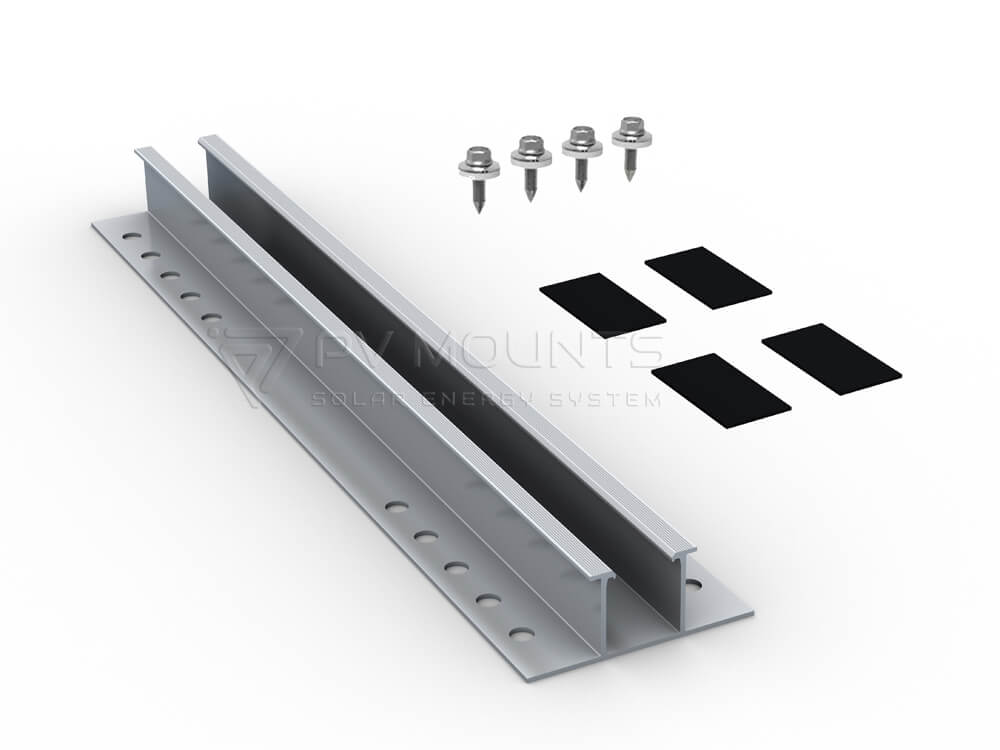
Proper solar mounting hardware is key to reliable installation:
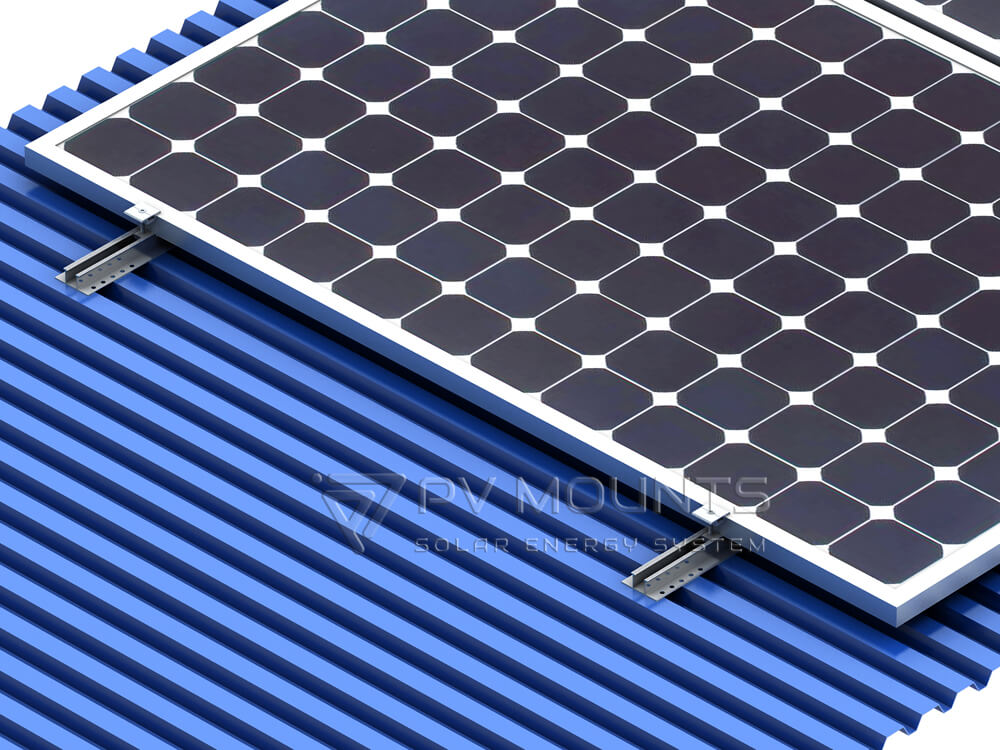
- L Feet: Attach rails to roof, adjust height for airflow
- Mini Rails: Support modules in flexible layouts
- Standing Seam Clamps: Secure modules without drilling, preserving roof integrity
- Adjustable Tilt Kits: Optimize solar angle for seasonal performance
- Rails and Fasteners: High-strength aluminum rails and stainless steel hardware for longevity
Suggested image: Collection of L feet, mini rails, clamps, and adjustable tilt kits


5. Step-by-Step Installation Guide
5.1 Preparing the Roof Surface
- Inspect roof for damage or rust
- Clean surface for proper adhesion
- Measure rafter and seam spacing
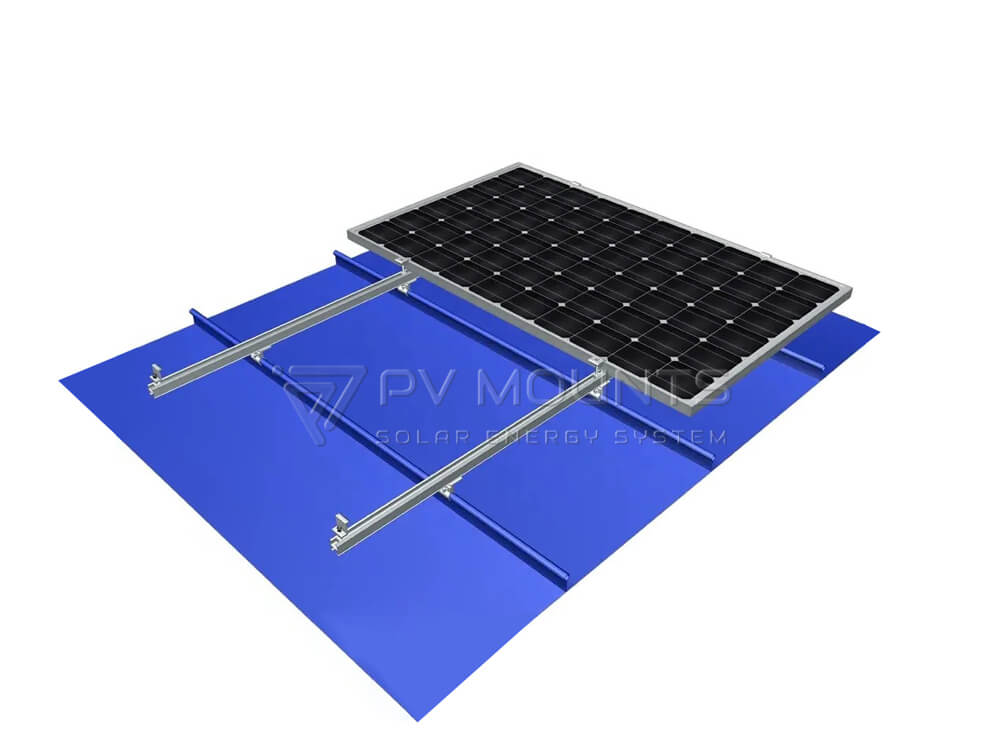
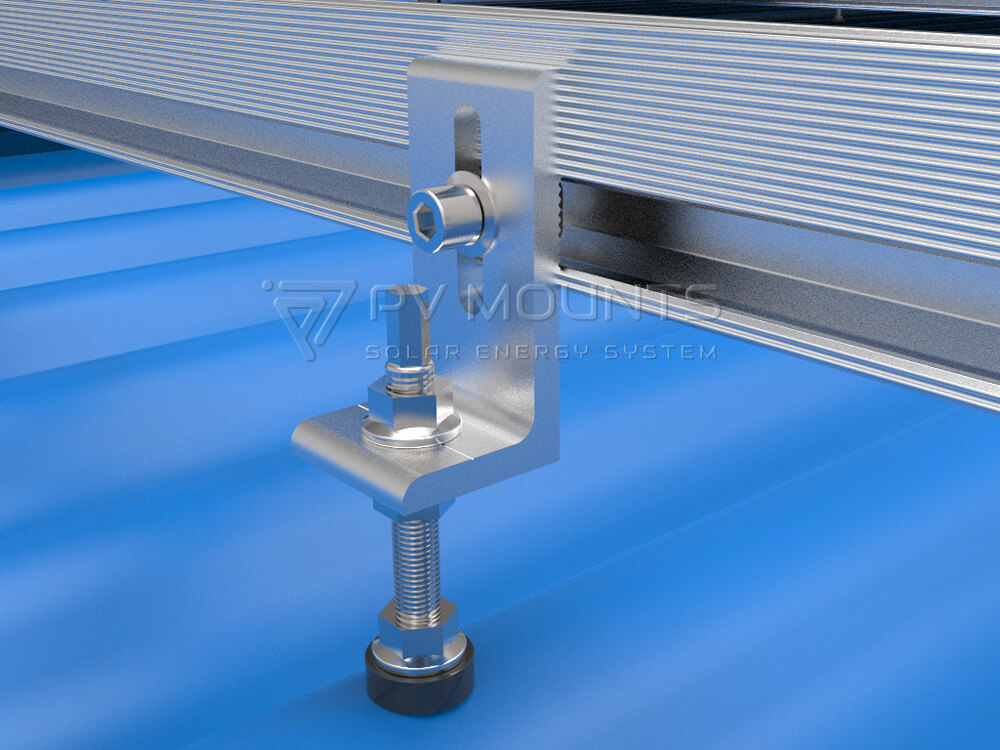
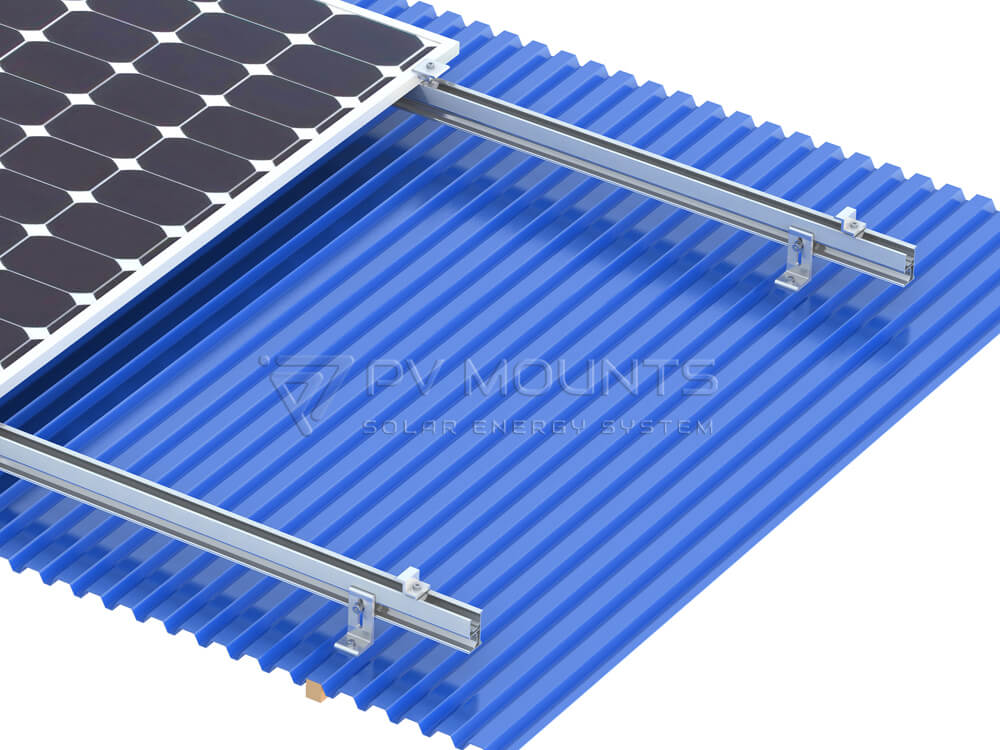
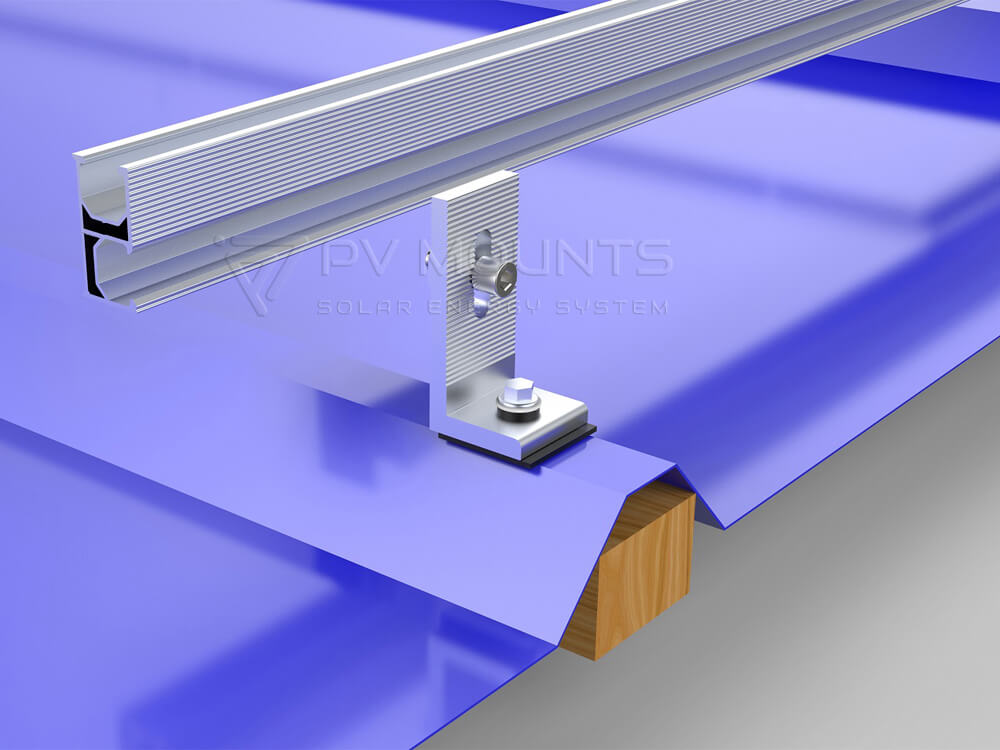
5.2 Installing L Feet and Rails
- Position L feet on pre-drilled anchors
- Use stainless steel bolts, torqued to specification
- Attach rails ensuring alignment and level
Suggested image: L feet and rail installation diagram
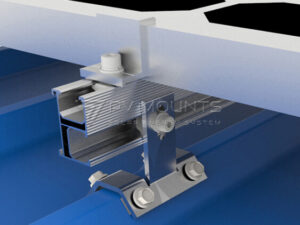
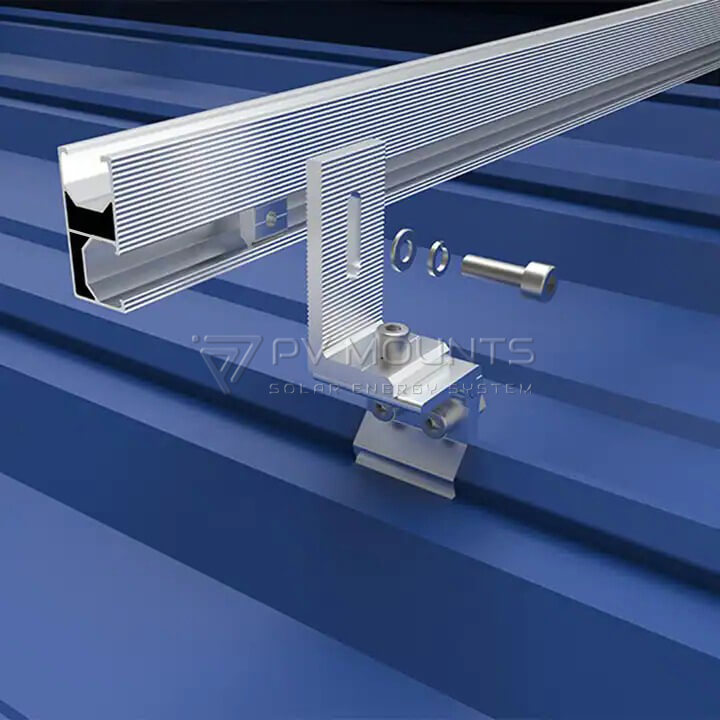
5.3 Standing Seam Clamp Installation
Slide clamp over seam
- Tighten with torque wrench
- Attach rail to clamp
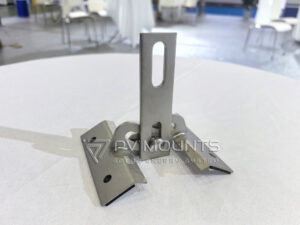
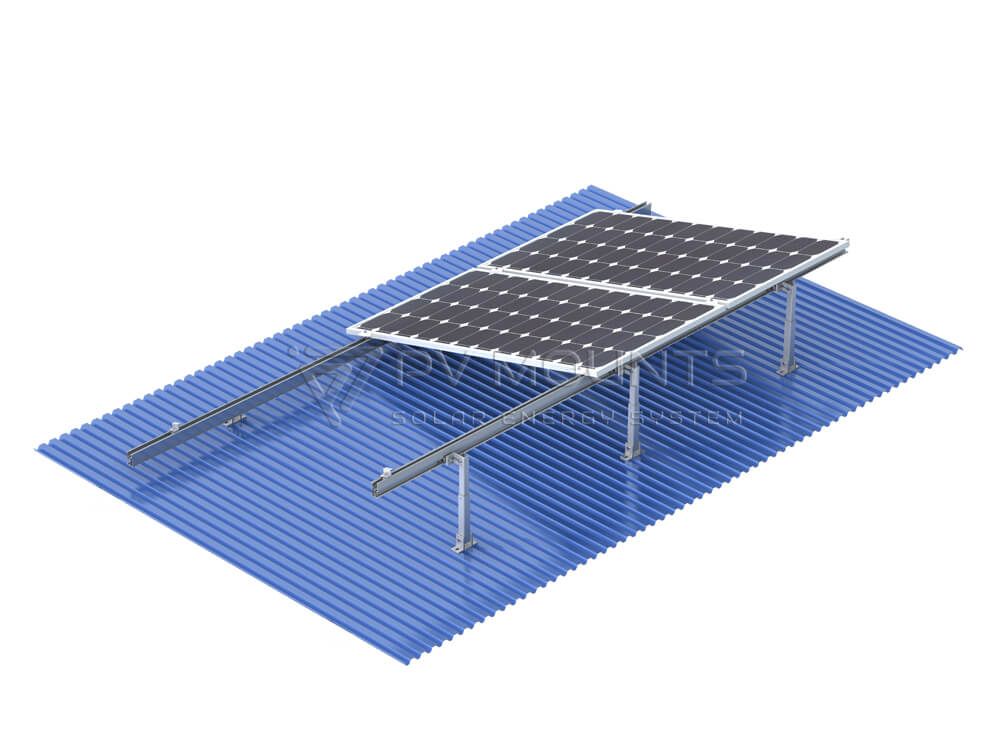
5.4 Adjustable Tilt Kit Installation
- Mount adjustable tilt kit where roof pitch is suboptimal
- Secure rails on tilt brackets
- Adjust angle for maximum solar irradiance
Suggested image: Adjustable tilt kit installation
5.5 Securing Solar Panels
- Attach solar modules with mid and end clamps
- Verify torque specification
- Ensure uniform spacing and flush alignment
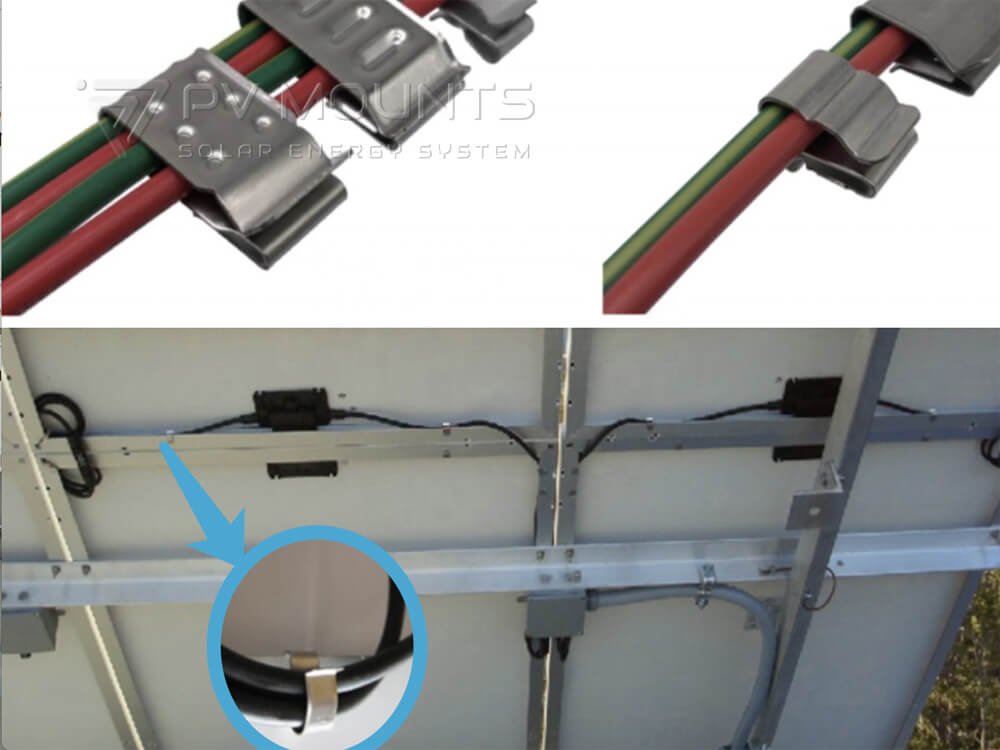
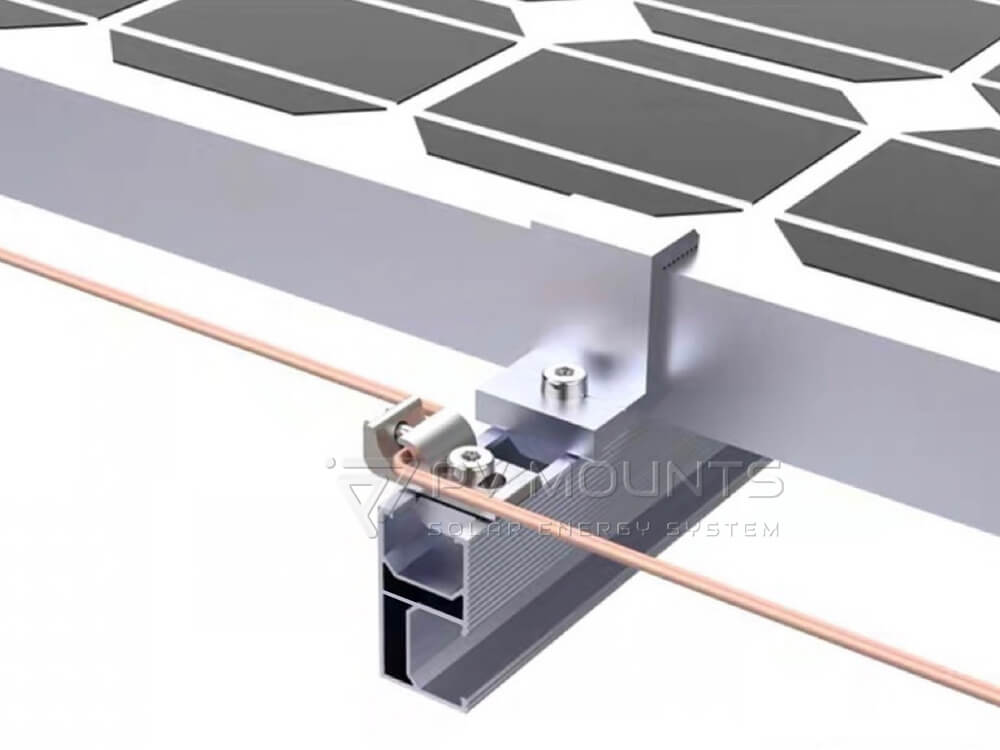
5.6 Cable Management and Grounding
- Use UV-resistant cable ties
- Route cables along rails or clips
- Attach grounding lugs to rail and module frame
Suggested image: Cable routing and grounding detail
6. Common Mistakes to Avoid
- Over-tightening clamps causing panel or roof damage
- Misalignment of rails leading to stress on modules
- Using non-compatible hardware for roof profile
- Neglecting grounding or cable management
7. Maintenance Tips for Long-Term Performance
- Inspect clamps and rails annually
- Clean debris around panels
- Check torque after extreme weather events
- Replace rusted or damaged hardware promptly
8. Choosing the Right Solar Roof Mounting System Manufacturer
- Evaluate experience in metal roof systems
- Look for full hardware range: L feet, mini rails, clamps, adjustable tilt kits
- Check for OEM/ODM customization
- Verify material certifications: SUS304, aluminum alloys
- Suporturi PV provides tailored solutions for global solar project installers
9. Cost and ROI Considerations
- Proper attachment selection reduces installation time
- High-quality clamps reduce maintenance costs
- ROI improves with durable, non-penetrating solutions
- Adjustable tilt kits increase energy yield
10. Frequently Asked Questions (FAQs)
Q1. Can I install solar panels on any metal roof?
Yes, as long as the roof profile and material are compatible with the correct attachment.
Q2. Are standing seam clamps really non-penetrating?
Yes, they attach directly to the seam without drilling, preserving roof waterproofing.
Q3. What is the difference between L feet and mini rails?
L feet support standard rails; mini rails are for smaller panels or flexible configurations.
Q4. Do adjustable tilt kits improve energy yield?
Yes, they allow seasonal angle adjustments, optimizing irradiance collection.
Q5. How do I maintain a metal roof PV system?
Regular inspection, cleaning, torque check, and replacing damaged hardware.
Q6. Can PV Mounts customize hardware for my project?
Absolutely, we provide OEM/ODM solutions for unique roof profiles and solar layouts.
11. Conclusion
At Suporturi PV, we deliver a complete range of metal roof solar mounting attachments, including L feet, mini rails, standing seam clamps, adjustable tilt kits, and rails. Our products are designed for faster installation, structural reliability, and long-term performance.
👉 Contact PV Mounts today for samples, drawings, or bulk orders. Our engineering team will help you select the ideal configuration for your project.
12. Internal & External Link Suggestions
Internal Links:
External Links:
- UL 2703 Certification: https://standardscatalog.ul.com/standards/en/standard_2703
- IBC 2024 Structural Standards: https://codes.iccsafe.org/codes/ibc
- AS/NZS 1170 Wind Load Standards: https://www.standards.org.au