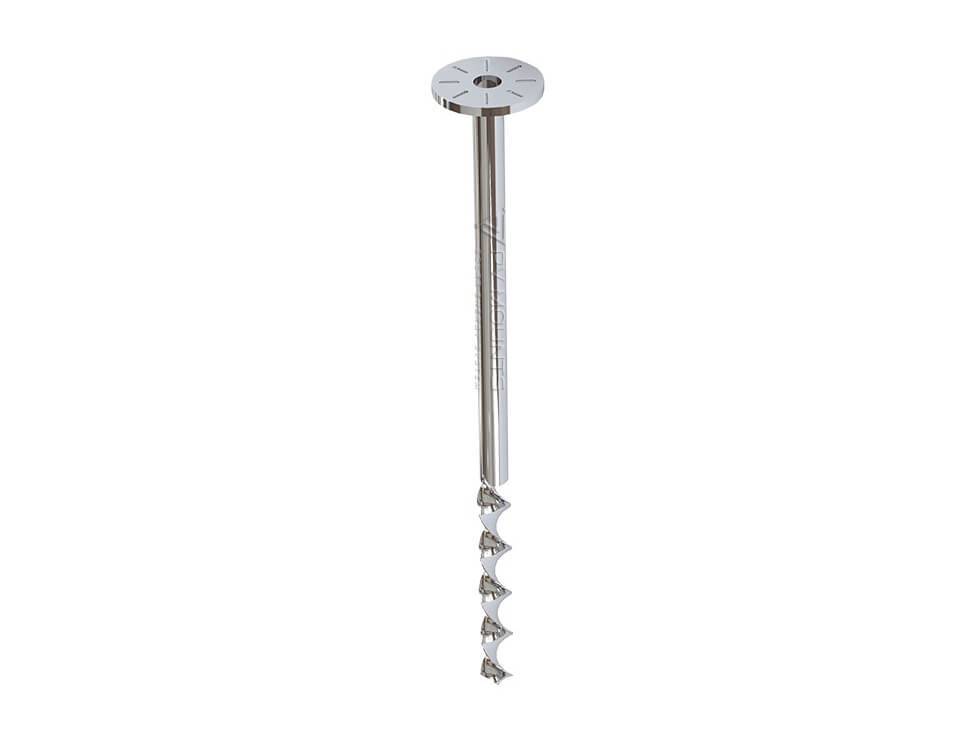
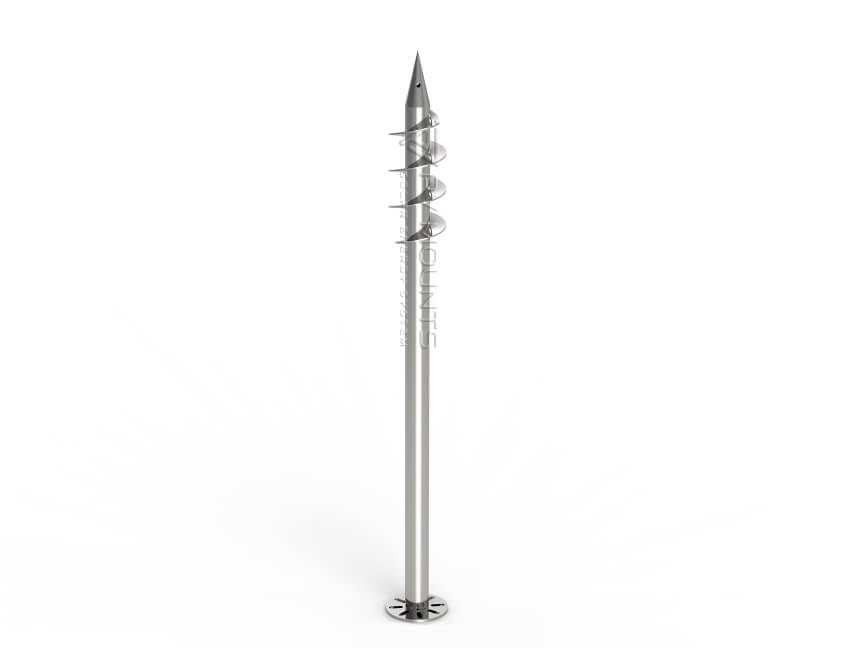
Caracteristici principale:
- Superior Durability & Corrosion Resistance: The Ribbon Helical Ground Screws are manufactured from high-quality steel and are coated to resist corrosion. This ensures a long-lasting, maintenance-free foundation, even in harsh environments, such as coastal or humid areas.
- Easy & Quick Installation: Designed for efficiency, these ground screws can be installed quickly using standard machinery. Their helical blades allow for easy penetration into the ground, reducing installation time and labor costs significantly compared to traditional concrete footings.
- Minimal Ground Disturbance: The installation process involves minimal disruption to the surrounding environment. There’s no need for large-scale excavation or concrete pouring, making this a more sustainable and eco-friendly solution for solar projects.
- Customization for Different Soil Conditions: The spiral blade design and length of the ground screw can be tailored to meet the specific needs of your project. Whether you are installing solar systems on rocky, sandy, or clay soils, these screws offer versatile performance. Additionally, the ground screws can be matched with flange plates or customized to ensure the best fit for your mounting solution.
- Flexible Length Options: Available in standard lengths of 1000mm, 1200mm, 1400mm, 1500mm, and 1600mm, the Ribbon Helical Ground Screws can also be customized to accommodate specific depth requirements or unique site conditions.
- Cost-Effective Foundation Solution: Ribbon Helical Ground Screws provide a more economical foundation option for solar mounting, with faster installation times and reduced material costs compared to traditional methods. The long-term stability and minimal maintenance needs further enhance the overall cost-effectiveness.
Why Choose Ribbon Helical Ground Screws:
- Faster Installation: Save time and reduce project costs with an installation process that requires minimal equipment and labor.
- Stabilitate sporită: The helical design ensures a firm grip in the ground, providing a stable foundation for solar panels, even in difficult soil conditions.
- Environmentally Friendly: With minimal soil disturbance and no need for concrete, these ground screws are an eco-conscious choice for sustainable solar energy projects.
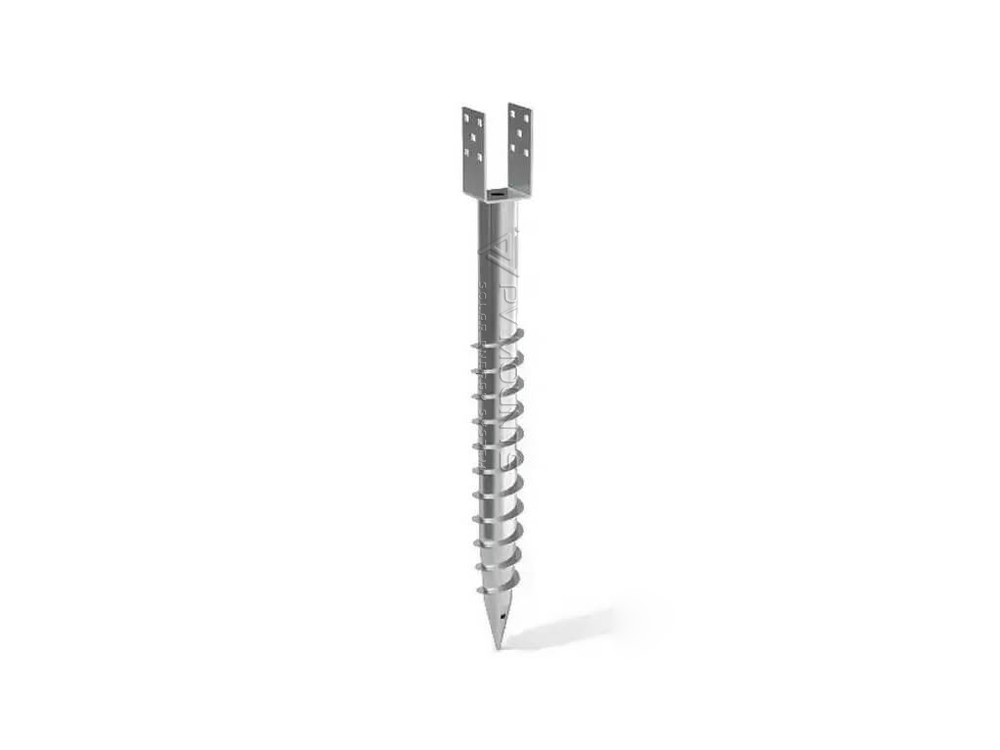
Construction & Customized Design
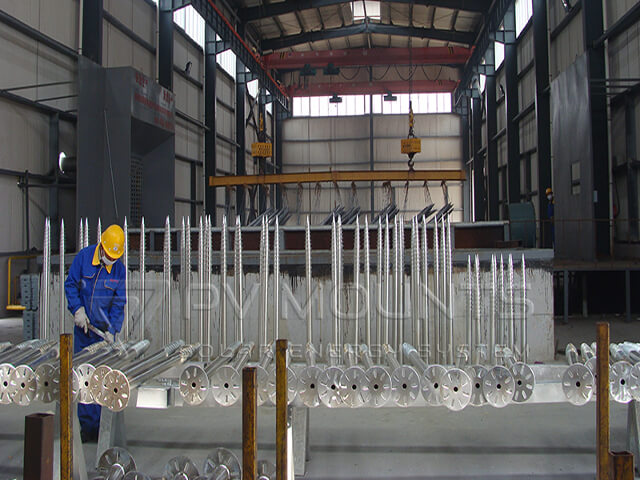
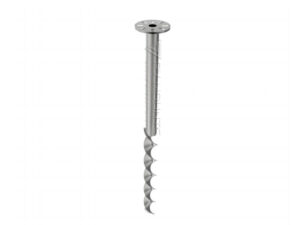
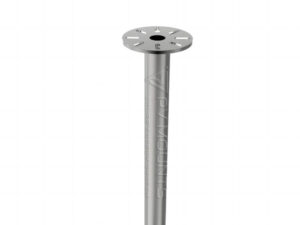
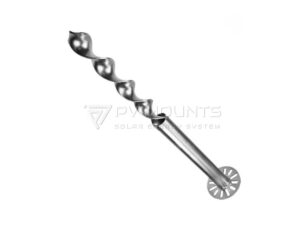
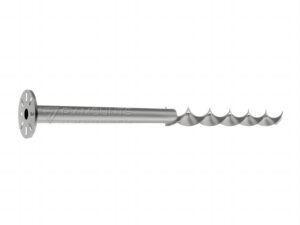
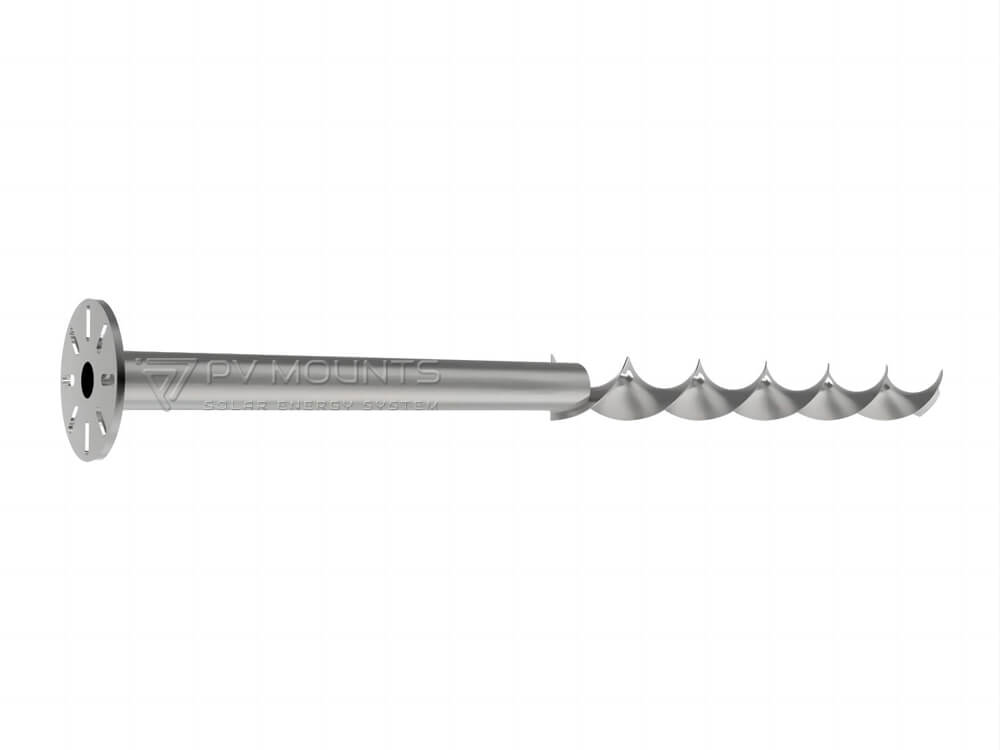
Ground screws are constructed using advanced forging technology, ensuring a smooth, burr-free surface. The spiral ground pile consists of a galvanized steel pipe with welded blades, which increases bearing capacity based on terrain conditions. Blade variations, such as single-blade, double-blade, and multi-blade designs, allow customization for different soil types and load-bearing requirements.
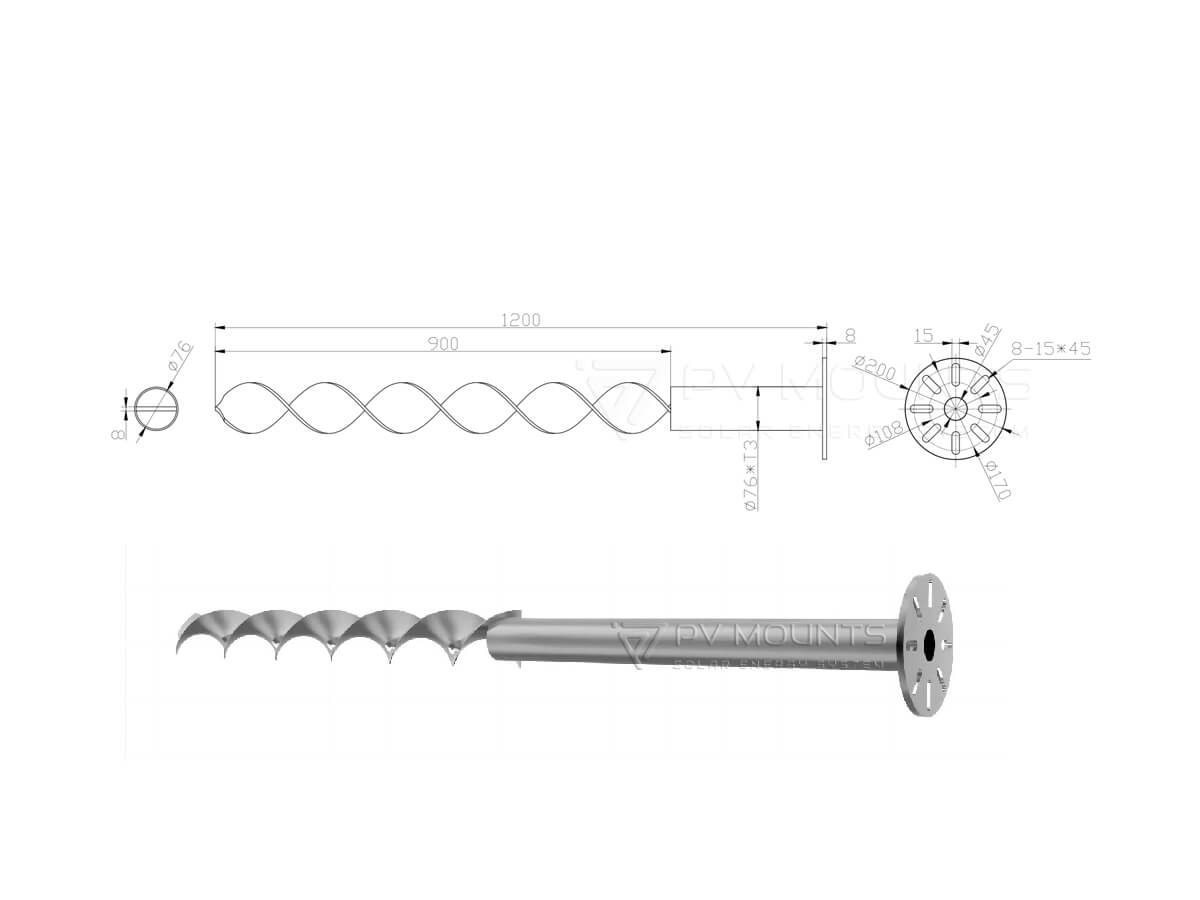
| Parametru tehnic |
| Material: | Carbon Steel Q235B |
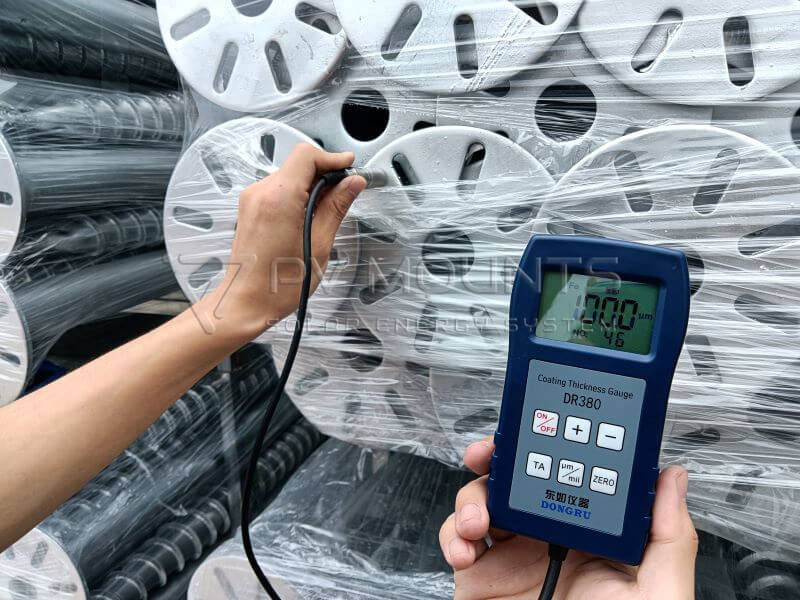
| Suprafață: | Hot-dip Galvanized according to DIN EN ISO1461 |
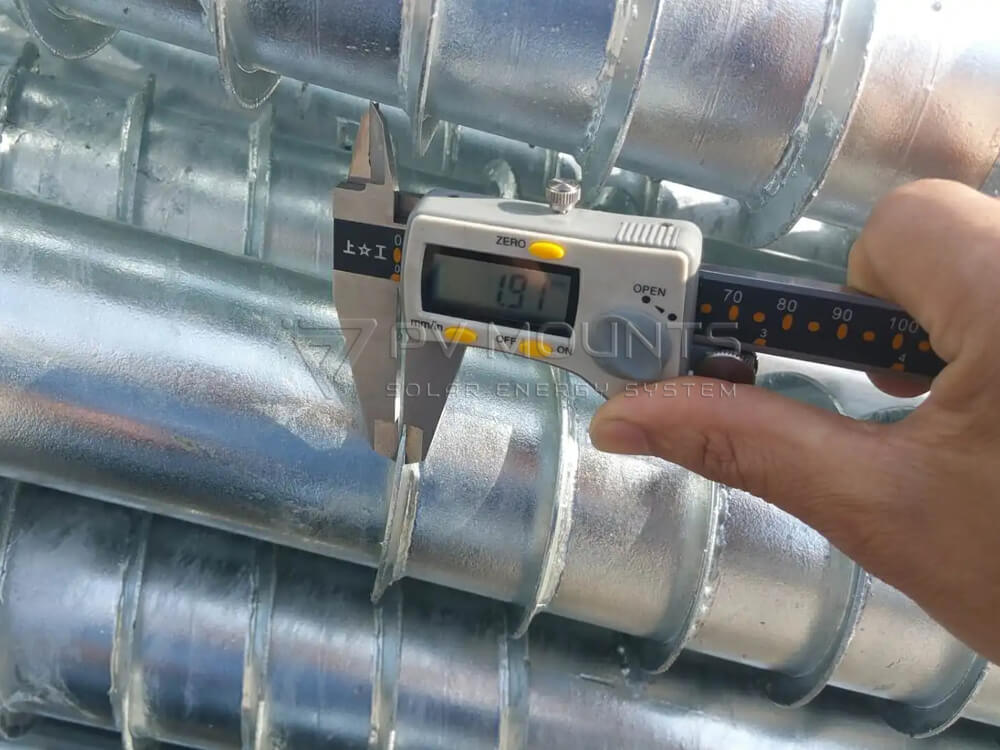
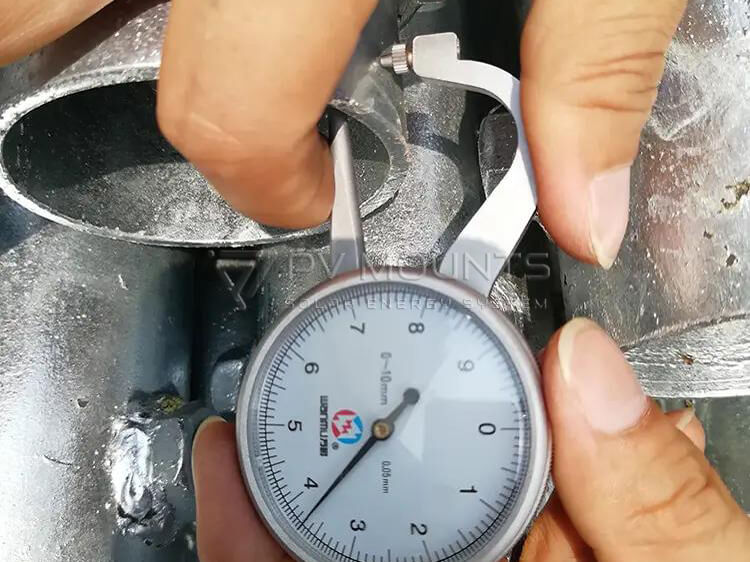
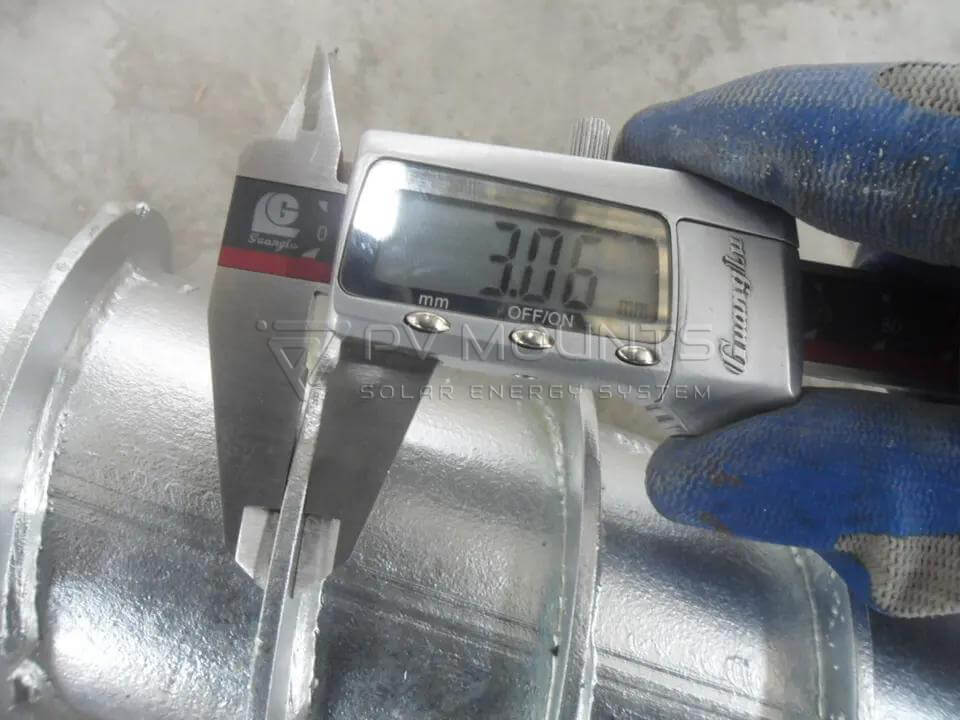
| Thickness of galvanized | ≥ 80μm |
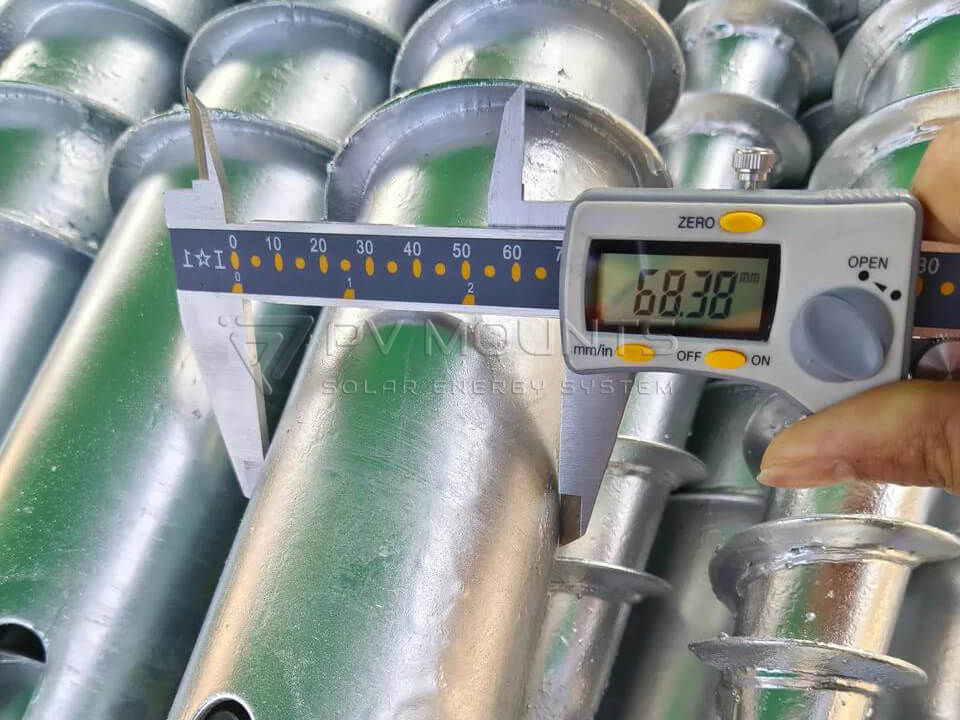
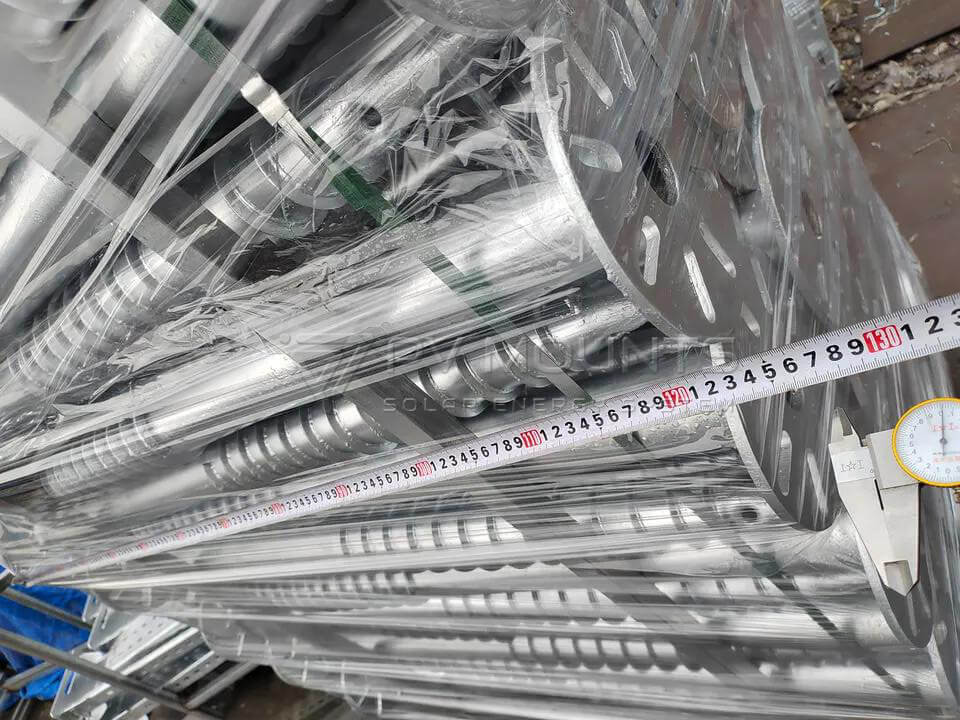
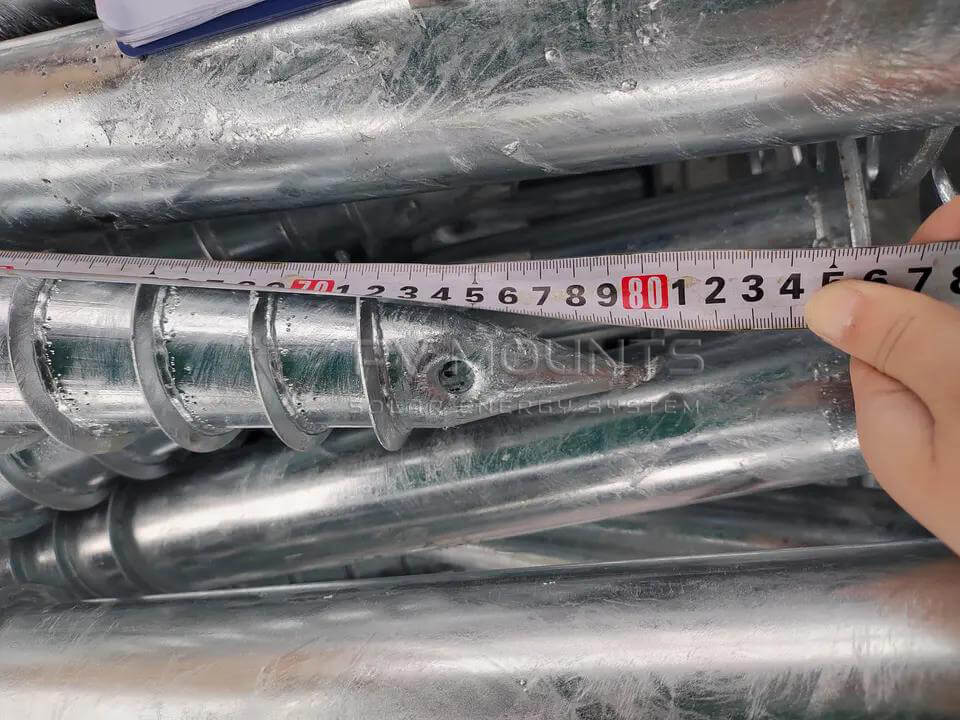
| Outer Diameter | φ76mm (optional:48mm,60mm,68mm,76mm,89mm,102mm,114mm,121mm,219mm etc.) |
| Length | Usual type: 1600 /1800 /2000mm (600~3500mm) |
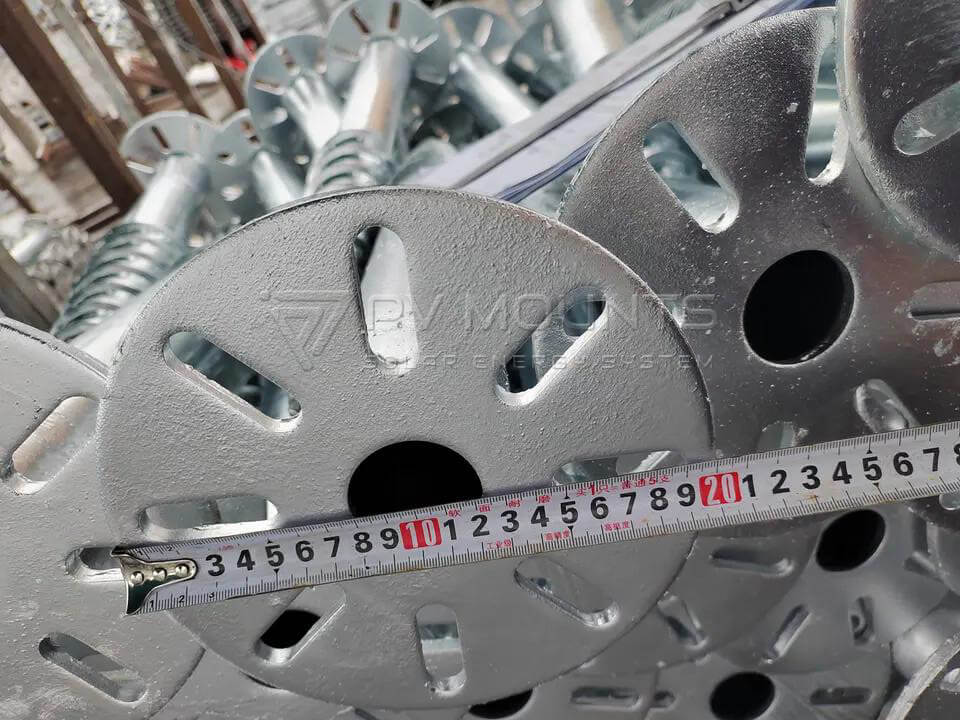
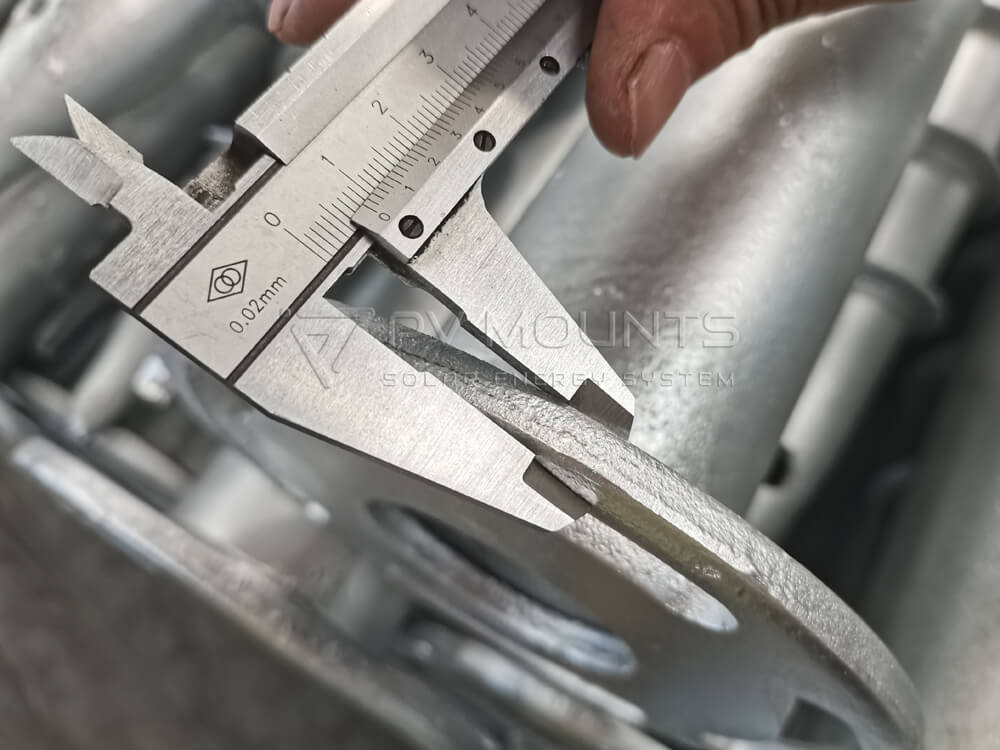
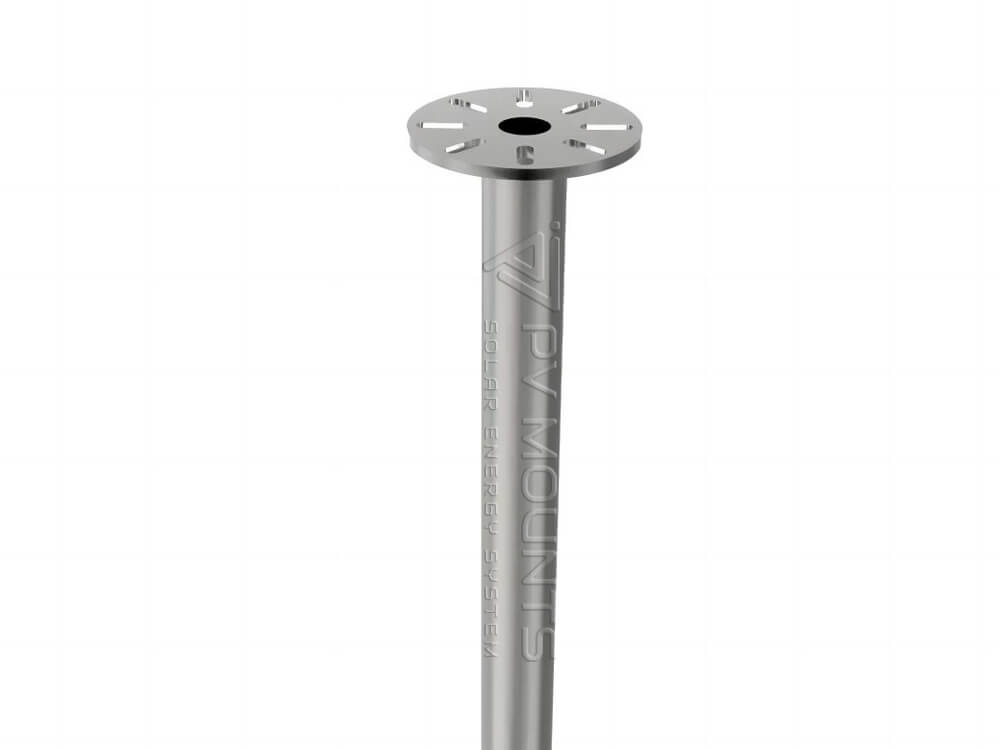
| Diametrul flanșei | D200x8mm / D220x8mm /D180x8mm or as required |
| Flange Thickness: | 8~12mm |
| Pipe thickness | 2.5mm/3mm/3.5mm (optional 2~4mm) |
| MOQ | 100 Pcs |
| Package Type: | Steel pallets |
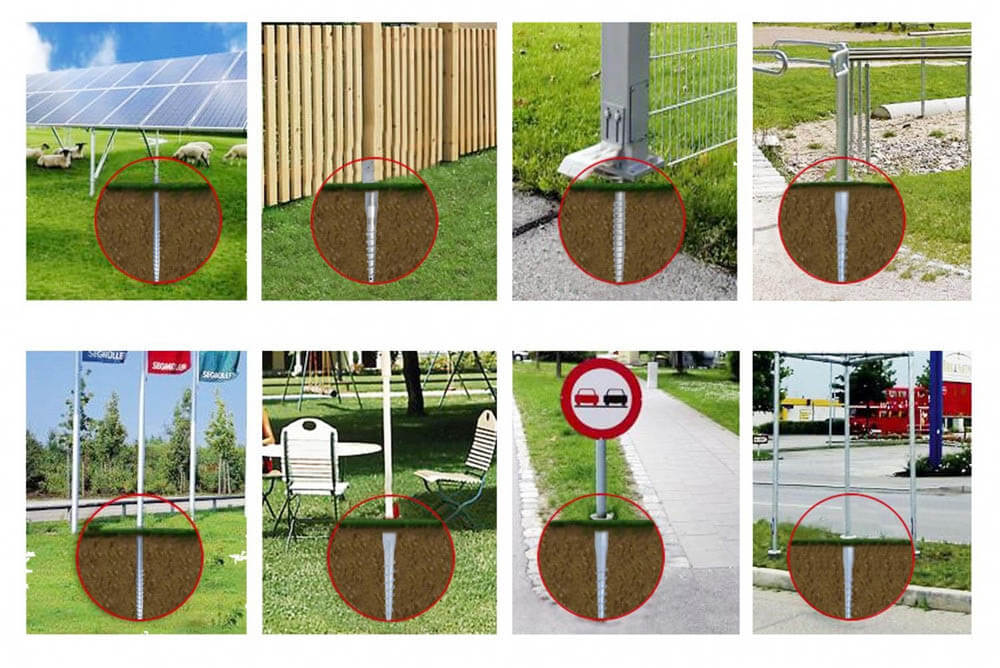
| Foundation: | Suitable for all kinds of geology,such as sand, Soft soil, tight soil, clay, gobi desert,gravel etc. |
| Cerere: | Foundation for Solar power station,fence,house construction,checkmark,field,advertising board,road signs,billboards etc |
| Serviciu: | OEM/ODM |
| Sarcina vântului: | Max 60m/s |
| Sarcina de zăpadă: | Max 1.4KN/m |
| Garanție | 10 ani |
| Durata de viață | 25 de ani |
| Standard | AS/NZS 1170.2/JIS C 8955:2017/ISO9001/UL1565/DIN 1055 |
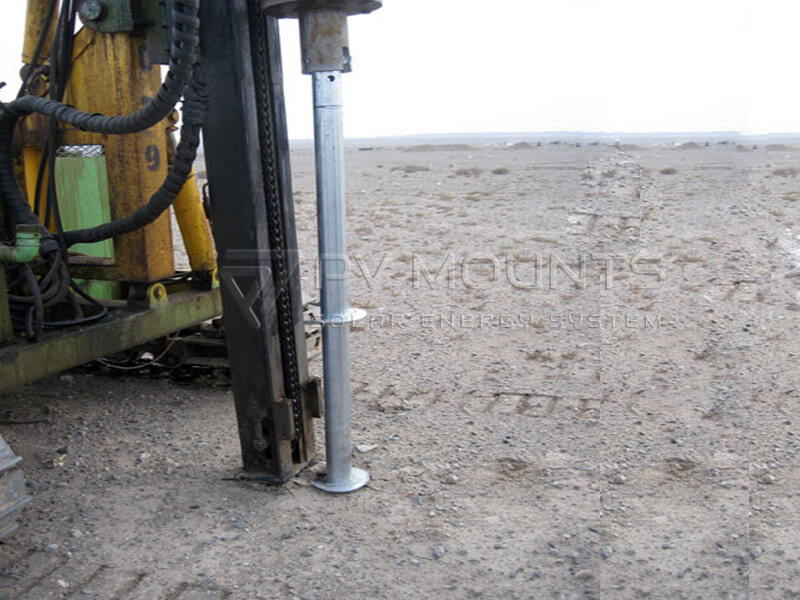
Installing Ribbon Helical Ground Screws for a solar ground system is a straightforward process, but it requires proper tools and techniques to ensure optimal performance. Below is a step-by-step guide to installing these screws:
Step-by-Step Installation of Ribbon Helical Ground Screws
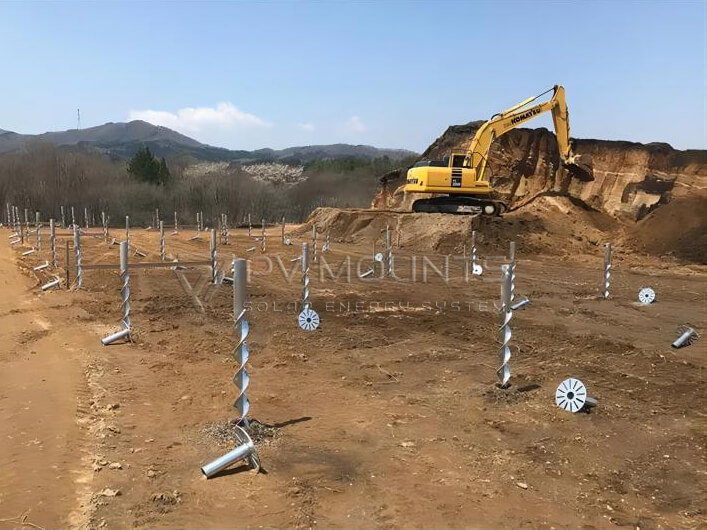
1. Site Preparation:
- Survey the Site: Before installation, conduct a site survey to evaluate the soil condition, determine the number of ground screws needed, and mark the locations for each screw. Ensure the layout matches your solar system design and that there is enough space for the screw installation machinery.
- Clear the Area: Remove any vegetation, rocks, or debris from the installation area. The ground should be level and free of obstacles to ensure the screws can be installed properly.
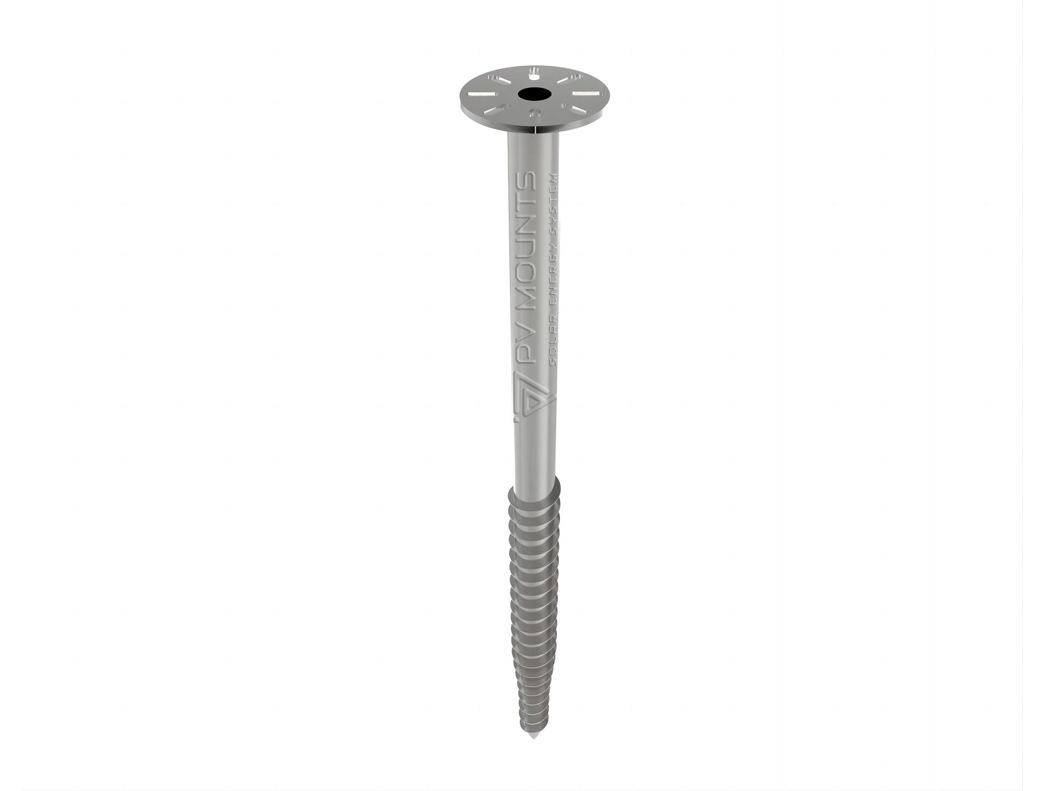
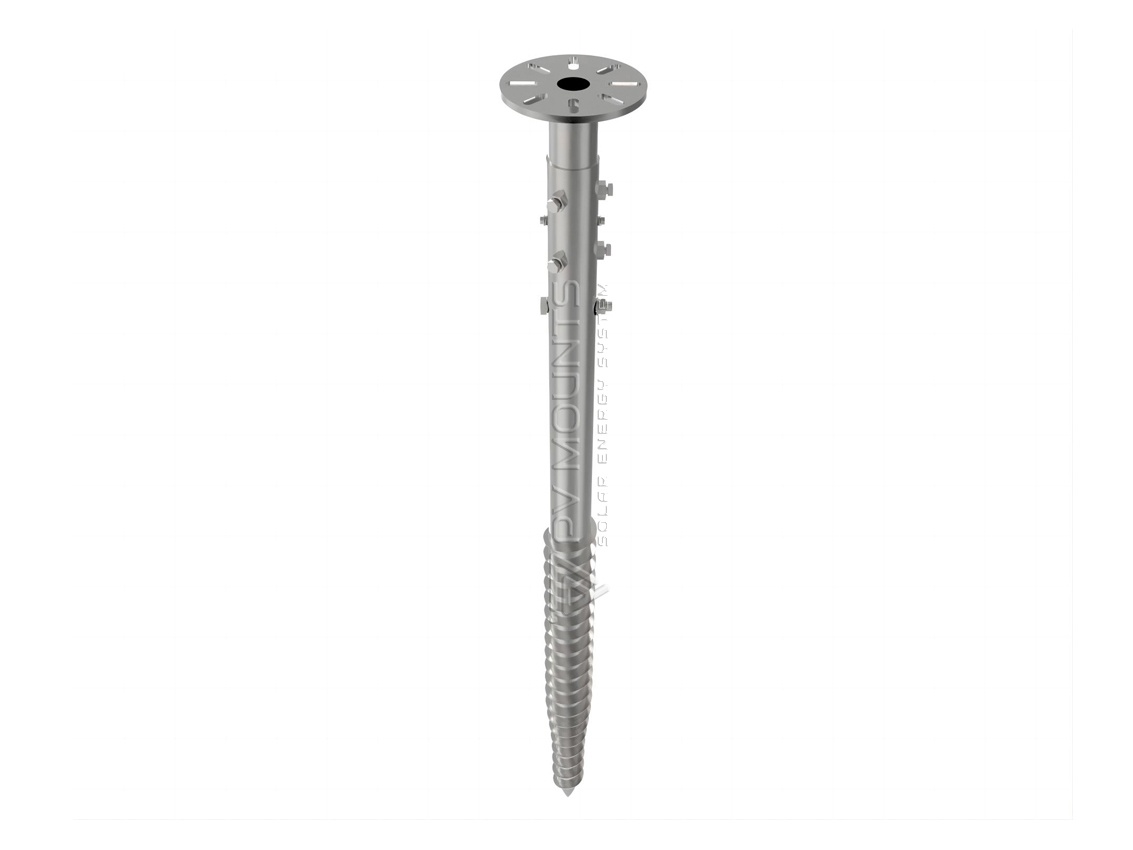
2. Choose the Correct Ground Screw Size:
- Select the Length & Type: Based on the soil conditions and the load requirements of the solar mounting system, choose the appropriate length (typically 1000mm to 1600mm) and type of Ribbon Helical Ground Screw. The screw length depends on factors like soil type and depth required to secure the screw.
- Optional Flange Plates: Determine if flange plates are needed for added stability, especially for larger solar panel arrays or systems requiring a stronger base.
3. Equipment Needed:
- Helical Ground Screw Driver: Use a specialized machine or an auger with an adapter for driving the ground screws into the soil. This equipment is designed to rotate and drive the screws deep into the ground efficiently.
- Leveling Tool: To ensure the ground screws are installed vertically and properly aligned.
- Torque Wrench (if required): To verify that the ground screw is tightened to the correct torque.
4. Installation Process:
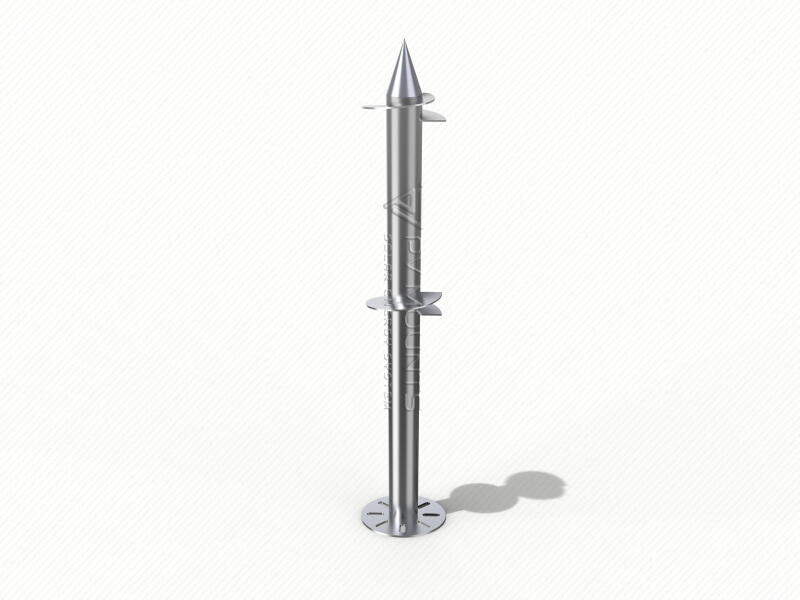
a. Position the Drill Bit and Screw:
- Align the Ribbon Helical Ground Screw with the marked position on the ground.
- Ensure the screw is vertical and correctly aligned with the surface. Misalignment can cause uneven installation or instability.
b. Drive the Ground Screw into the Ground:
- Using the helical screw driver, slowly rotate the screw into the ground. The helical blades will dig into the soil and provide resistance as the screw penetrates the ground.
- Continue driving until the top of the screw is at or just below the ground surface, ensuring the screw is fully installed and secure.
c. Check Alignment and Depth:
- Use a leveling tool to ensure the ground screw is installed vertically and remains stable. Make sure the screw is installed to the correct depth to reach stable, firm ground, especially if you are working in loose or rocky soil.
- Verify that the screw is aligned with the mounting frame’s design requirements.
d. Repeat for All Screws:
- Continue installing additional ground screws following the same process, ensuring they are all evenly spaced and properly aligned.
5. Connect the Mounting System:
- Attach Flange Plates (if applicable): If flange plates are being used, securely attach them to the top of each ground screw using bolts or other fasteners.
- Mount the Racking System: Once all the ground screws are installed, use the flange plates (if included) or directly mount the racking system onto the top of the screws. Secure the racking to the screw piles as per the design of the solar system.
- Level the Frame: Use leveling tools to ensure the racking system is straight and level, ensuring the panels will be mounted properly.
6. Final Inspection:
- Torque and Tighten: If necessary, use a torque wrench to ensure the screws and flange plates are securely tightened to the correct torque settings.
- Verify Alignment: Double-check the alignment of the screws and the mounting structure to ensure everything is secure and level.
- Inspect Stability: Make sure each screw is firmly anchored in the ground and the racking system is sturdy.
7. Mount the Solar Panels:
- Once the foundation is fully installed and stable, proceed to mount your solar panels on the racking system according to the manufacturer’s instructions.
Additional Tips:
- Soil Type Considerations: The installation process might differ slightly based on soil conditions. For harder or rocky soils, specialized equipment may be needed. If the ground is particularly rocky, pre-drilling pilot holes may help ease the installation.
- Avoid Over-Tightening: Be careful not to over-tighten the screws, which could damage the soil or structure. Ensure the screw is driven deep enough to provide secure anchorage without excessive force.
- Environmental Impact: The minimal excavation required for the installation is beneficial for environmentally sensitive areas. Ribbon Helical Ground Screws can be removed with minimal disturbance to the soil if future modifications are needed.
This installation process provides a quick and efficient method for securing solar ground systems using Ribbon Helical Ground Screws. It’s a reliable, eco-friendly solution, ideal for diverse soil conditions and locations. If you need further details on equipment or troubleshooting, feel free to ask!
PV Mounts este un producător unic pentru sisteme de montare a panourilor solare. Putem produce diferite componente montate pe panouri solare, inclusiv:
- Șine
- Cârlige
- L-Picior
- Șuruburi de împământare
- Cleme pentru cusături permanente
- Mid Clamp & End Clamp
- Lug de legare la pământ
- Grounding Clip
- Cable Clip
- și mai mult