
The utilization of solar energy has gained immense popularity as a sustainable power source and Solar Panel Installation on rooftops is a common method of harnessing this renewable energy. In this article, we will provide a step-by-step guide on how to successfully install solar panels on your roof, ensuring efficiency and compliance with regulations.
Evaluating Roof Suitability
Before proceeding with the installation, it is crucial to assess your roof’s suitability. Factors such as age, structural integrity, orientation, and shading should be taken into account. Ensure that your roof can support the weight of the panels and receive adequate sunlight throughout the day. Additionally, be aware of local regulations and obtain the necessary permits before commencing the installation process.
Determining the Ideal Positioning
The positioning and tilt of your solar panels significantly impact their energy production. While south-facing roofs generally receive the most sunlight, east and west-facing roofs can also be viable options. Utilize online tools or consult with a solar professional to calculate the optimal tilt and azimuth angle based on your location, considering factors such as latitude, climate, and desired energy output.
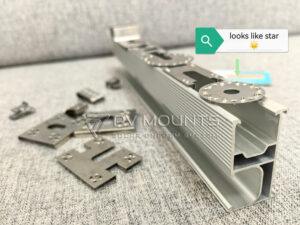
Selecting the Mounting System
Choosing the appropriate mounting system is crucial for the stability and longevity of your solar panel installation. Roof-mounted systems are commonly used for residential installations due to their cost-effectiveness. They can be attached directly to the roof or mounted on a racking system. Seek advice from a solar installer to determine the most suitable mounting system for your specific requirements.
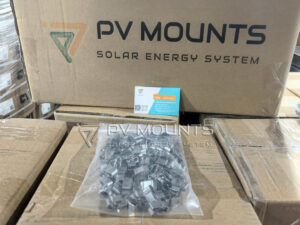
Preparing for Installation
Prior to installation, gather all the necessary tools and equipment, including solar panels, mounting brackets, rails, flashings, and fasteners. Ensure you have a secure ladder or scaffolding for safe roof access. Having a helper for certain tasks is recommended. Thoroughly clean the installation area, removing any debris or obstacles that could impede the process. Familiarize yourself with the manufacturer’s instructions and guidelines for your solar panels and mounting system.
Installing the Mounting System
Begin by marking the locations for the mounting brackets on the roof, following the layout plan provided by the manufacturer. Maintain accuracy by using a chalk line or laser level. Install flashing and weatherproof seals around any penetrations to preserve the roof’s integrity. Secure the mounting brackets, ensuring they are level and firmly anchored. Attach the rails to the brackets, ensuring proper spacing and alignment.
Attaching the Solar Panels
Lift the solar panels onto the mounting rails with care, ensuring proper alignment and spacing according to the manufacturer’s instructions. Secure the panels to the rails using provided clamps or brackets. Connect the panels using the supplied wiring and connectors. Follow the wiring diagram to connect the panels to the inverter, which converts the DC power generated by the panels into usable AC power for your home.
Finalizing the Installation
Once the panels are securely mounted and connected, conduct a thorough inspection of the installation to ensure everything is in order. Double-check all connections, tighten any loose fasteners, and verify the correct routing and protection of the wiring. Upon satisfaction, activate the inverter and monitor the solar panel system’s performance.

Conclusion of Solar Panel Installation
Installing solar panels on your roof can be a rewarding investment, both financially and environmentally. By thoroughly evaluating your roof’s suitability, selecting the appropriate mounting system, and following the installation steps diligently, you can enjoy the benefits of renewable solar energy while contributing to a greener future.